New panels and reticles by Stockplane! - Page 3
Page 3 of 4 FirstFirst 1234 LastLast
Results 51 to 75 of 88

Thread: New panels and reticles by Stockplane!

  1. #51

    Icon22

    Hi Stefano,
    For the cylinders/tubes, a little "trick" :
    Do a search on Google with the word "tube" or "aluminium (or plastic) tube" or "pipe" then go to the related pictures, there You'll find a lot of pictures with metallic (or plastic) tubes, download the pics You like and, with Your paint program, cut and paste the section You want and change its colour and, if necessary the shape/perspective....
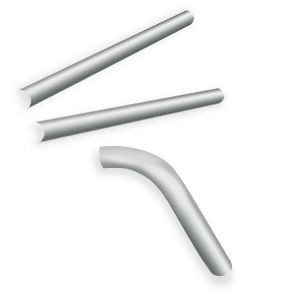
    Examples :

    Click image for larger version. 

Name:	TUBO ALLUMINIO SAT.jpg 
Views:	0 
Size:	7.4 KB 
ID:	24485 Click image for larger version. 

Name:	R698770-91.jpg 
Views:	0 
Size:	15.4 KB 
ID:	24486 Click image for larger version. 

Name:	TUBO CROMATO.jpg 
Views:	0 
Size:	73.2 KB 
ID:	24487


  2. #52
    mvg3d, your suggestion make the job a little more easy!

    Thanks for the idea.


    Best regards.

  3. #53

    Icon22

    Quote Originally Posted by stockplane View Post
    Hei ma siamo tutti italiani!!?

    Qualche piccolo progresso, avrei bisogno di trovare un manuale decente per Gimp o PSP, invece che tutorial fatti a spizzichi e bocconi.

    Come si dice: per aspera ad astra.

    Stefano
    Hi Stefano,

    For Gimp try here :

    http://docs.gimp.org/2.8/it/index.html

    and here

    http://www.gimpfacile.altervista.org...torial:Manuali

    For PSP (and others) try here

    http://www.cerca-manuali.it/manuale-guida/paintshop.htm


  4. #54
    SOH-CM-2016 kelticheart's Avatar
    Join Date
    Jun 2005
    Location
    Fidenza, Northern Italy, 65 miles south of Milano
    Age
    68
    Posts
    2,515

    Bel lavoro!

    MILLE GRAZIE!


    Alla salute!
    KH

    My wee mods here at the Outhouse:

    FileUploadName=kelticheart

  5. #55

    G4M1 and G4M2 Betty reworked panel.zip


    A new entry has been added to Add-Ons Library, category CFS 2 Panels Add-Ons

    Description: A remake of panel for G4M1 by Allen and G4M2 by B24 Gui that you can find at SOH.

    The backgrounds are a mod. over the Alphasim freeware panels series, in both two version are present the left and the right site and the bomber view, (not mine) with two VC different cockpit.

    Best regards.

    To check it out, rate it or add comments, visit G4M1 and G4M2 Betty reworked panel.zip
    The comments you make there will appear in the posts below.

  6. #56
    Senior Administrator Rami's Avatar
    Join Date
    Jun 2005
    Location
    Massachusetts
    Age
    45
    Posts
    16,304

    Icon14 Reply...

    Stockplane,

    Yet another outstanding job. Well done!
    "Rami"

    "Me? I'm just a Sea of Tranquility in an Ocean of Storms, babe."

    My campaign site: http://www.box.net/shared/0k1e1rz29h
    My missions site: http://www.box.net/shared/ueh4kazk3v
    My scenery site: http://www.box.net/shared/knb1l0ztobhs2esb14rb

  7. #57

  8. #58
    SOH-CM-2016 kelticheart's Avatar
    Join Date
    Jun 2005
    Location
    Fidenza, Northern Italy, 65 miles south of Milano
    Age
    68
    Posts
    2,515

    Unhappy Ouch!

    Hi Stockplane,

    a very nice job on the Betty panel.

    Yet, I remember a discussion here a few years ago involving Morton, where someone objected that Betty pilots and the majority of Japanese bombers, sat on the right instead of sitting on the left seat, as in the rest of world aviation.

    You might want to investigate this, the main pilot sat on the right seat and the co-pilot, when present, sat on the left. Therefore the 2d bitmap should be turned 180 degrees around, to get the same effect.

    Other than this small detail, your panels are very, very good.

    Thank you!
    KH
    My wee mods here at the Outhouse:

    FileUploadName=kelticheart

  9. #59
    Hallo Kelti, i don't know in the Betty where has the pilot position, but the two half part of the cockpit are correct, a part some gauges not graphically perfect.

    See it in the image of Hisato Nakada.

    Another question i believe more important some italian gauges aren't in the actual collection, where is possible find for example an anemometer or a gauges that can be placed instead of?


    Anyway i am glad you like the Betty panel.

    Cheers.
    Attached Thumbnails Attached Thumbnails G4M1.gif  

  10. #60

    Icon22

    Hi Stockplane,
    I apologize that I never studied deeply the Japanese planes, but the only thing I'm sure is that the cockpits of Japanese FIAT Br.20 were factory modified with the main pilot seat and related instruments on the right side.
    Looking at the Betty's panel pic by Mr.Nakada I can see the Artificial Horizon (primary instrument) in the right panel only (not replied in the left one)......


  11. #61
    Member gaucho_59's Avatar
    Join Date
    Jan 2009
    Location
    Indio, California
    Age
    86
    Posts
    2,491
    Blog Entries
    1

    Ciao Stefano,

    Following to the advise by Manuele, if what you are looking to do is something like this:


    then, using PSP, you need to get familiarized with working with nodes... First, you convert the object to a vector object.

    1 On the Tools toolbar, select the Pen tool .

    2 On the Tool Options palette, click Edit Mode button .

    3 Click a vector object.

    The object's nodes appear.

    4 Click the node.

    The selected node appears with a solid gray fill.

    You can also,

    Select multiple nodes

    Hold down Shift, and click the nodes.


    Select all nodes on a contour

    Double-click one node. If the object has only one contour, this selects all nodes in the path.


    Select all nodes in a path (all nodes in the object)

    Right-click a node, and choose Edit Select All.


    Select the next or previous node on a contour

    Hold down Shift, and press [ or ].


    Deselect a selected node

    Hold down Shift, and click the node.

    Then you can deform the object to your desired shape...

    Ecco, qui un WIP redo che sto faccendo dal tuo panel for the Ki 43 III...
    nel medessimo, ho cambiato la prospettiva usando questo tipo di operazione....

    Non e difficile, ma ci vuole un attimino di attenzione al dettaglio...

    To wit:


    IMHO la parte piu dura e' in somma, la voglia di finire e "pubblicare"... inquanto i lavori finiscono un po' meno precisi dal previsto...

    Carlos

  12. #62
    Hallo mvg3d also i had never investigate about japanese cockpit and were was the pilot and co-pilot, but i not have understand this question about the Betty.

    The only thing that is possible do is put the right section at Window00 and the left at Window02, if the problem isn't it sincerely i have not understand what you want.

    Thank to Gaucho for the rapid lesson, i this days i try some test about, good repaint of Ki-46, you are really great.

    I presume that the silence about anemometer gauge means that there is not one around.

    Cheers

  13. #63

    Icon22

    Quote Originally Posted by stockplane View Post
    Hallo mvg3d also i had never investigate about japanese cockpit and were was the pilot and co-pilot, but i not have understand this question about the Betty.

    The only thing that is possible do is put the right section at Window00 and the left at Window02, if the problem isn't it sincerely i have not understand what you want.

    Thank to Gaucho for the rapid lesson, i this days i try some test about, good repaint of Ki-46, you are really great.

    I presume that the silence about anemometer gauge means that there is not one around.

    Cheers
    Hi Stockplane,
    I simply supposed the Betty's main pilot was on the right seat because the only AH gauge was mounted on the right side of the panel.
    About the "silence", we (I & KH) are working on NEW Italian gauges, just today he sent me some bmps to modify, but I still not opened the zipped files he sent me because I forgotten them in my PC at office ......


  14. #64
    Member gaucho_59's Avatar
    Join Date
    Jan 2009
    Location
    Indio, California
    Age
    86
    Posts
    2,491
    Blog Entries
    1

    I forgot...!

    Quote Originally Posted by stockplane View Post
    Hallo mvg3d also i had never investigate about japanese cockpit and were was the pilot and co-pilot, but i not have understand this question about the Betty.

    The only thing that is possible do is put the right section at Window00 and the left at Window02, if the problem isn't it sincerely i have not understand what you want.

    Thank to Gaucho for the rapid lesson, i this days i try some test about, good repaint of Ki-46, you are really great.

    I presume that the silence about anemometer gauge means that there is not one around.

    Cheers

    I forgot an even easier to use tool... the WARP MESH tool...

    it is far more intuitive... and nodes are preselected... also there is
    the warp mesh brush, probably more precise.... to wit:

    Cheers,
    G.
    Attached Thumbnails Attached Thumbnails tubes 2 warp tool.jpg  

  15. #65
    SOH-CM-2020 Wayland's Avatar
    Join Date
    Jun 2012
    Location
    48.800 N, 118.612 W. North Central Washington State, USA
    Age
    71
    Posts
    387

    New Panels

    I read in one of the old Monogram Aviation Publications series on Japanese aircraft that some of the Japanese bombers with dual controls had the aircraft commander/pilot in command in the right seat. The author was Robert Mikesh, a curator at the NASM/Smithsonian. I'll see if I can find the actual reference. The co-pilot would stand on his seat and direct the taxiing on the ground while stuck half out of the cockpit greenhouse.

    Steve
    AAF Lament:

    "Glory! No more regulations!
    Rip them down at every station!
    Ground the guy that tries to make one!
    And LET US FLY LIKE HELL!"

    From "There I Was...Flat On My Back" by Bob Stevens

    Tune: Battle Hymn of the Republic

  16. #66
    SOH-CM-2016 kelticheart's Avatar
    Join Date
    Jun 2005
    Location
    Fidenza, Northern Italy, 65 miles south of Milano
    Age
    68
    Posts
    2,515

    Icon26 Oh, this is easy!

    Quote Originally Posted by stockplane View Post
    ...if the problem isn't it sincerely i have not understand what you want....
    Hi stockplane,

    it's very simple, look below, I just copied your screenshot and did an horizontal flip to it. That's the right pilot seat, obviously now every label is mirror-like reversed.

    All you have to do is take your work, do the same thing and place the instruments according to the right side of the Betty panel as shown in Hisato Nakada's photo. Manuele pointed out to you that the presence of the attitude gauge on the right side, missing on the left side, confirms the right side is the main pilot, or aircraft commander, seat.

    Done!

    Cheers!
    KH
    Attached Thumbnails Attached Thumbnails Betty_pilot_seat.jpg  
    My wee mods here at the Outhouse:

    FileUploadName=kelticheart

  17. #67
    Oh Kelty, our Good had made the Word in six day and you want make a new cockpit in 30 sec!!!

    The black box at the center of cockpit between the two seater is inamovible it is a rack with the two gyros instruments product in Japan under german license and is present i many bombers type always the same,
    as you can see in the images attached below (also Il-2 SAS had make panel for Betty in the same unique way),
    one image is of the G5N1 Shinzan with the last type of this rach, the second the il-2 cockpit, the third is a photo of a G4M2 Betty ( the unique difference between G4M1 is that two instrument at the left and right of the compass are missing ), the last image is a kit fotoincision fot a 1/48 plastic model of the Eduard.

    There are other many images of japanese bombers ( also the Nell, the Lily etc) with it and all are identical, the disposition of the black box and the instruments are always the same.

    And also in the right seat ( in all models of Betty ) the attitude is in the identical place as you can see in the images.

    For the dubts about the pilot and the co-pilot i have write to my spanish friends that have a japanese friend civilian pilot, his father had flow in the WWII on the Betty, i have ask for your question, i hope they reply me prompt, if i have the his reply, as i hope, i post it for you.

    Believe Kelty, the instruments are in the correct position, only that (as for italian) not all are are of the correct type series but very closed.

    Cheers
    Attached Thumbnails Attached Thumbnails G5N1 Shinzan.jpg   G4M1-1.jpg   G4M2.JPG   G4M2-2.jpg  

  18. #68

    Icon22

    Hi Stockplane,
    Where is Your problem with the Autopilot and the other gauges ?
    With just a little "know-how" in Photoshop (or Paintshop)......

    Click image for larger version. 

Name:	BETTY.jpg 
Views:	0 
Size:	159.5 KB 
ID:	24709

    The ONLY thing to do is to place the right gauges in the right places.....

    P.S. : I don't changed the gauges with the right ones, I only mirrored Yours (the Kelti's complete mirroring was only indicative).


  19. #69
    Hallo mvg3d, if for you is more usefull an alternate right panel as you have made i can post it in this day,
    but the your positions of the gauges in the right place notexist in the reality.

    See with carefull the image in the my last post or find another images of the Betty cockpit i have no see this disposition at all.

    This is a site about, (one of many ) and see by yourself.

    http://gunsight.jp/a/english/hunatu05e.htm

    Cheers

  20. #70

    Icon22

    Quote Originally Posted by stockplane View Post
    ....The black box at the center of cockpit between the two seater is inamovible it is a rack with the two gyros instruments product in Japan under german license and is present i many bombers type always the same.....
    I ONLY mirrored the Autopilot panel, as I wrote, Kelticheart mirrored the WHOLE panel bitmap ONLY for demonstrate his/our suppositions.
    I DON"T WANT to make the Betty's panel, it is Your job.
    I also specified that the gauges in the panel MUST be changed with the real ones and, of course, repositioned as in the original.


  21. #71
    Dear mvg3d, as i said in other post, i am not interested preserve my little jobs, anyone has the possibility to modify, inplement and so on, any my panels and mods, the important thing is that at the end these works will be usefull for all community members. Also if someone want improve these i am happy, because for the moment i am not a great painter. The only thing i ask is that the final work is in tuning with the related plane as aspect.

    My intervention were only for clarity about the reality, but any mod is wellcome.

    Cheers.

  22. #72
    SOH-CM-2016 kelticheart's Avatar
    Join Date
    Jun 2005
    Location
    Fidenza, Northern Italy, 65 miles south of Milano
    Age
    68
    Posts
    2,515

    Icon26 Woah!

    Hold your horses, the two of you! Un attimo di calma!

    First of all, Stockplane:

    I do not expect a new panel in lesser time than the Lord created earth. I do not want a new panel at all from you, I just wanted to spare criticism to your beautiful work for a silly, yet historically sound, detail. Ti volevo aiutare, non criticare.

    There's no fiction here, the main pilot seat on Japanese bombers WAS on the right side of the cockpit, you weren't around a few years ago when this subject caused a long discussion here.

    Do you want solid proof of what Manuele and I have been trying to suggest you?

    Look I the attached pictures, that I took from the very same you posted: do you see where the attitude gauge, or Artificial Horizon, is located? I circled it in white for you.
    It is on the right side of the cockpit panel and clearly missing from the left side.
    This indicates that the aircraft main pilot, which is also, by the way, the CFS2 user, sat on the right.

    Not only the attitude gauge is missing from the left side, but all of the engine gauges are grouped on the left side, clearly indicating that the left seat was occupied by the co-pilot/flight engineer/motorist.

    Is it clear now?

    Now, considering, as I said, that a 2d panel must be done keeping in mind the point of view of a future CFS2 virtual pilot, anyone creating a 2d Japanese bomber panel, or adapting/updating an existing one, should place the CFS2 user in the place where the historical pilot sat, that is on the right seat.
    Only for love of historical accuracy, part of that difference which kept CFS2 alive for over 15 years.

    What I am saying is that the original Alpha 2d Betty panel texture you worked on is simply wrong. Just like their Mavis one, again painted with the main pilot post on the left. It's not your fault, you did not paint it originally.

    What can you do to avoid repeating the same mistake?

    This is how I would handle it:


    1. take the whole bitmap, without gauges, do a horizontal flip or, if you prefer, turn the entire image 180° around,
    2. save the bitmap in a new file;
    3. reposition the gauges according to the great historical sources you have for the true main pilot side;
    4. since you say that the central autopilot group - resembling a Sperry MkIII autopilot - cannot be turned around - and you are darn' right here according to the photos you posted - just copy the correct one from the original file and paste it on top of it here, bringing it back to the original look;
    5. cover the gauges of the autopilot with working Japanese ones.


    It does not seem a big deal to me, and you'll get high praises for having been so accurate and respectful of history.

    I wrote in English to allow the vast majority of SOH members, who might be interested in this thread, understanding my explanation. If you are missing something, let me know and I will send you a PM with all of the above translated in our mother tongue.

    Ciao and take it easy, man! In spite of how you describe yourself, an inexpert rookie moving his first steps in creating addons for CFS2, you are already producing beautiful output, no doubt about it! More than anything else, you showed you do not like fictional things, a trait that will be greatly appreciated by many people around here.

    Cheers!
    KH
    Attached Thumbnails Attached Thumbnails Betty_main panel_ AH.jpg   Betty_main panel_ AH_2.jpg  
    My wee mods here at the Outhouse:

    FileUploadName=kelticheart

  23. #73
    SOH-CM-2016 kelticheart's Avatar
    Join Date
    Jun 2005
    Location
    Fidenza, Northern Italy, 65 miles south of Milano
    Age
    68
    Posts
    2,515

    Morton's 2d panel for SG's G4M1 Betty

    Hi Stockplane,

    the attached is what I meant. Morton designed it in this fashion for Stuart Green's G4M1 Betty, following a comment made by a Japanese SOH member, I believe Talos, because Morton had originally placed the pilot (CFS2 view) in the left seat instead.

    It's still available at Morton's webpage here:

    https://skydrive.live.com/?cid=7f260...2604CFE3F60274

    this 2d, 1024 x 768 panel is inside the Betty repaint pack.

    The pilot's point of view is from the right seat of the airplane. As you can see many of the gauges Morton painted directly on the panel match the historical layout that can be seen in the pictures you posted.

    Once installed in CFS2, this 2d panel creates for us the illusion of sitting on the right side of the Betty cockpit, the place for the chief pilot/commander of the aircraft during WWII on all G4M Betty airplanes.

    I hope this clarifies my suggestions to make your nice work looking even better.

    Cheers!
    KH
    Attached Thumbnails Attached Thumbnails bettypanel.jpg  
    My wee mods here at the Outhouse:

    FileUploadName=kelticheart

  24. #74
    Also i have this great work of Morton, probably the best Betty around, i have make the alternate panel for the Betty,and it is ready for upload, but i have write in PV at Kelticheart for a final decision, i wait his reply first.

    Best regards.

  25. #75

    Ki-44 panel V2.zip


    A new entry has been added to Add-Ons Library, category CFS 2 Panels Add-Ons

    Description: I have find other datas and informations about Ki-44 series, in according to them I have remade his cockpit both for the first serie and the second, with new bmp panel and an implementation of the gauges.

    I have also add the engine controls.

    Use the first release or this according your preferences.

    Best regards.

    To check it out, rate it or add comments, visit Ki-44 panel V2.zip
    The comments you make there will appear in the posts below.

Members who have read this thread: 1

Bookmarks

Posting Permissions

  • You may not post new threads
  • You may not post replies
  • You may not post attachments
  • You may not edit your posts
  •