... next project - more enemy "targets"
Results 1 to 25 of 25

Thread: ... next project - more enemy "targets"

  1. #1

    Wink ... next project - more enemy "targets"

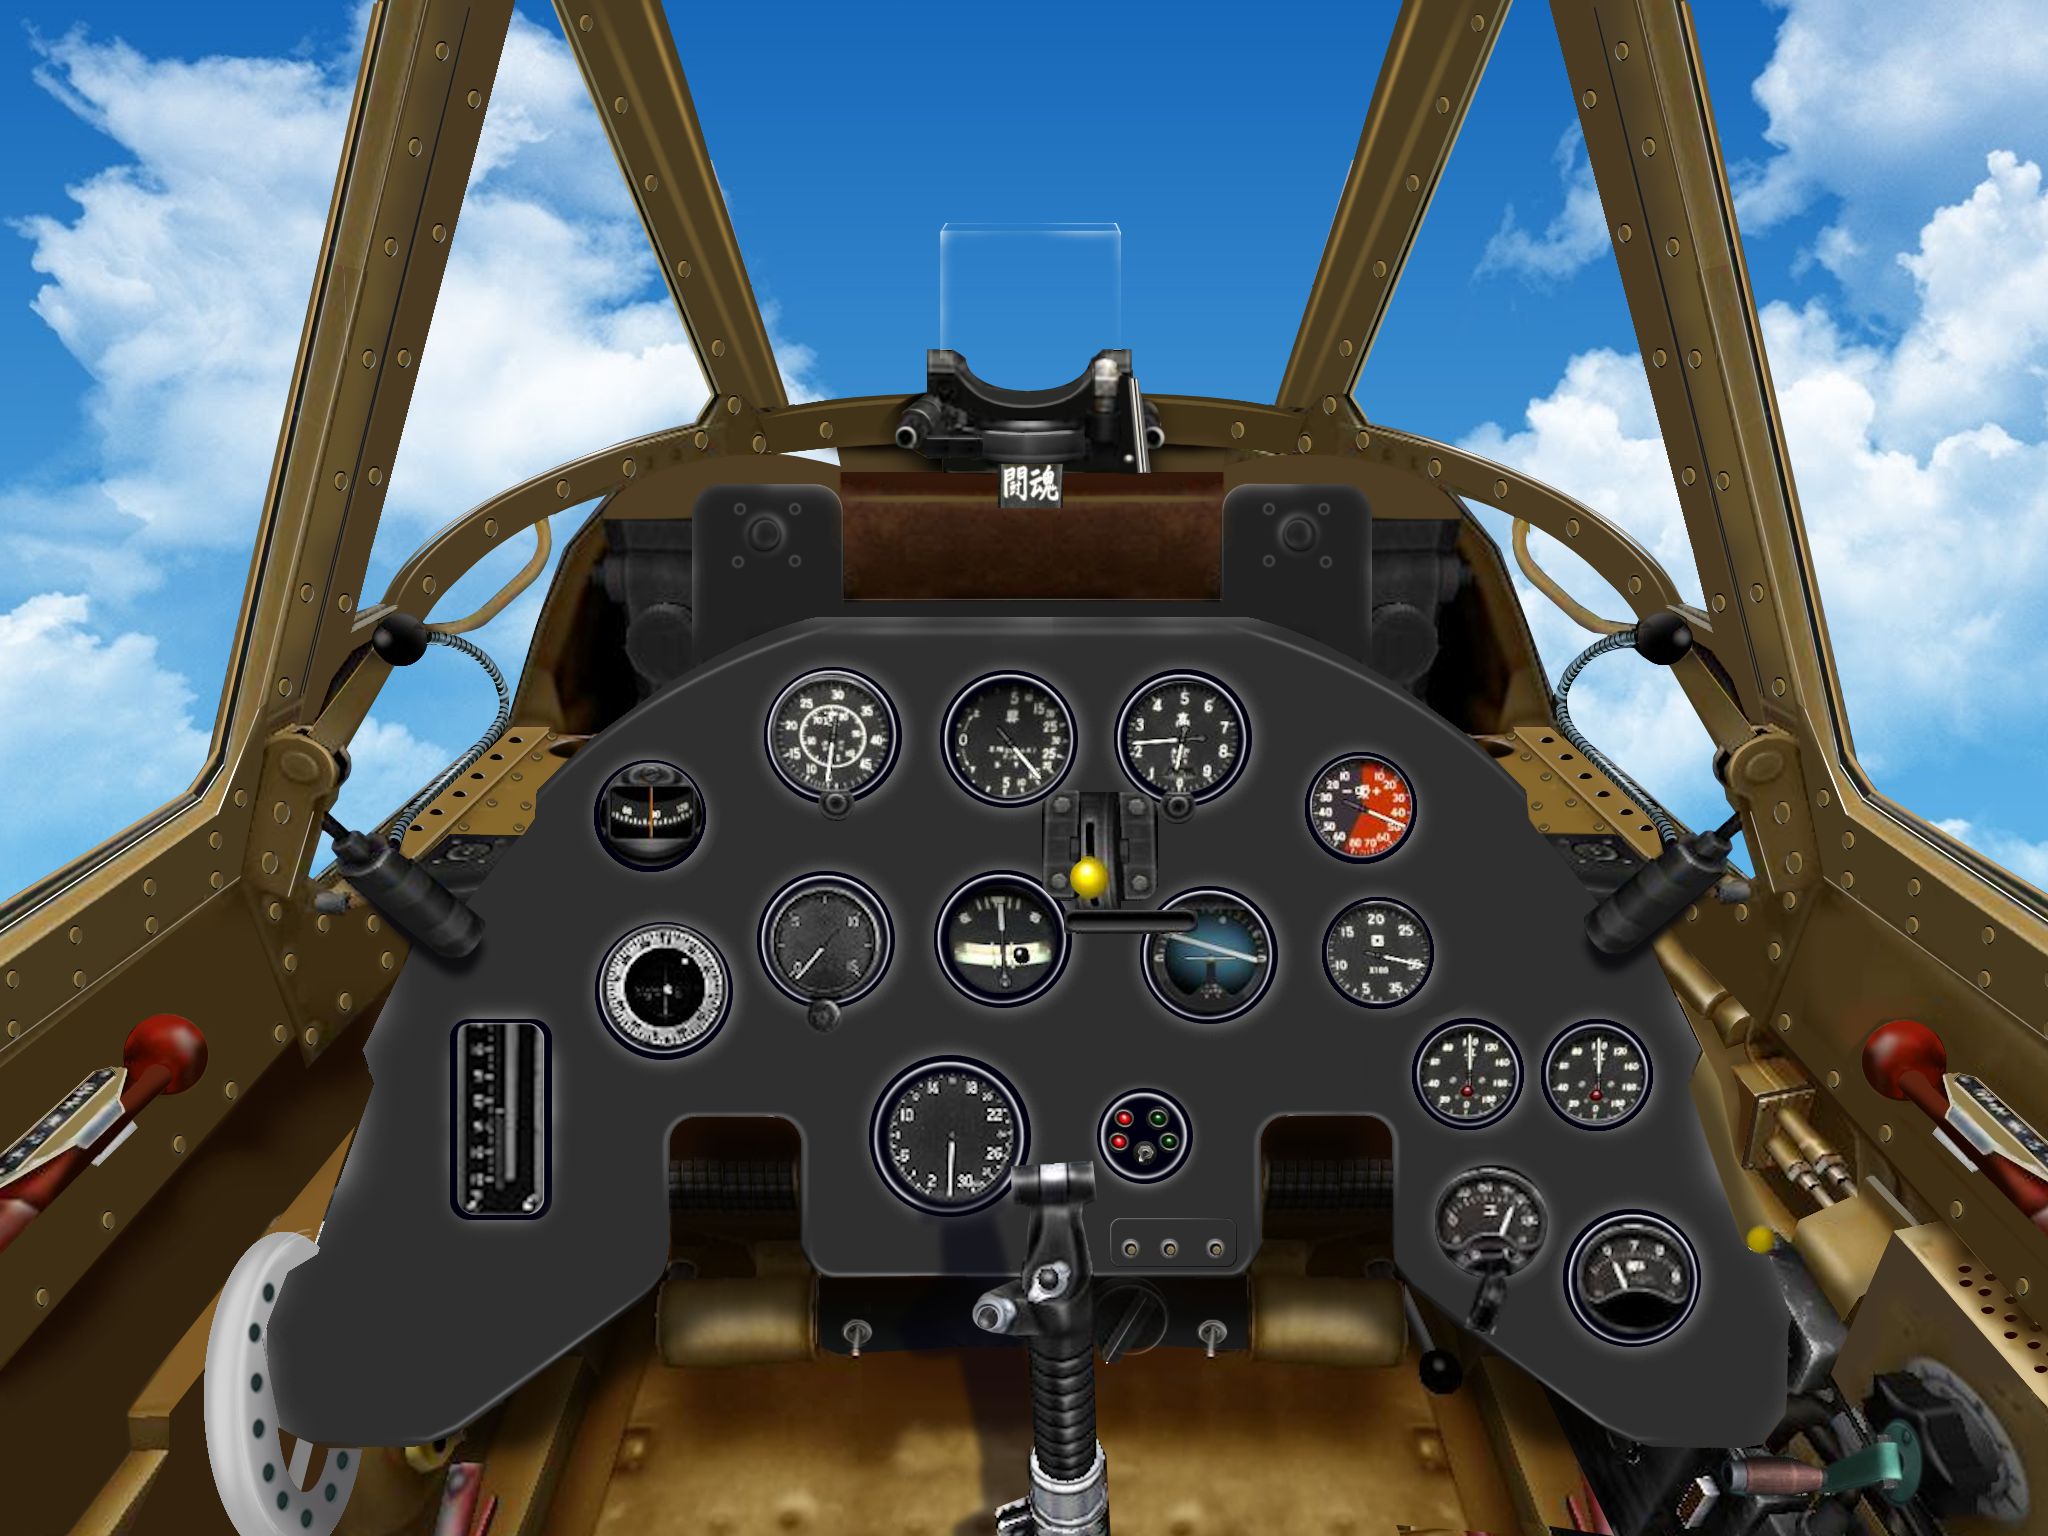
    Using the ki-61-Ib by Vladimir Kochmarsky, Rob Cox, Kevin Bacon and Steve Seybolt. Its the 1% JA ki-61b here at SOH, & is also included as an opponent in Capt Kurt's 49th Fighter Group install.


    Although the wings are mirrored, its got breaking parts logic & seems a good AI opponent in QC.

    Some early stage WIP screenies as teasers...

  2. #2

  3. #3
    OK, another one done, this time from very late on in the war...

  4. #4
    SOH-CM-2016 kelticheart's Avatar
    Join Date
    Jun 2005
    Location
    Fidenza, Northern Italy, 65 miles south of Milano
    Age
    68
    Posts
    2,515

    Bravo!

    Very nice repaints Uncle Tgt! Kochmarsky's Ki-61 (three models) are still available over at Simviation, Combat Flight Sim menu-CFS2-Older Files.

    Cheers!
    KH
    My wee mods here at the Outhouse:

    FileUploadName=kelticheart

  5. #5
    some more screenies - trying to avoid the more famous skins, which are already pretty well covered

    Plenty of dp file work needed to represent the different armaments used on the different versions. Although based on the texture mapping for the -1b, as far as I can tell the mapping is identical on all three versions, so more accurate dp files would allow us to fly ko, otsu, hei, Tei (a,b,c,d) sub-types (and associated late-war kamikaze loadouts, which was the original source of the interest for this model as it has breaking parts).

  6. #6
    Magnificent and appreciated work!!!

  7. #7
    I'll be taking some time to work on the dp files for the different versions.

    Maxstuka is right, we badly need some smaller Jap ordnance. It would be great to have the MD bombs resized & re-released...

    Meantime, I'm keeping my hand in with another Caproni skin for Peperez, but I thought I'd leave you with a Zero-sen WIP. This time an early A6M5 of 205ku, working out of Formosa & Sakishima Gunto during Iceberg, April of 1945.

    Got to hand it the stockers, the base paints really are superb starting points & full of paint chip & weathering details...

  8. #8
    Redding Army Airfield Allen's Avatar
    Join Date
    Dec 2007
    Location
    O85 Benton Field Airport
    Age
    36
    Posts
    5,460
    Quote Originally Posted by UncleTgt View Post
    Maxstuka is right, we badly need some smaller Jap ordnance.
    You know that they can be made quite easily now. Also if you have the info on the size and shape I can do them.
    "Let Being Helpful Be More Important Than Being Right!" Some SOH Founder.

  9. #9
    SOH-CM-2020 Wayland's Avatar
    Join Date
    Jun 2012
    Location
    48.800 N, 118.612 W. North Central Washington State, USA
    Age
    71
    Posts
    387

    Japanese Ordnance

    I have PDF files of the US tech manuals for Japanese ordnance including one for bombs and fuses if they might be useful. They aren't the best quality in the world, but readable and gives shape and dimensions. It will take me a bit to sort through my ebooks and locate them but I can capture the data and line drawings for the needed pieces and send them on. I'm on a dial-up connection so it might take a couple of days to fire them off. I'll probably have to go to the public library and borrow a few mb of bandwidth. Let me know.

    Steve

  10. #10
    Redding Army Airfield Allen's Avatar
    Join Date
    Dec 2007
    Location
    O85 Benton Field Airport
    Age
    36
    Posts
    5,460
    Weapons are most easy as cake to make for the most part. Get the size is the hard part.

    I did find this while looking around.

    Click image for larger version. 

Name:	IJAAF_Bomb_diagrams.jpg 
Views:	1 
Size:	48.3 KB 
ID:	11542

    It covers a good range of bombs.
    "Let Being Helpful Be More Important Than Being Right!" Some SOH Founder.

  11. #11

    Very Nice Paint!

    Hello UncleTgt,

    I have never been any good at painting camouflage. How did you do the paint job on the third Aeroplane in your first post?
    I also have a Ki-61-Id that needs a good camouflage pattern but is otherwise complete.

    I have tried a couple times, but have never gotten quite the results I wanted.

    Thanks.
    - Ivan.
    Attached Thumbnails Attached Thumbnails Ki61-Id.jpg  

  12. #12
    SOH-CM-2020 Wayland's Avatar
    Join Date
    Jun 2012
    Location
    48.800 N, 118.612 W. North Central Washington State, USA
    Age
    71
    Posts
    387

    Japanese Ordnance

    Quote Originally Posted by Allen View Post
    Weapons are most easy as cake to make for the most part. Get the size is the hard part.

    I did find this while looking around.

    Click image for larger version. 

Name:	IJAAF_Bomb_diagrams.jpg 
Views:	1 
Size:	48.3 KB 
ID:	11542

    It covers a good range of bombs.
    I have that one also, and the companion piece on the aerial torpedos from the same source.

    Steve

  13. #13
    Redding Army Airfield Allen's Avatar
    Join Date
    Dec 2007
    Location
    O85 Benton Field Airport
    Age
    36
    Posts
    5,460
    Found it and the torps at http://www.clubhyper.com/reference/j...ebombsdw_1.htm The coloring of Naval Bombs vs Army Bombs dosen't make since with the pic.
    "Let Being Helpful Be More Important Than Being Right!" Some SOH Founder.

  14. #14
    SOH-CM-2020 Wayland's Avatar
    Join Date
    Jun 2012
    Location
    48.800 N, 118.612 W. North Central Washington State, USA
    Age
    71
    Posts
    387
    Quote Originally Posted by Allen View Post
    Found it and the torps at http://www.clubhyper.com/reference/j...ebombsdw_1.htm The coloring of Naval Bombs vs Army Bombs dosen't make since with the pic.

    I'll check and see what I've got on colors, I think the TMs have colors in for identifying the explosive filler. Not sure about overall colors.

  15. #15
    Redding Army Airfield Allen's Avatar
    Join Date
    Dec 2007
    Location
    O85 Benton Field Airport
    Age
    36
    Posts
    5,460
    The link I posted say.

    "Naval Bombs" "Naval bombs are usually coloured grey with tail fin supporting straps painted green."

    "Army Bombs" "These are coloured black, with two light bands around the body and a red band about the nose."


    But I'm kind of confused looking the the pic with the text. I'm going to guess the pic is showing Army Bomb painting.
    "Let Being Helpful Be More Important Than Being Right!" Some SOH Founder.

  16. #16
    SOH-CM-2020 Wayland's Avatar
    Join Date
    Jun 2012
    Location
    48.800 N, 118.612 W. North Central Washington State, USA
    Age
    71
    Posts
    387

    Jap Ord

    It looks like the army explosive bombs were black overall, and the navy explosive bombs were gray, the color varying with what was on hand. The other kinds varied in overall color (gas, incendiary and so forth).

  17. #17
    Redding Army Airfield Allen's Avatar
    Join Date
    Dec 2007
    Location
    O85 Benton Field Airport
    Age
    36
    Posts
    5,460
    You wouldn't happen to have better drawing of the 30, 50 and 100 KGs? The measurement say that the fins and body are not the same size but the drawing show fins and body are the same same size. I don't know what meseument is what....
    "Let Being Helpful Be More Important Than Being Right!" Some SOH Founder.

  18. #18
    SOH-CM-2020 Wayland's Avatar
    Join Date
    Jun 2012
    Location
    48.800 N, 118.612 W. North Central Washington State, USA
    Age
    71
    Posts
    387
    I'll take a look and see. We should probably start a thread just for ordnance, we kinda hijacked this one. Let's let UT have this one back. I have several other TMs covering British, German, Italian, French and U.S., so if you need data for other countries, I'll see what I can do.

  19. #19
    Redding Army Airfield Allen's Avatar
    Join Date
    Dec 2007
    Location
    O85 Benton Field Airport
    Age
    36
    Posts
    5,460
    If you can find any thing make a thread. I'll keep looking but I keep finding a lot of guns and tanks pic...
    "Let Being Helpful Be More Important Than Being Right!" Some SOH Founder.

  20. #20
    Quote Originally Posted by Ivan View Post
    Hello UncleTgt,

    I have never been any good at painting camouflage. How did you do the paint job on the third Aeroplane in your first post?
    I also have a Ki-61-Id that needs a good camouflage pattern but is otherwise complete.

    I have tried a couple times, but have never gotten quite the results I wanted.

    Thanks.
    - Ivan.
    Hi Ivan,

    Paint Shop Pro 8.1 & lots of layers & masks. Some custom brush tips allow me to hand draw a reasonable "mop-head" applied camo.

    I start with a mono colour blank & build up the details with layers. Once the camo pattern is established I use different filters & masks overlaid to build up the colour. It allows you to do fine adjustments without losing the original drawing work. Time-consuming, but flexible.

    In this particular case I cheated a little. I used the camo pattern from "Tony32v2.zip" & selected everything with a green shade. I then created a new layer & filled the selection with a dark green, & began to soften & blur the edges slightly. Duplicate the layers & build the effects with differing transparancies & you'll retain the panel line details.

    Same approach for markings, wear & tear & paint chips. Using masks & layers is the key - oh, and lots of patience!!!

  21. #21
    Member gaucho_59's Avatar
    Join Date
    Jan 2009
    Location
    Indio, California
    Age
    86
    Posts
    2,491
    Blog Entries
    1
    Quote Originally Posted by UncleTgt View Post
    Hi Ivan,

    Paint Shop Pro 8.1 & lots of layers & masks. Some custom brush tips allow me to hand draw a reasonable "mop-head" applied camo.

    I start with a mono colour blank & build up the details with layers. Once the camo pattern is established I use different filters & masks overlaid to build up the colour. It allows you to do fine adjustments without losing the original drawing work. Time-consuming, but flexible.

    In this particular case I cheated a little. I used the camo pattern from "Tony32v2.zip" & selected everything with a green shade. I then created a new layer & filled the selection with a dark green, & began to soften & blur the edges slightly. Duplicate the layers & build the effects with differing transparancies & you'll retain the panel line details.

    Same approach for markings, wear & tear & paint chips. Using masks & layers is the key - oh, and lots of patience!!!
    Dear Uncle Tgt,

    You hit the nail right on the head! I have been preaching for a long time about using the latest PSP issues (or Photoshop... which I find no so friendly)!
    To achieve good results one needs to use an UP TO DATE and FRIENDLY paint program... lots of layers, brushes, etc.
    It is a lot of wasted time and effort to try to do stuff with the freebies... or OLD, OLD PSPs... (like PSP 3... it just does not have the versatility... good for its
    time, but quite passe' now
    Also, the more you can do... the better you get at it!! btw... EXCELLENT WORK on those camos...
    Keep it up... (I am working on natural metal finishes now.. and learning a lot too)

    G.

  22. #22
    My biggest issue right now is how to keep consisten "Mop Sizes". The scaling between Fuselage, Tail, Wings is all different, so what looks right while drawing usually doesn't look so right on the aeroplane. Also, matching all the mop patterns across the top of the fuselage spine is something I haven't worked out to look good.

    Instead of PSP, I have generally been using GIMP for the layer effects. Guess I should look at PSP.

    Thanks.
    - Ivan.

  23. #23
    Member gaucho_59's Avatar
    Join Date
    Jan 2009
    Location
    Indio, California
    Age
    86
    Posts
    2,491
    Blog Entries
    1

    Indeed...

    Quote Originally Posted by Ivan View Post
    My biggest issue right now is how to keep consisten "Mop Sizes". The scaling between Fuselage, Tail, Wings is all different, so what looks right while drawing usually doesn't look so right on the aeroplane. Also, matching all the mop patterns across the top of the fuselage spine is something I haven't worked out to look good.

    Instead of PSP, I have generally been using GIMP for the layer effects. Guess I should look at PSP.

    Thanks.
    - Ivan.
    I got GIMP just to try it... and found it 'unfriendly'... not very easy to figure out without instructions... I think you'll be happier with PSP... Photoshop is really great... notwithstanding the fact that it requires some knowledge of graphic arts... My son is a graphics artist and used it throughout his 4 years of college at the Ft Lauderdale Art Institute... so he swears by it... but I think it would be a long learning curve to know all the "ins and outs" to where I can work sort of automatically...
    I am almost 77 now... so I figured... I've been using PSP as an amateur since the late 80s... at least I know what I am doing with it (almost)
    too late in life to start a learning curve to be proficient with Photoshop... Once in a while I try it... and go back to PSP right away... lol
    Like I said before... if you choose PSP... make sure you get one of the latest like from PSP x5 on up...
    I am using X6 still... and it is sophisticated enough... X3 or X4 just don't have the wherewithal yet...
    G.

  24. #24

    Icon22

    Ivan,

    Broadly agree with Gaucho on this, but for your information I 'm operating PSP8.10 on WIN7 quite successfully - occasional OOM (out of memory) issues, but that because my template files can be extremely large in size.

    Little tip for matching mop brush sizes on different bitmaps - trial & error when you're sizing panel lines will give you rough ratios when working with different sized texture bitmaps. Once you get the panel lines to match in visual appearance on the model in sim, just use the ratio between the panel line widths as a guide for the respective increase/decrease on your "mop" brush size.
    I'm afraid the rest is lot's of trial & error.

    Just remember sometimes close enough is good enough - it's not FSX eye-candy after all, it's a Combat Sim!

  25. #25
    Member gaucho_59's Avatar
    Join Date
    Jan 2009
    Location
    Indio, California
    Age
    86
    Posts
    2,491
    Blog Entries
    1

    Just cooked this panel bmp for the "Nick"

    If anyone is interested... here it is... (available to all) just cook up a config file:


Members who have read this thread: 1

Bookmarks

Posting Permissions

  • You may not post new threads
  • You may not post replies
  • You may not post attachments
  • You may not edit your posts
  •