
 CFS2
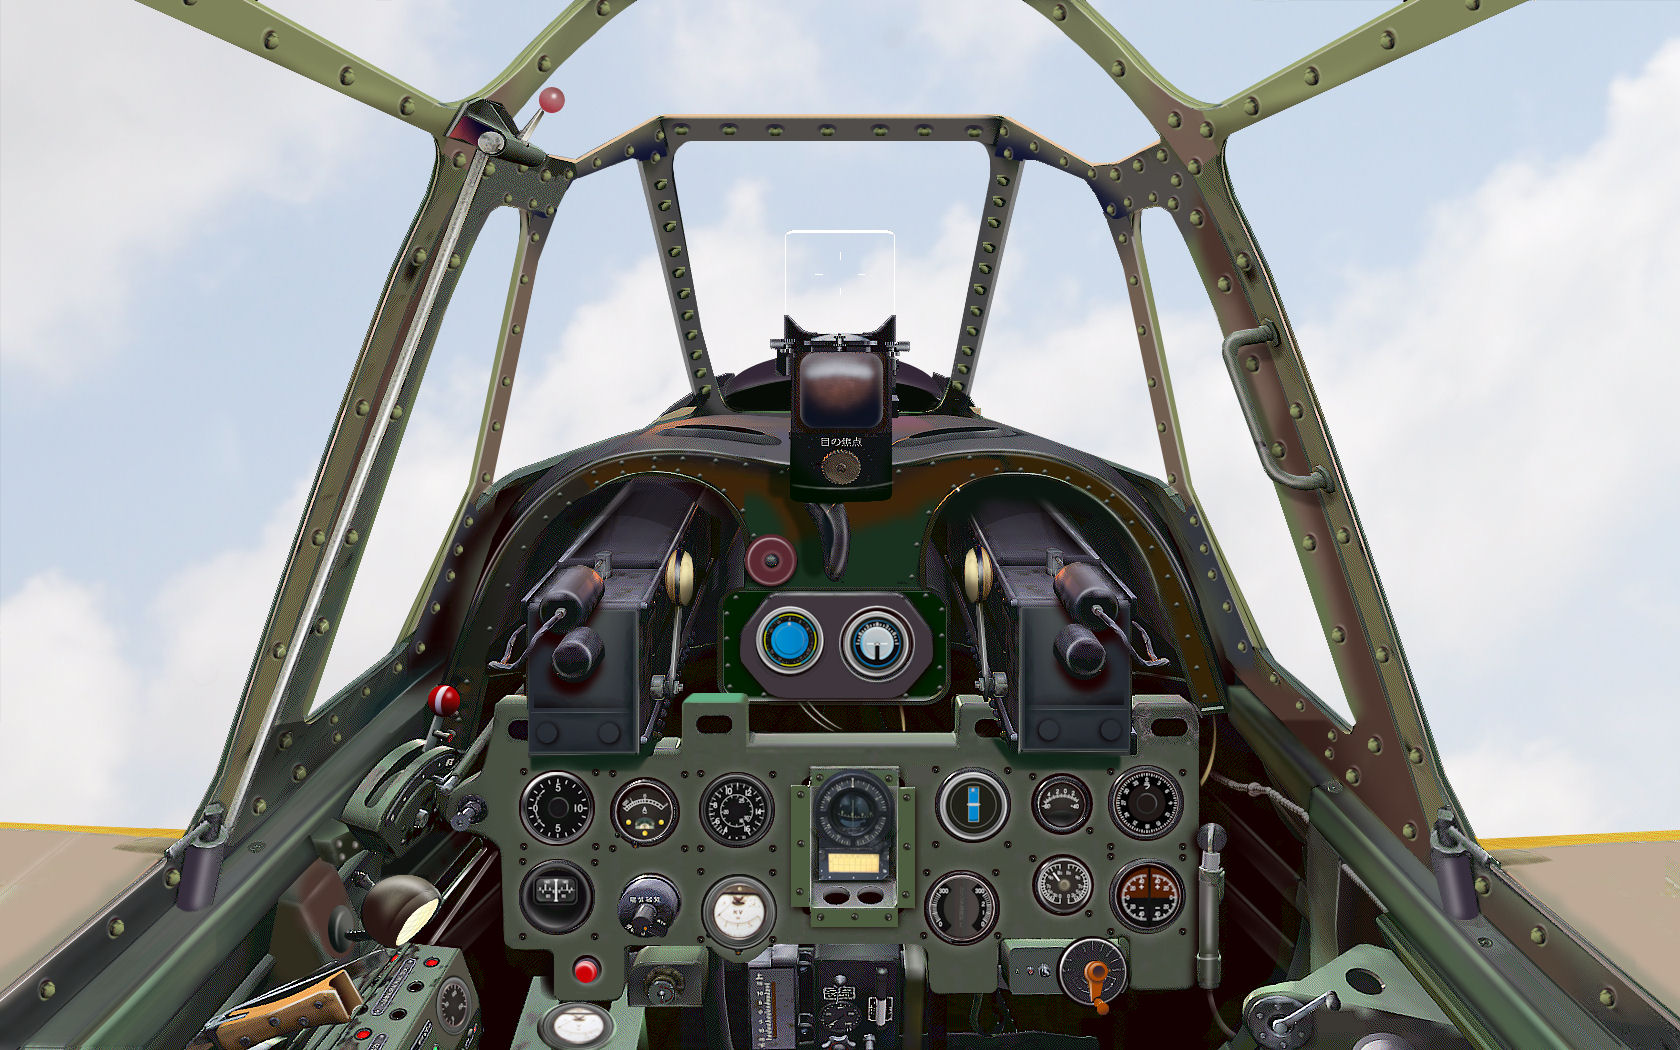
CFS2Two versions, one green and one white for Akemi's superb Zero. And a widescreen panel.. of course
Morton


Two versions, one green and one white for Akemi's superb Zero. And a widescreen panel.. of course
Morton
My AC, Panels & skins: http://mycfs2.wixsite.com/cfs2-aircraft
VERY NICE MORTON. Love the wide panel.
A new entry has been added to Add-Ons Library, category CFS 2 Skins - Japanese
Description: White and green A6m2 version with high-res wide screen panel for Akemi's Zero.
To check it out, rate it or add comments, visit mk-a6m2-Zero_X2.zip
The comments you make there will appear in the posts below.
Are you close to release it? It really looks superb....Originally Posted by Morton

Kudos,
G.

Morton,
These are yet another example of your fine work. Outstanding job!
"Rami"
"Me? I'm just a Sea of Tranquility in an Ocean of Storms, babe."
My campaign site: http://www.box.net/shared/0k1e1rz29h
My missions site: http://www.box.net/shared/ueh4kazk3v
My scenery site: http://www.box.net/shared/knb1l0ztobhs2esb14rb
Thank you!

Still another time,
GREAT WORK Morton!!!!
Thank you

Those two actually look like they're still in pretty good condition, something you don't see on an A6M2 or M5 these days.... Usually they have been rode hard, they're battle weary, and in need of some fresh paint. Superb work as always, Mrton!
BB686
"El gato que camina como hombre" -- The cat that walks like a man

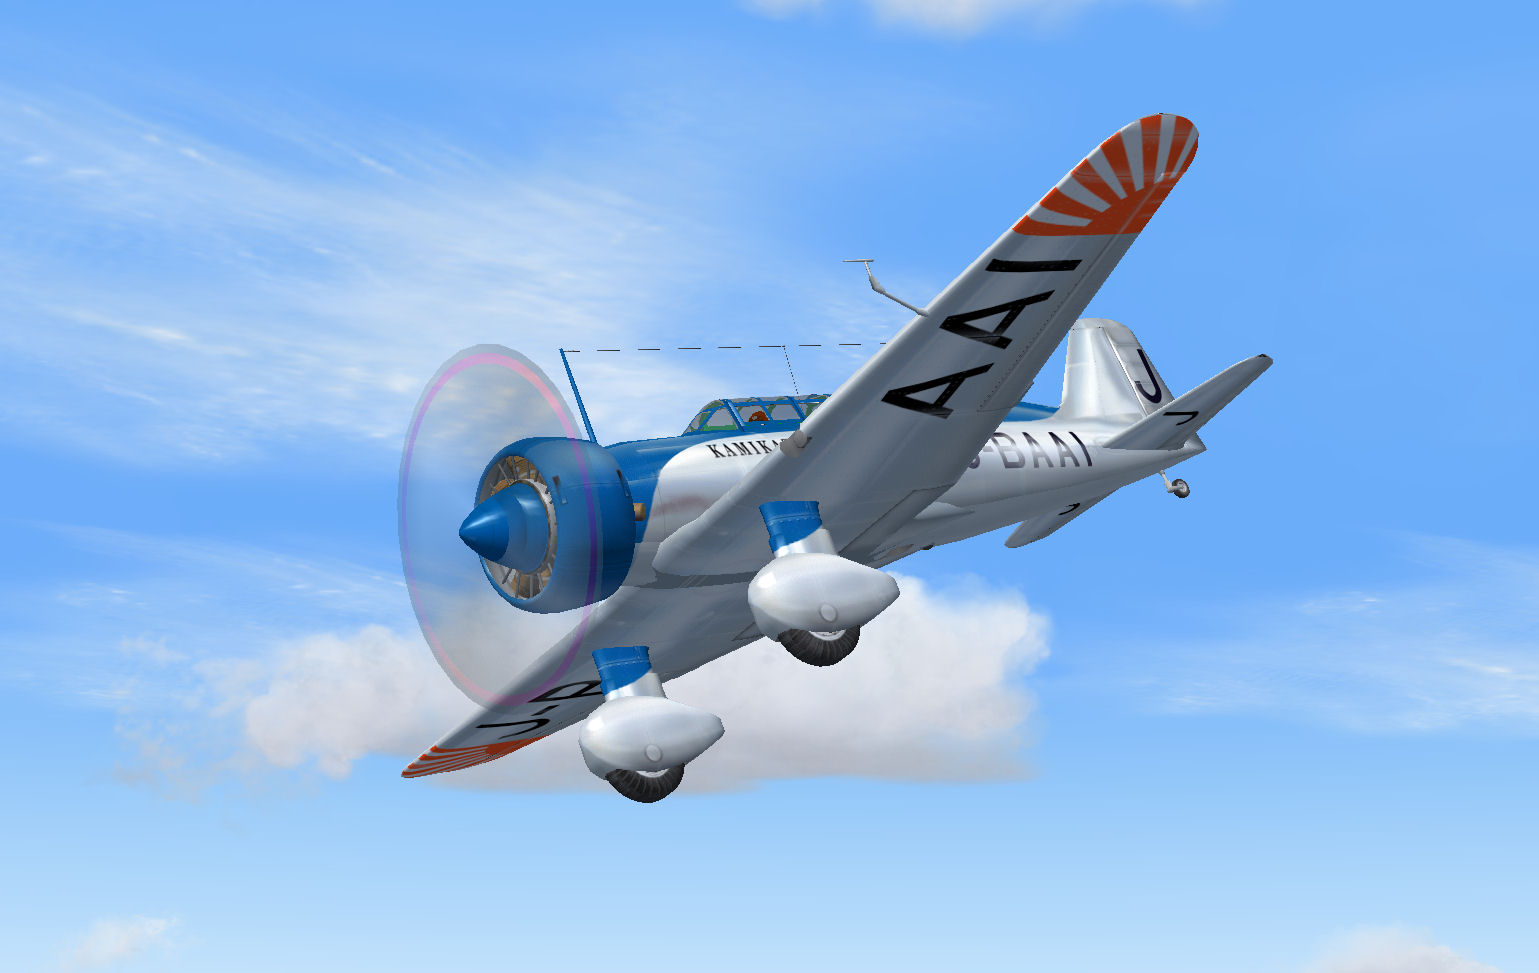
Kamikaze reserves for the "Final" homeland defense stand. Been stashed away underground from those dang B-29 raids and fighter sweeps.
♠♠
"If you're in a fair fight, you didn't plan it right"

Top shelf quality Morton. Once again, Thanks!
Looks very pretty!
You might want to remove the Trim Tab from the Rudder though. A6M2s didnt have an air adjustable one.
- Ivan the Rivet Counter.
Yep, they are beauts, but no worries on the tab my rivet-counting mate. For Allied-only players like meself, its all just cannon fodder anyways. I'll make sure the tab doesn't suffer much in the take-downs
♠
"If you're in a fair fight, you didn't plan it right"
Thanks Mort ,

Morton! U make feel like we really can touch these planes. Thank u.
....the way I showed in my tutorial... a little bit at a time...
As usual, available upon request...to anyone... just PM me...
Hey, good observation mate. But I really didn't know. I'll remember next timeYou might want to remove the Trim Tab from the Rudder though. A6M2s didnt have an air adjustable one.
- Ivan the Rivet Counter.
Yes why not Gaucho_59. I', sure a lot of simmers would like your version too. Generally cleaned up texture and panel bitmaps works better in sims. For example, photos transferred to models unprosessed mostly looks terrible. Me, I always try to keep my textures as close to the real thing as possible, especially regarding colortones. But the digital tools today make endless possibilities. It's all a matter of personal taste.
Mrton
My AC, Panels & skins: http://mycfs2.wixsite.com/cfs2-aircraft
I noticed that your panels are not "hand made" but rather... computer generated... the only drawback are those "saucer sized" malformed rivets, and way out of proportion perspective errors.. but,
in all, it renders a very nice starting point to refine colors (the ones in this computer generated render are Ok... but of very low definition... than can be easily corrected nonetheless) and add visual appeal...
What program is it? Do you start with a color photo.. or drawing? I am very interested because, as you may have noticed, I like a good 2D panel over some of the 3D monstrosities one sees around... anytime...
Please let me know what the name of the program is and where to get it...
Thanks in advance,
G.
I actually "revealed" this little idea years ago here at SOH. Yes , sure they are computer generated. Because many of them are based on and reworked from snapshots of 3D VCs! From all kind of sims actually. And agree, a good 2D cockpit is much better, at least in a combatsim like CFS2, than a crappy 3D VC. But traditionally CFS2 panels were just flat dull instrument holders. So why not mix the best of two worlds, the 2D bitmap's capability for details and the VC's perspective and sense of cockpit "space". Also, there is an enormous amount of pictures and resources on the net. The rest is a mix of tidious combining the bits and pieces and careful handpainting. About the "out of proportion perspective errors", I'm not sure I totally agree with you on that matter, but again, it's maybe in the eye of the beholder..
By the way, I still use the old, but capable Micrographx Picture Publisher. Modern graphic editors like Photoshop have much more possibilities, but as a 1954 model, I never find the motivation to learn them..you know...
cheers
Morton
My AC, Panels & skins: http://mycfs2.wixsite.com/cfs2-aircraft


For the record... these airplanes fly very well in FS9! The Textures are the most realistic I've seen a Reisen dressed in for FlightSim!
Now, if I can only find a good Sakae 12 Sound set...

Morton,
Very nice! As per usual.
Bub
"These Blockbuster Bombs don't go off unless you hit them JUST right". "Agent Provacateur".
Well, I don' know about the "eye of the beholder"... when rivets or screw heads are DEFORMED... out of proportion... LIKE THE SIZE OF SAUCERS... mmm
maybe the eye of the beholder is BLIND and does not notice it.... lol... you know... like panel lines... in REAL LIFE... once you are more than 20 feet from
an aircraft.. you can hardly see them... when they are fairly thick lines... it means the panels are about 2 or 3 inches apart! and no plane could fly with
that... too much parasitic drag... rivets... at more that 30 feet... they don't even show... I used to do IPMS stuff in my youthful years in Hawaii... and
folks just never understood that the panel lines in plastic models were WAY out proportion... even 1 mm in a 32 scale model... is still two big a gap...
actually.. to do it right... one had to fill the gap.. and the scribe a pencil thin and not too deep cut.. REMEMBER that in real life... the gap is barely enough
to allow a little grime in it!!! At any rate.. since it is a good FIRST step to get things going with a 2D panel... I'd like to use the program... Where do you
find this Microgaph Picture Publisher? Is it payware? I mean...is this the program that makes a 3D cockpit? I have been using Photoshop and PSP since
the 80s and you can't do CAD work with them... they are graphic editors... very good indeed... but no 3D modeling...
what I am interested in is... the 3D modeling of the cockpit... Please as much info in this process as you can muster... Thanks in advance...
G.
Ok Gaucho, I won't stretch this too far, but I must say i dont agree with you.
You may present the math calculations of the panel line width or the rivet size on a CFS2 model etc etc as much as you like. You may be right. And you are free to paint the Zero by simply dropping a white color onto the texture and claim the panel lines and rivets and details are all there. You just cant see them! But I would not care to download it. These models and textures are not real life. It's actually very simple to me. If it looks good, it's right. It's called artistic freedom.
Beside that, photos of surviving Zeros in mint condition clearly shows a lot of panel lines from distance. Then think about a tired ww2 Zero with oil leakage, rust and panels not exactly flush anymore. This is not a F-35 Gaucho.
Well, this is my opinion. Should be interesting to here what others members think about this matter..
About the 3D effect in cockpits. My explanation was maybe not good enough. The basic 3D perspective layout comes from any quality VC you see in the sim. There's no tool which will create it for you I'm afraid. And as I said, your Photoshop is probably a much better SW so stick with it.
cheers
Morton
My AC, Panels & skins: http://mycfs2.wixsite.com/cfs2-aircraft
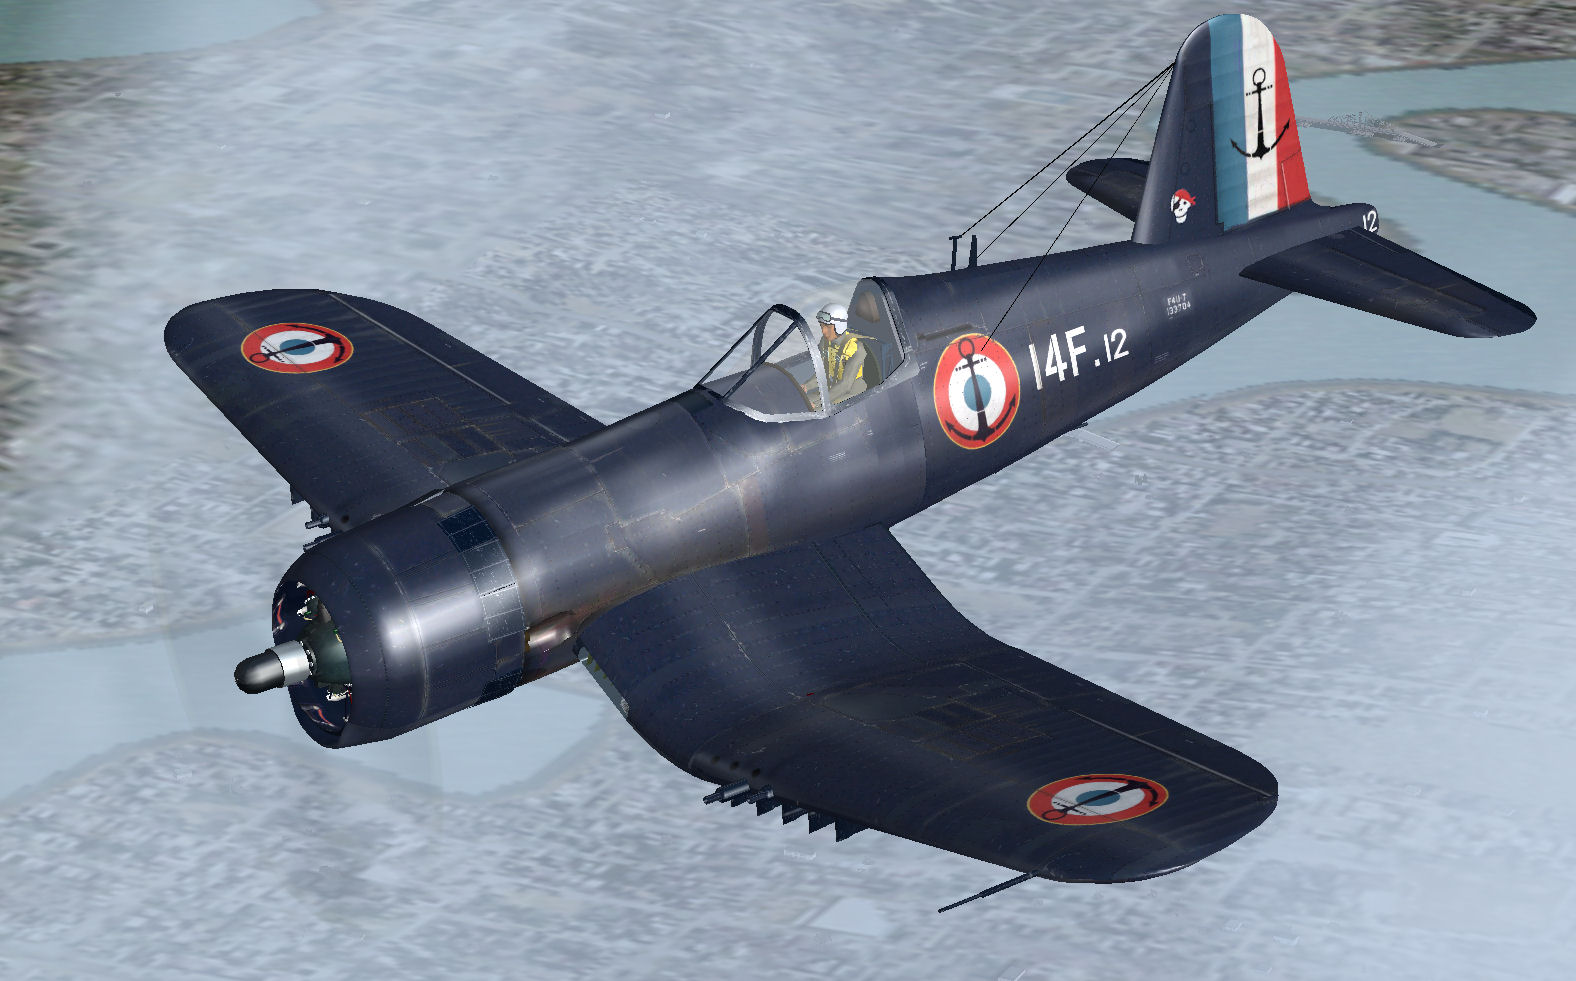
I believe in artistic judgment.. and we all differ... basically.. I paint to satisfy myself... that is why I don't post my repaints for download... if anyone wants them... they can PM me and I send them forth...
and although I can feel free to paint the Zero as you say... I really don't... this is more the type of surface finish I do:
I would hardly call this... throwing a slap of white... with no details... lol
Cheers,
G.

Thank you Morton!
These are the usual works of art you spoiled all of us with over the years! The caramel-coloured light grey skin is a touch of perfection, depicting the extra anti-corrosion measure taken by Imperial Japanese Navy by covering all embarked planes with a clear coat of varnish which gave an amber, caramel-like colour hue.
As a matter of fact, in spite of the fact I used the stock livery for some of my repaint works on Zeros and Vals involved in the Pearl Harbour attack, they were not historically correct. I read later in a Japanese webpage, whose link I can post later on, about this practice. Some static model websites even state that the original Mitsubishi and Nakajima factory-applied colour, analysed from wrecks remnants found in the Pacific, was a very light glossy olive green which turned grey with oxidation. At any rate, the CFS2 stock light grey painted Zero and Val are not historical.
Gaucho59, please, allow me a comment: I have been a SOH member since 2002 or 3, I don't remember.
Morton set repaint standards for CFS2 previously unknown before. To the point that I wouldn't hesitate to call "Morton-style" hundreds of repaints from other authors that came afterwards.
We are all in debt with Morton for the enormous amount of repaints he uploaded, to the point that many mission writers here made a point in directing downloaders toward Morton's works in order to ensure historical credibility to their missions. As anyone can be damn' sure that any aircraft repainted by Morton looks exactly like its real-life counterpart, with all the CFS2 due limitations, of course.
I agree to correcting some technical details that are out of place, like a rudder trim tab that was never there, but can be very easily overlooked when it was seen in countless profiles and repaints done by others. For example, I just checked the Wings Palette website, all of the A6M2a and M2b profiles I saw HAVE the rudder trim tab. How about it? Not everybody owns the entire collection of Squadron Signal Publications' "In action" books, where every aircraft technical detail and versions are covered in depth. But even they can make mistakes, as we are all human beings.
There were times where I counted rivets too. I started out with my mods by replacing stock payloads and wing/fuselage pylons that look ugly to me, or I found incorrectly placed, it's rivet-counting. My comments above about the Zero camo colours is rivet-counting, I personally hate "what-ifs" and anything that's not historical, but there's a limit to criticism.
I must say that every now and then someone falls into heavy criticism, forcing SOH forum moderators interventions and thread lock-ups. An ugly picture.
So, I repeat, please,..... I don't need to add anything else.
Cheers!
KH
Morton,
Your work looks incredible. Thank you for sharing; your efforts help makes this old sim look great.
msfossey
 Members who have read this thread: 53
 Posting Permissions

 Reply With Quote


Bookmarks