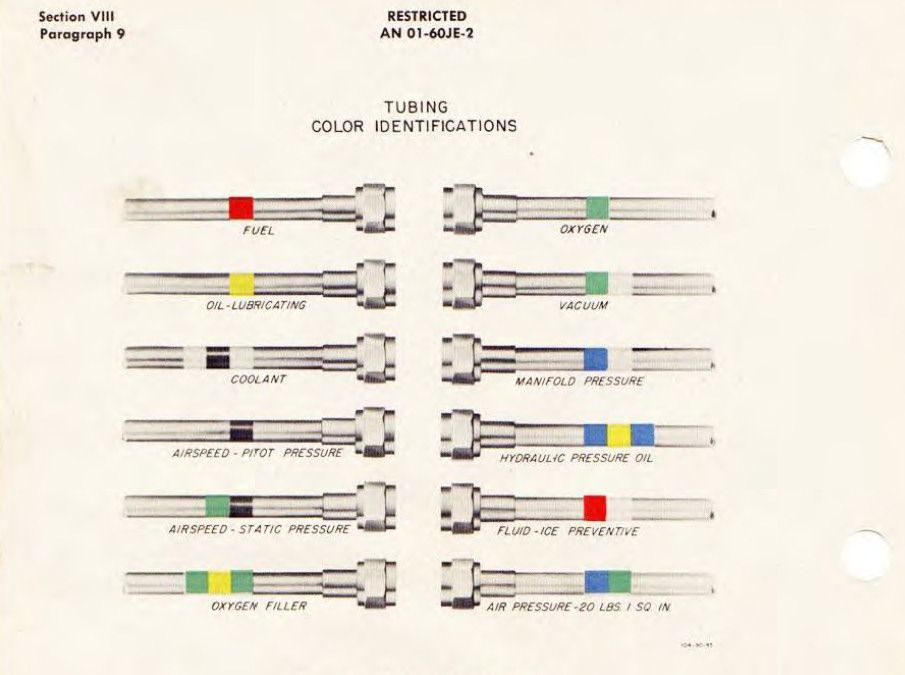
OT: P-51D Cockpit Progression Walk-Through
Results 1 to 23 of 23

Thread: OT: P-51D Cockpit Progression Walk-Through

  1. #1

    OT: P-51D Cockpit Progression Walk-Through

    Hi all,<o></o>
    <o></o>
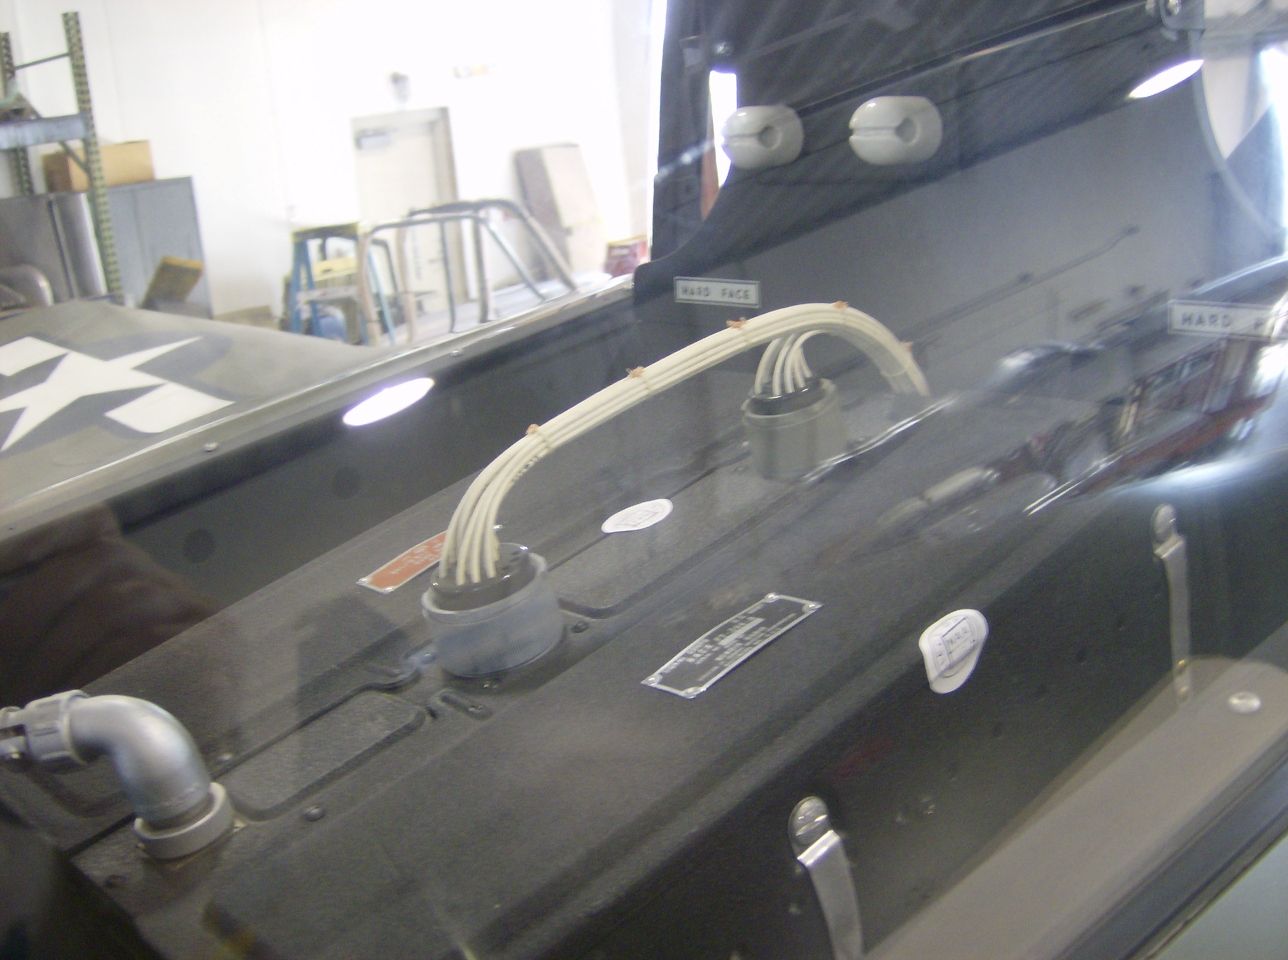
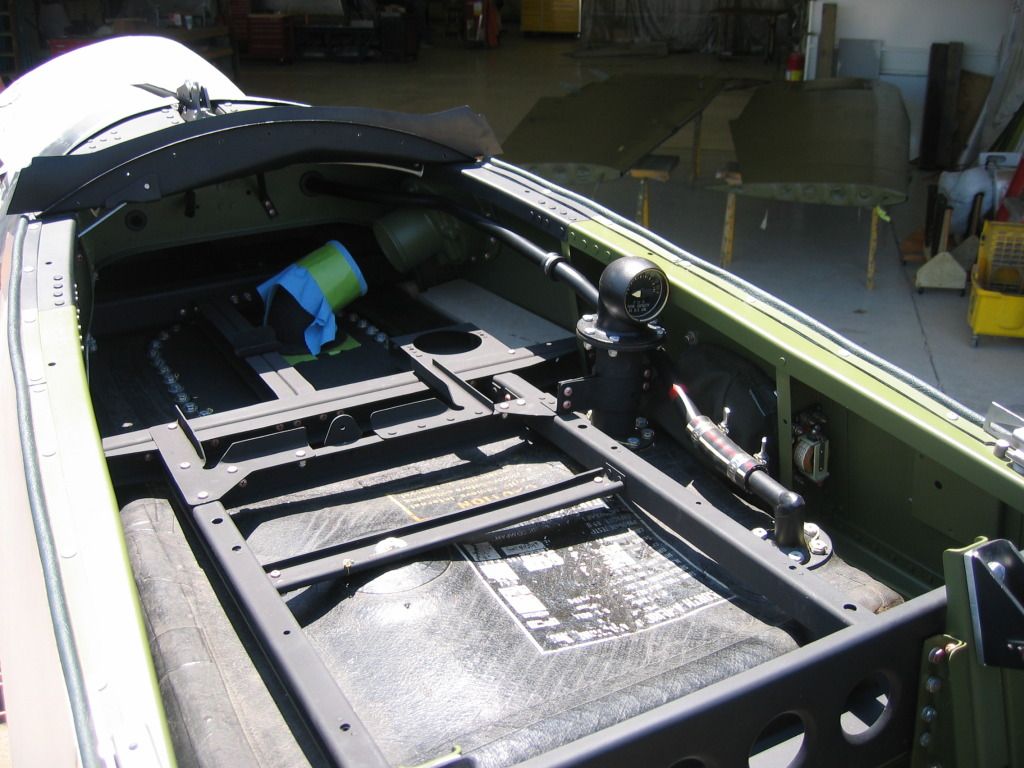
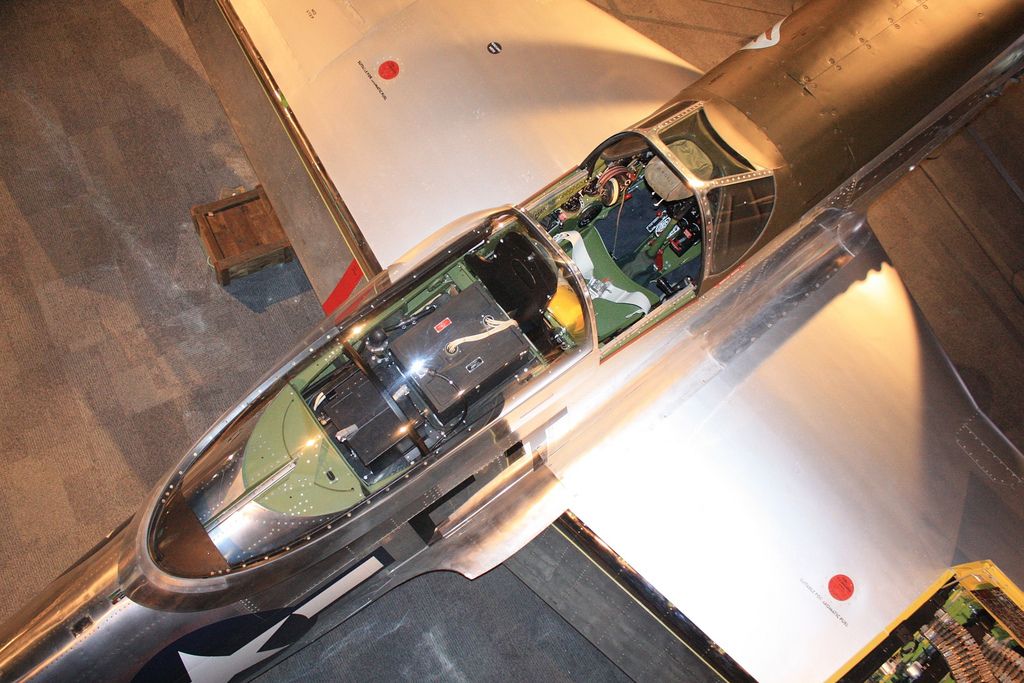
    I've been meaning to do this for quite some time, and I decided, with the variants reproduced so-far, that I would have a go at it. What I wish to show is the details of the various Warbirdsim P-51D reproductions, and how they authentically illustrate the way in which the P-51D changed and developed over time, starting with the very first production variant, the P-51D-5-NA, going all the way up to the P-51D-30-NA, one of the last production variants and most reproduced variants of the P-51D. Along the way I will be posting select photos to illustrate connections between certain details that might not often be focused on. This is all to try and help clarify why and where they are different, and to try and prevent or reduce confusion over it all.
    <o></o>
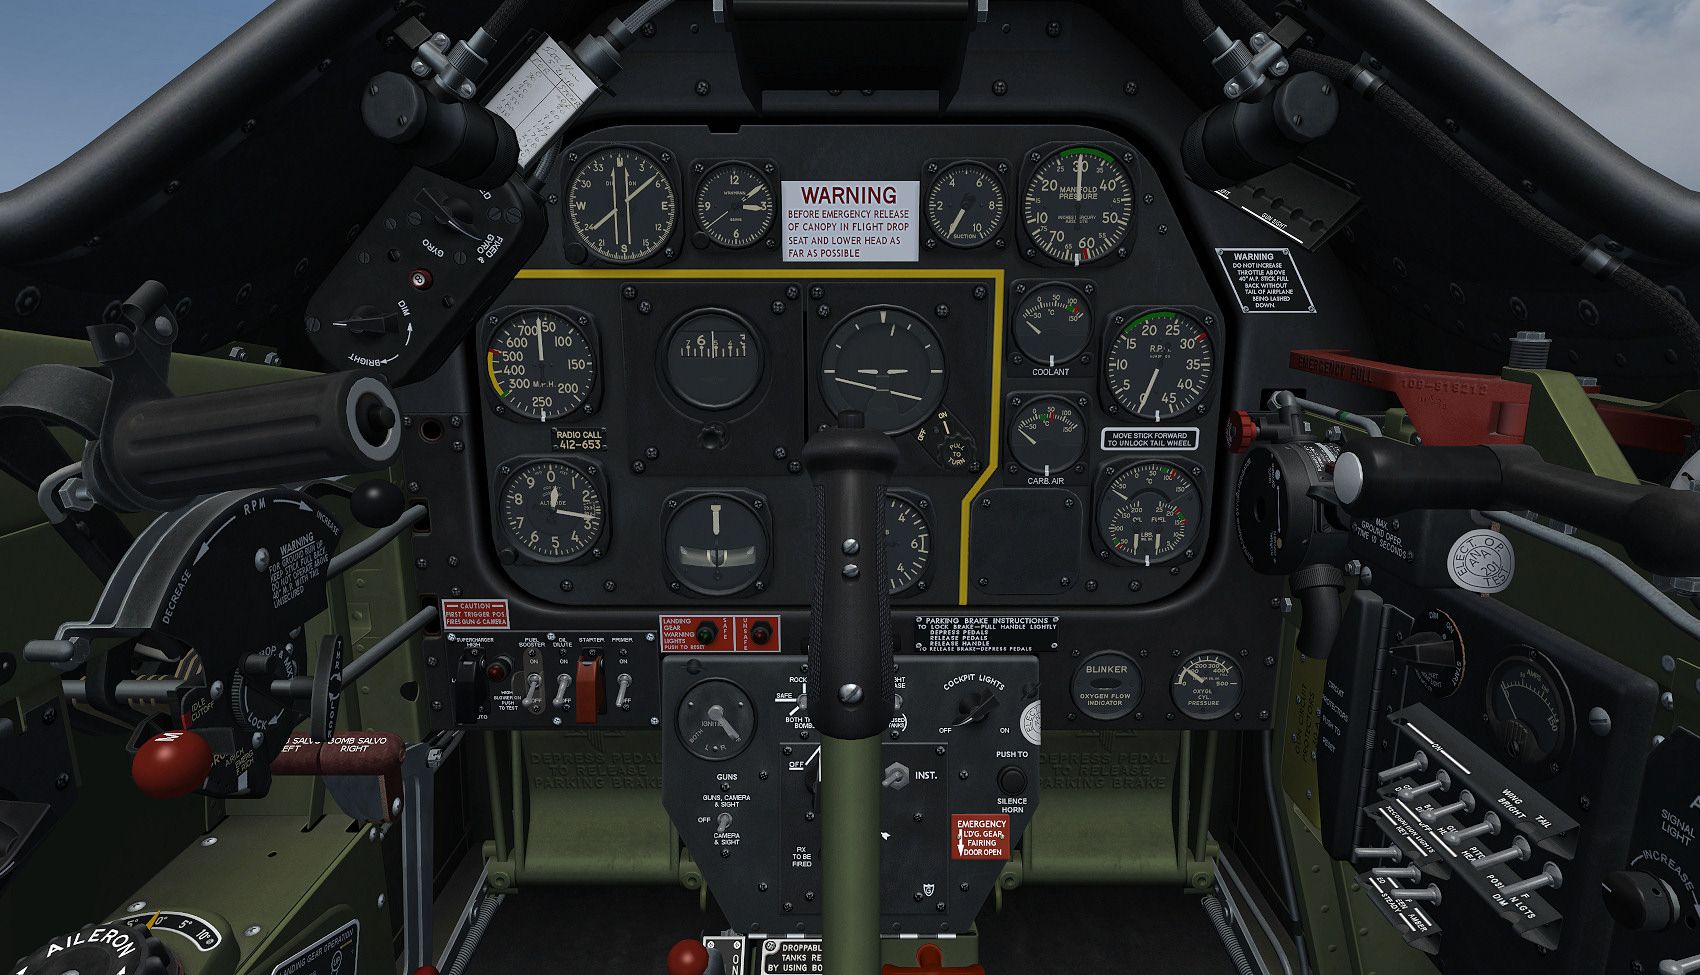
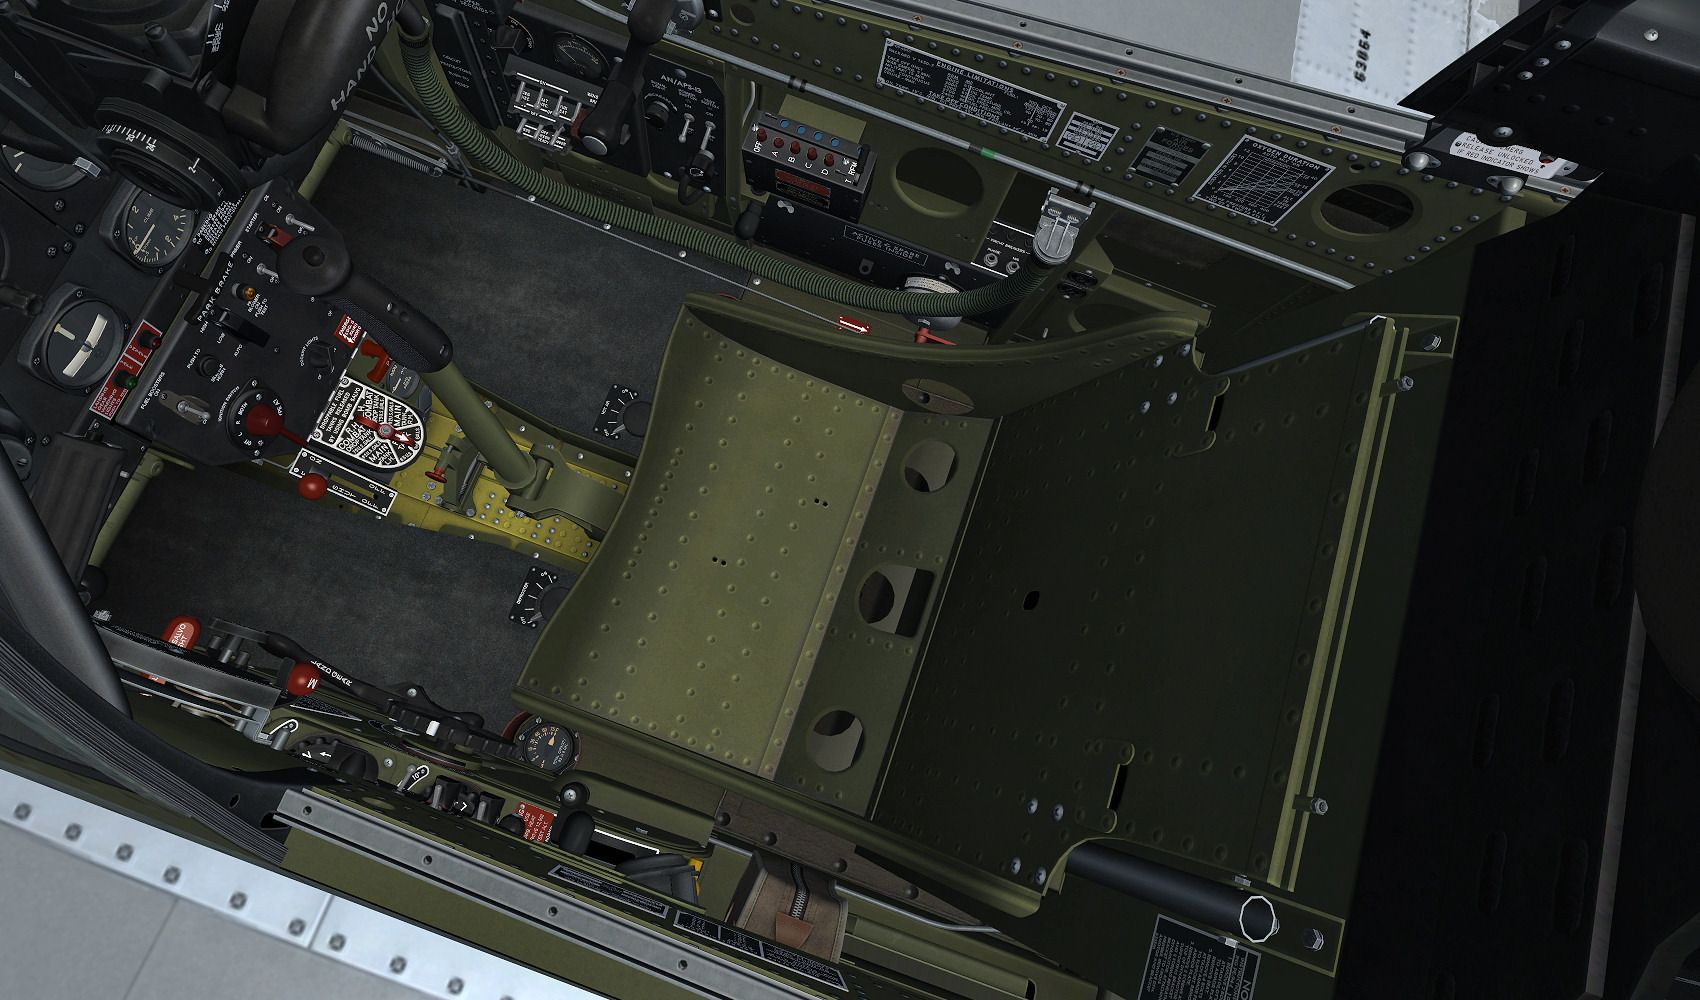
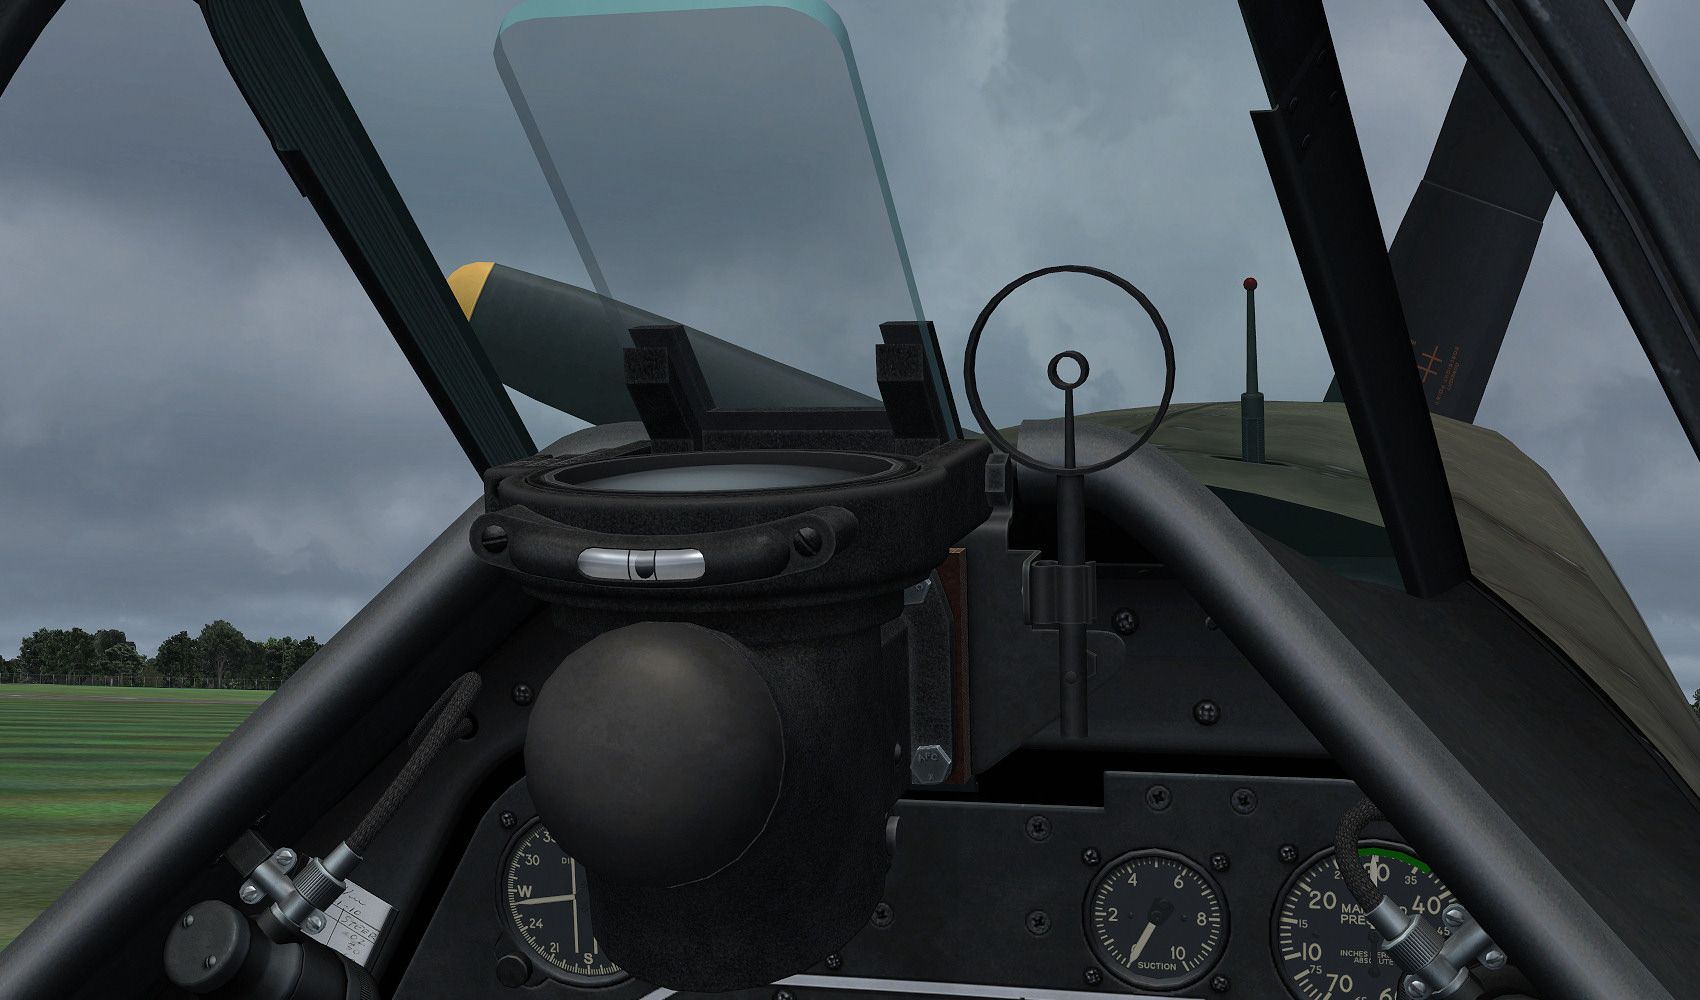
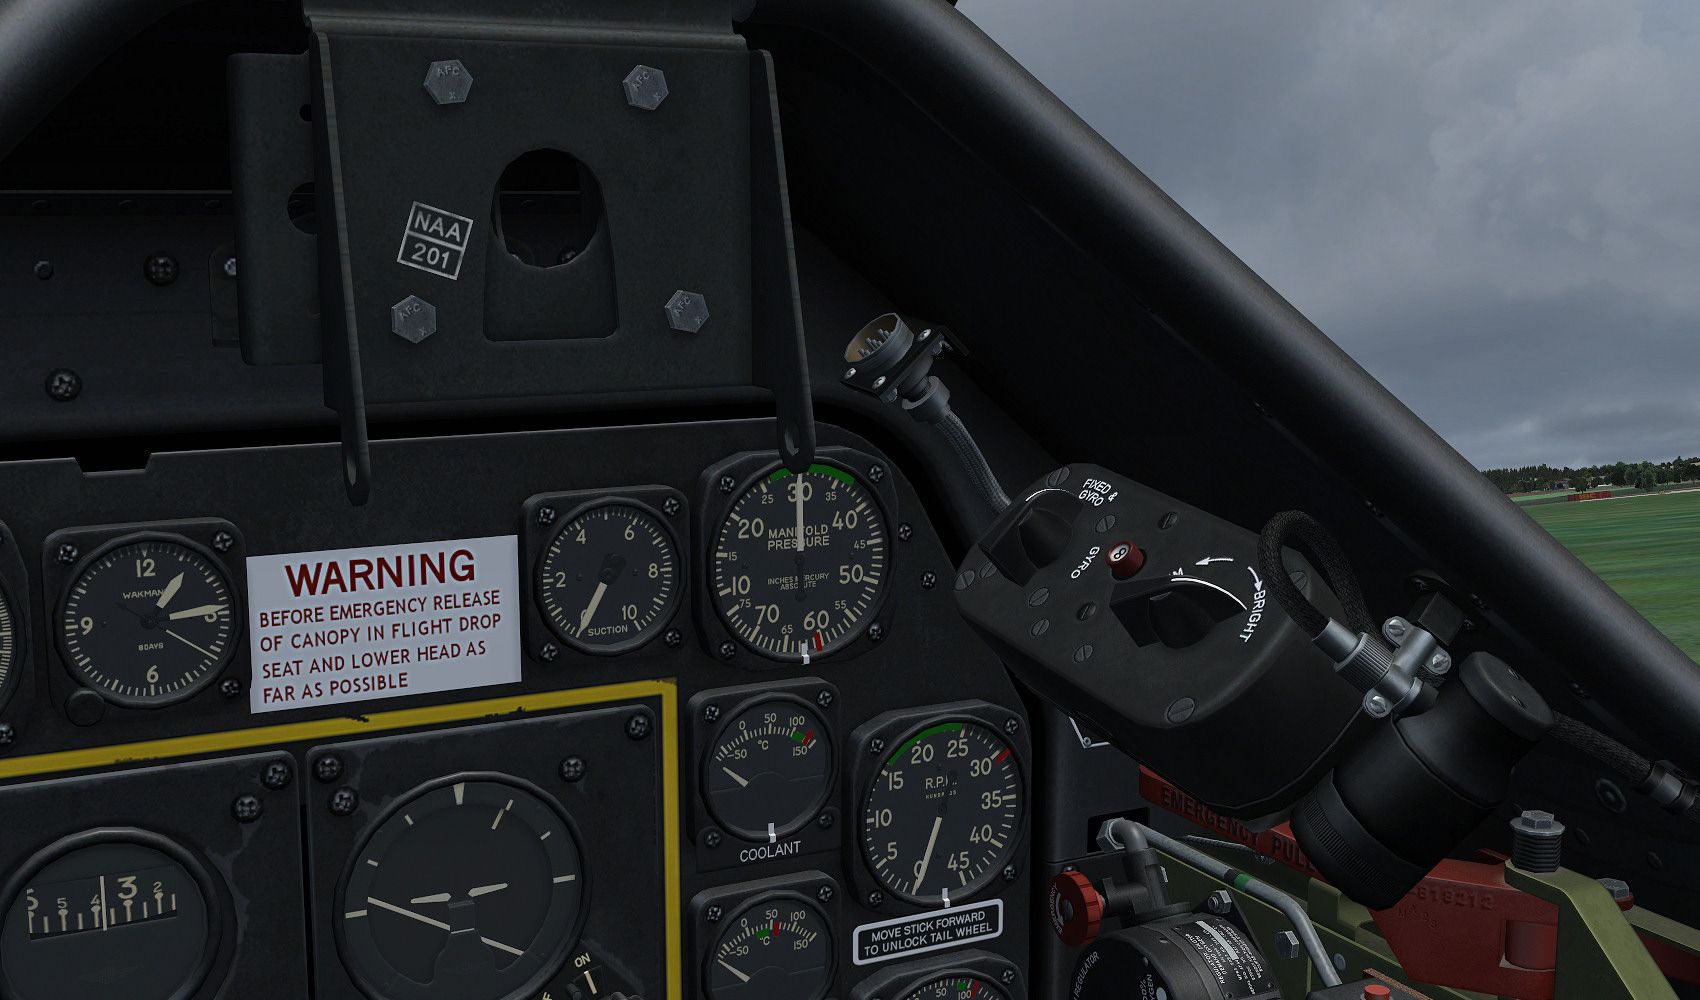
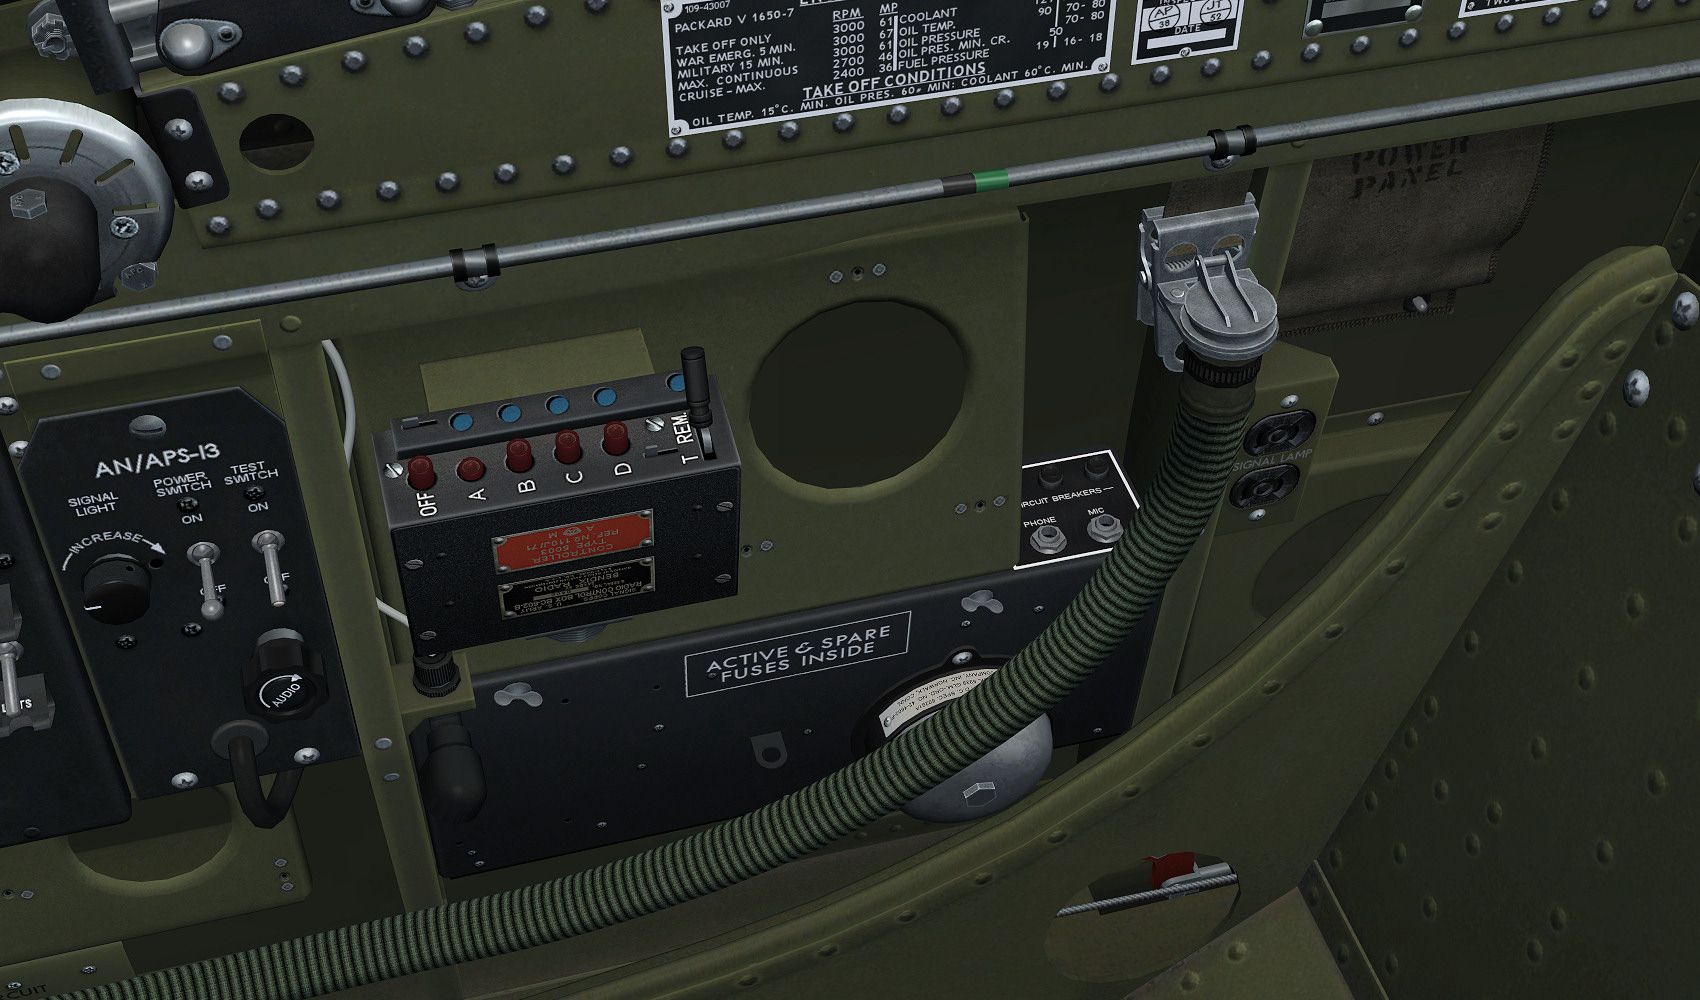
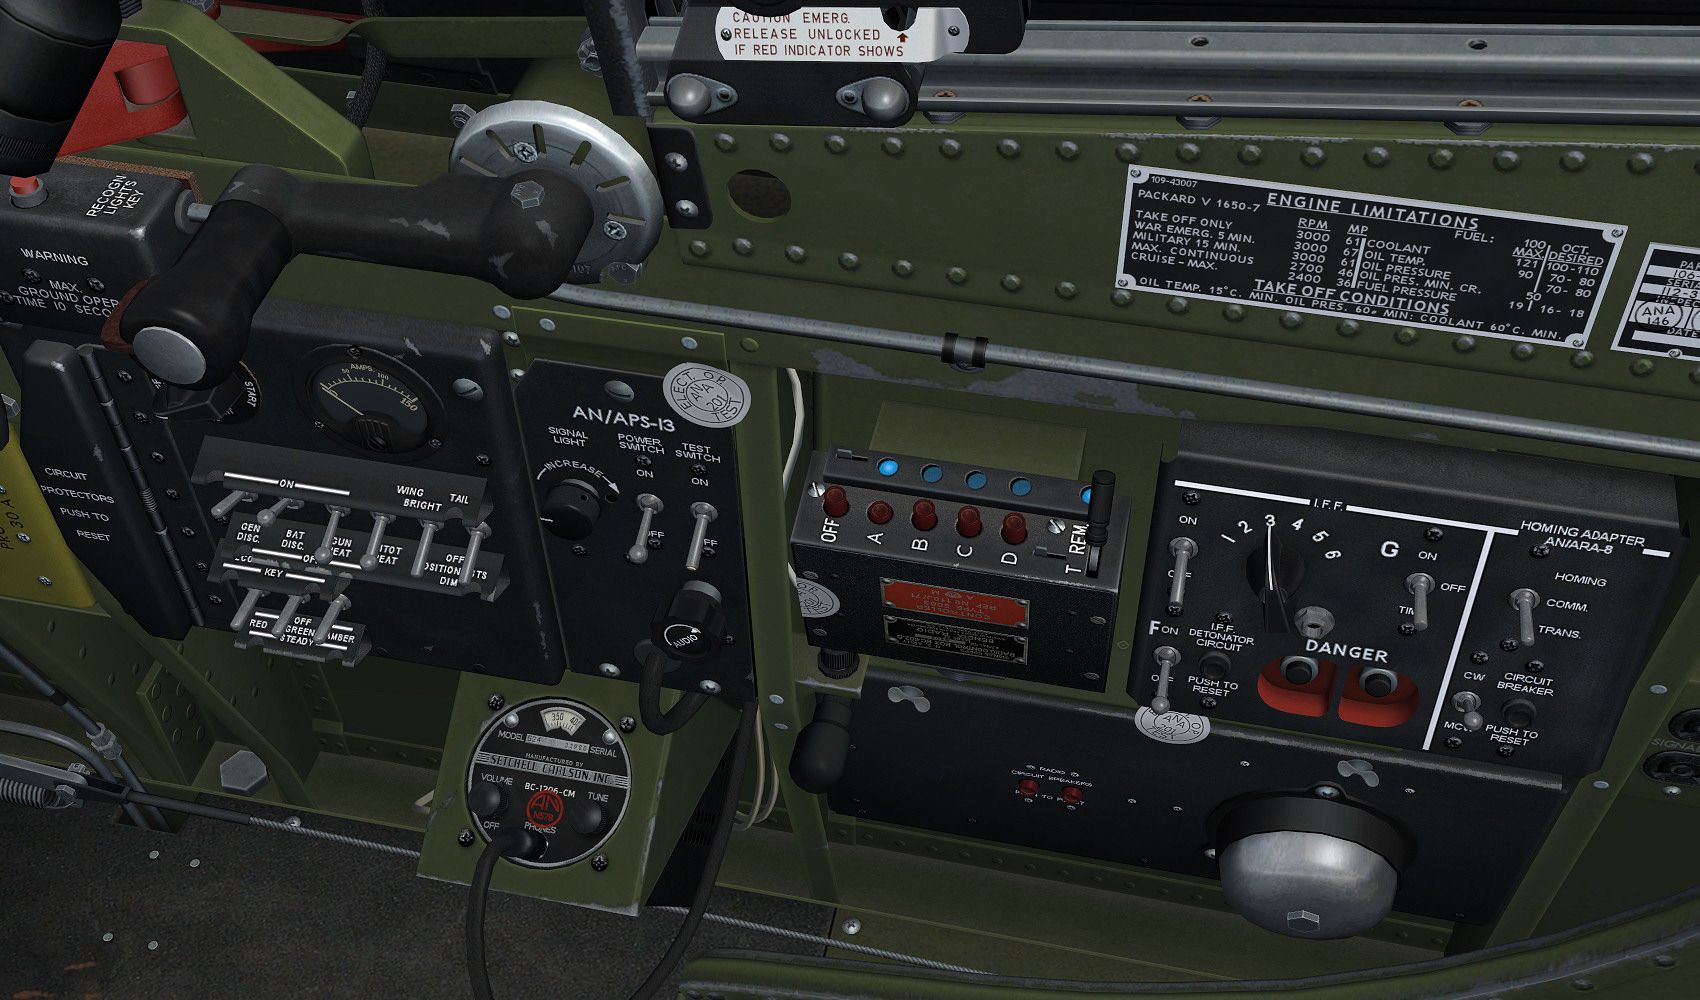
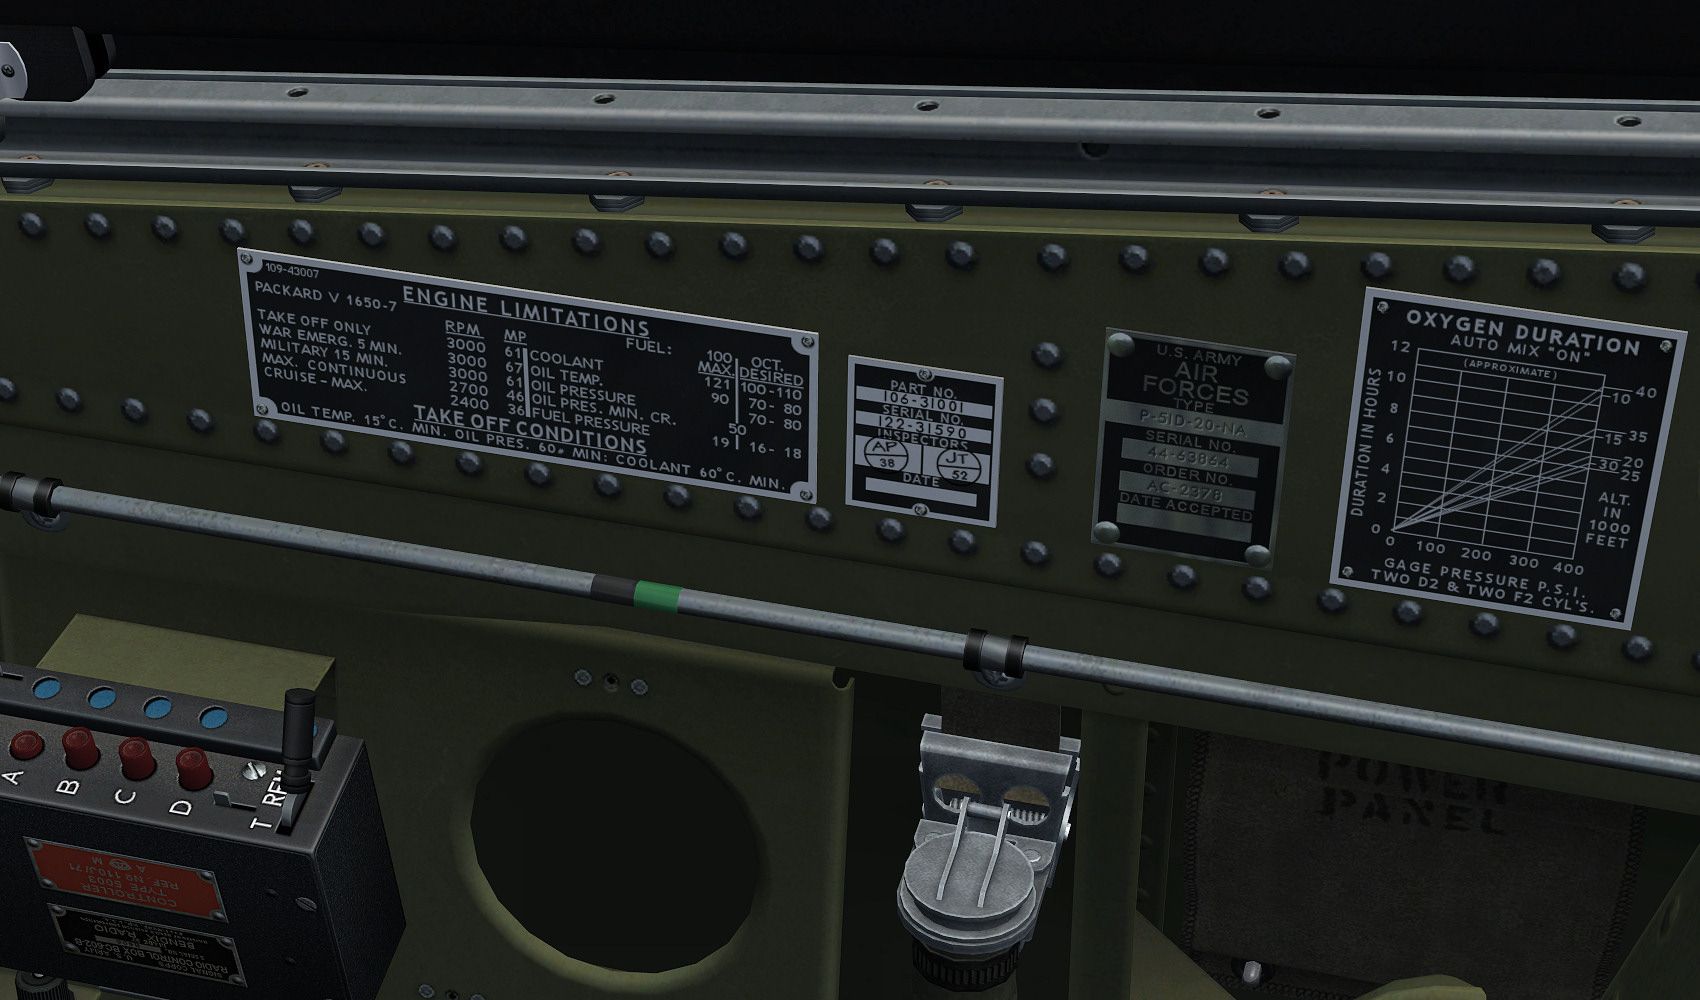
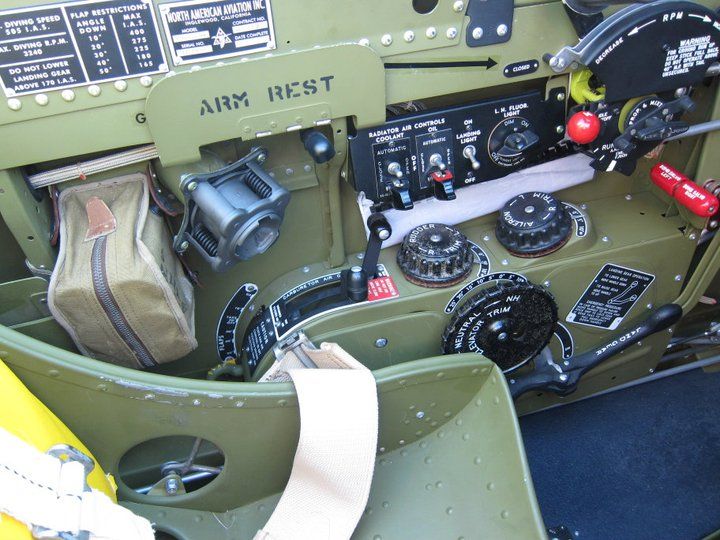
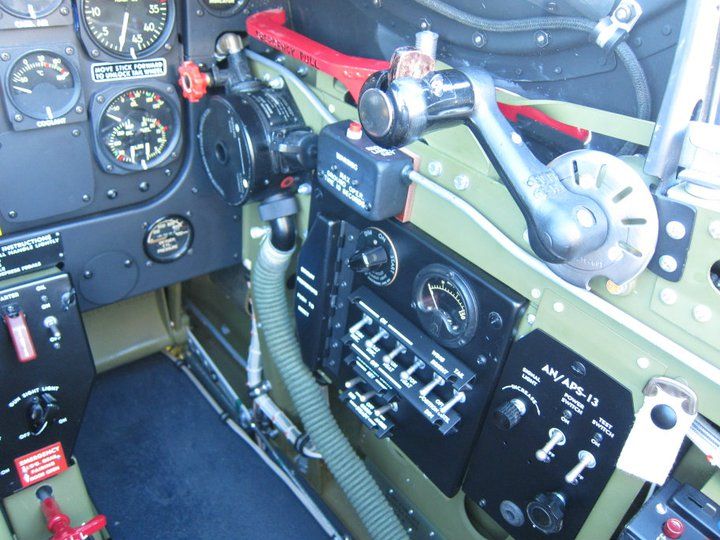
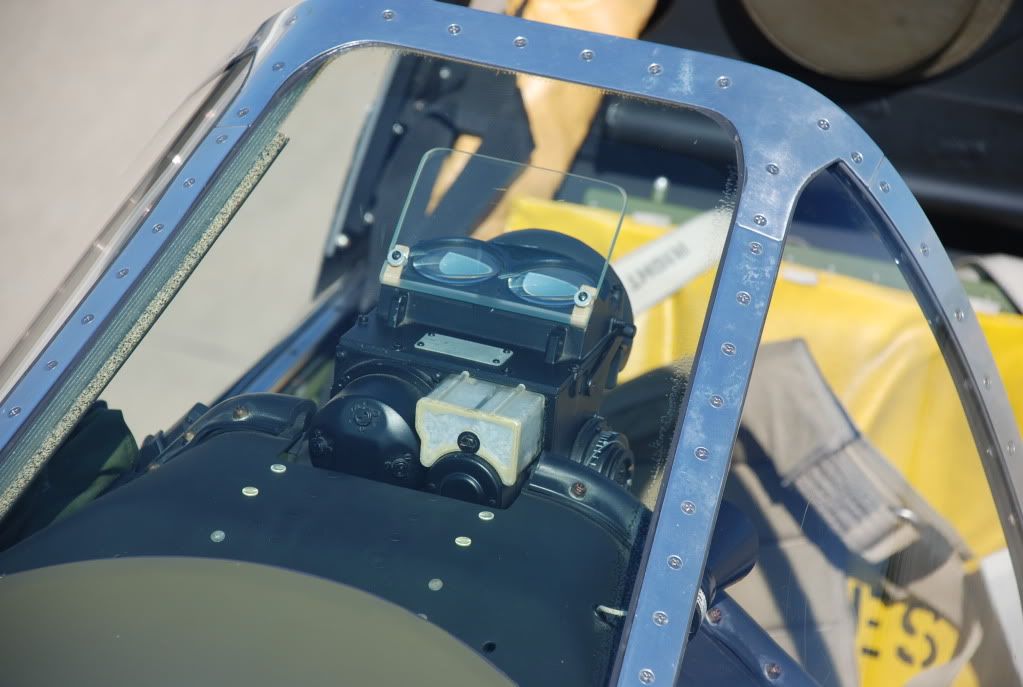
    At the start of P-51D production, a good chunk of the design work remained from the P-51B's and C's before, including many details of the cockpit. The most noticeable of these carry-overs was the instrument panel, looking nearly identical to that of the P-51B/C unit. <o></o>
    <o></o>
    Original P-51D-5-NA instrument panel:<o></o>
    <o></o>
    <o></o>
    <o></o>
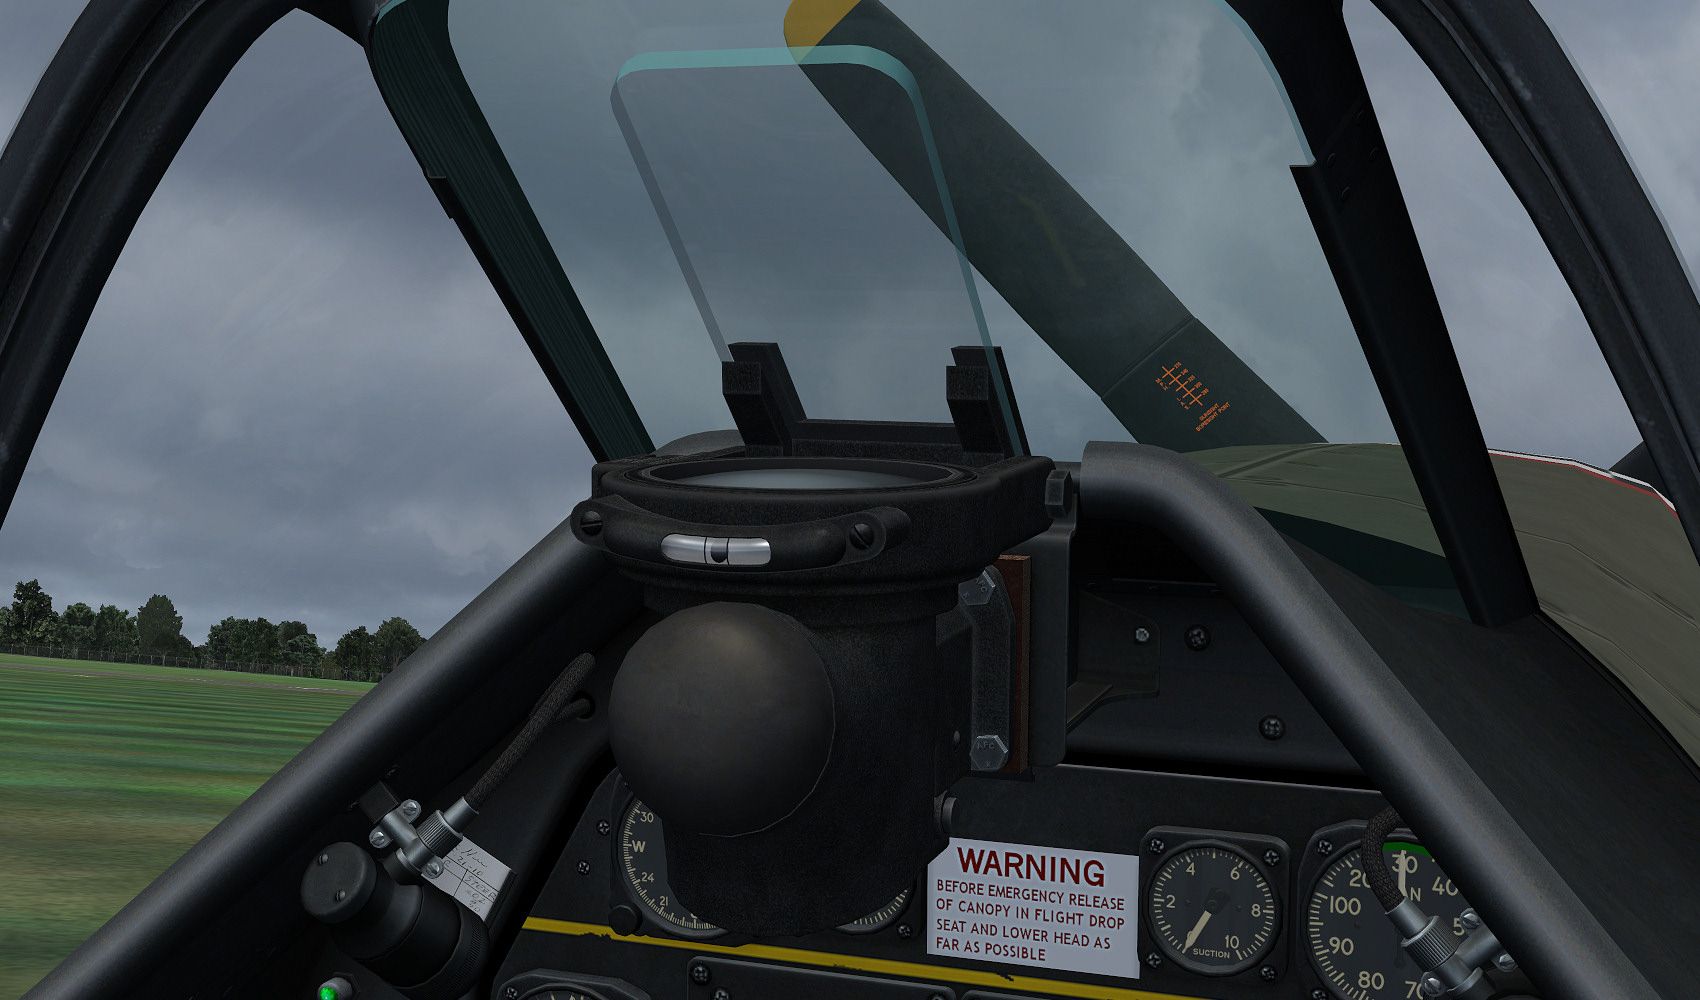
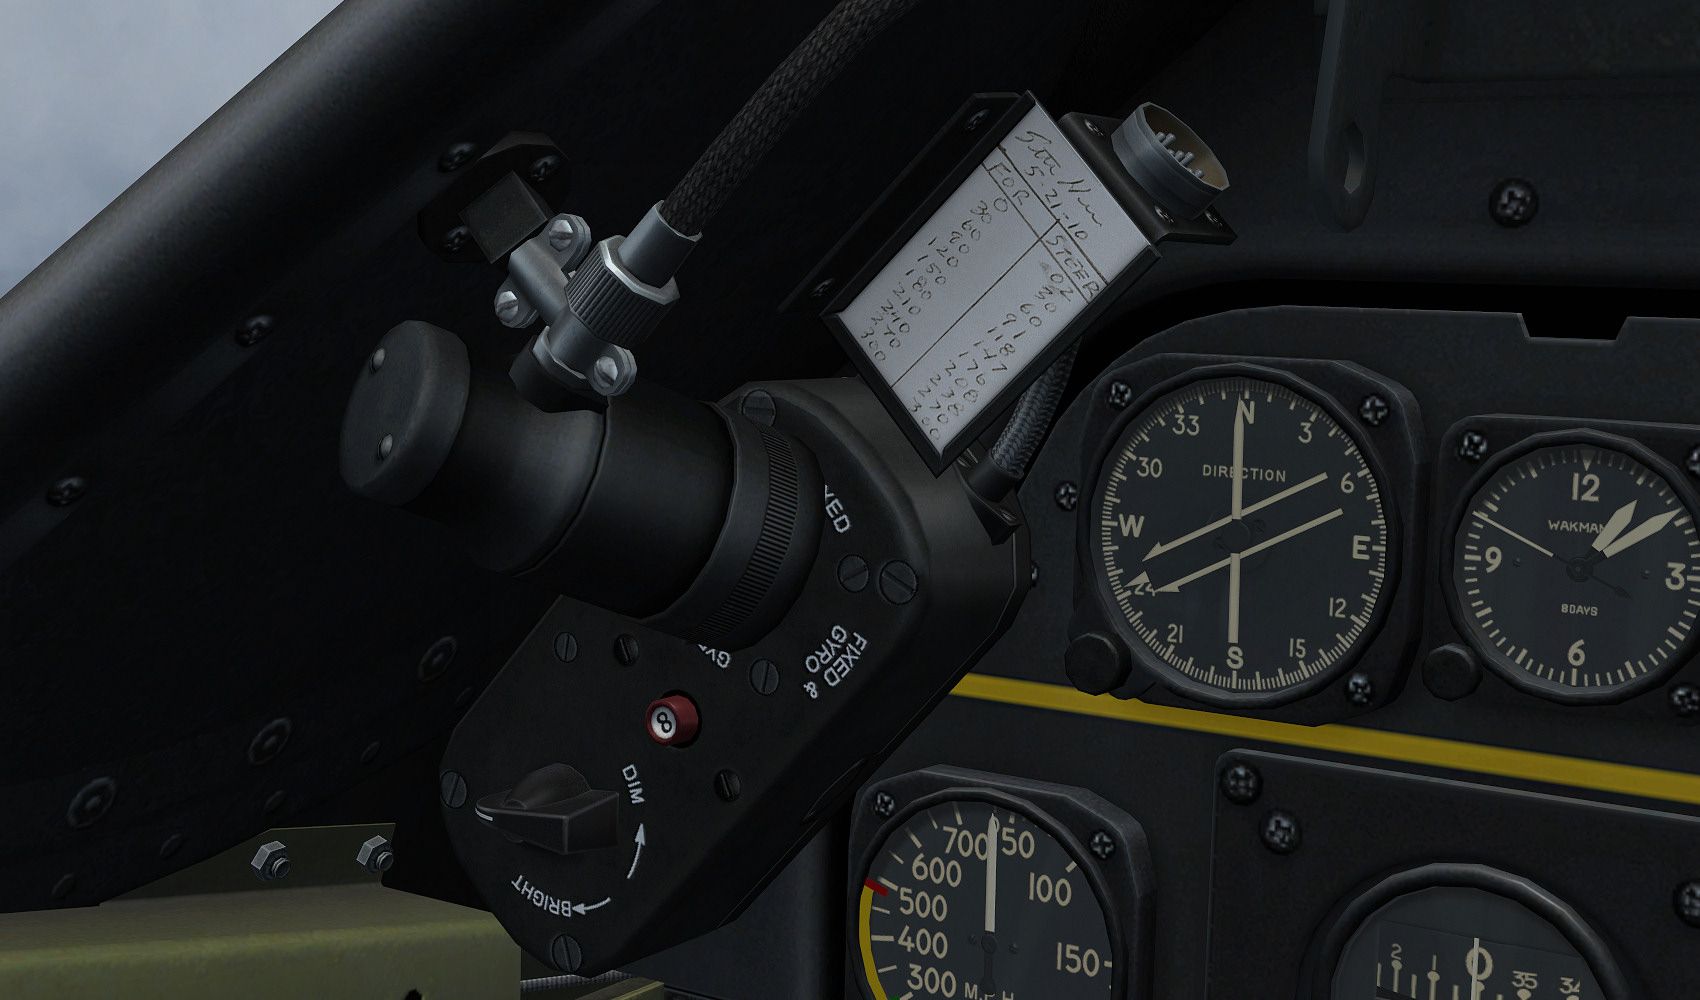
    By the very end of the P-51D-5-NA production run, a large number of changes were made and introduced into the next production run, the P-51D-10-NA. Amongst many other items, the instrument panel was redesigned, into what most know the P-51D instrument panel to be.<o></o>
    <o></o>
    Original P-51D-10-NA instrument panel:<o></o>
    <o></o>
    <o></o>
    <o></o>
    To illustrate more of the changes over time, here are a series of 5 screenshots looking straight ahead at the instrument panels of 5 different production models of the P-51D. <o></o>
    <o></o>
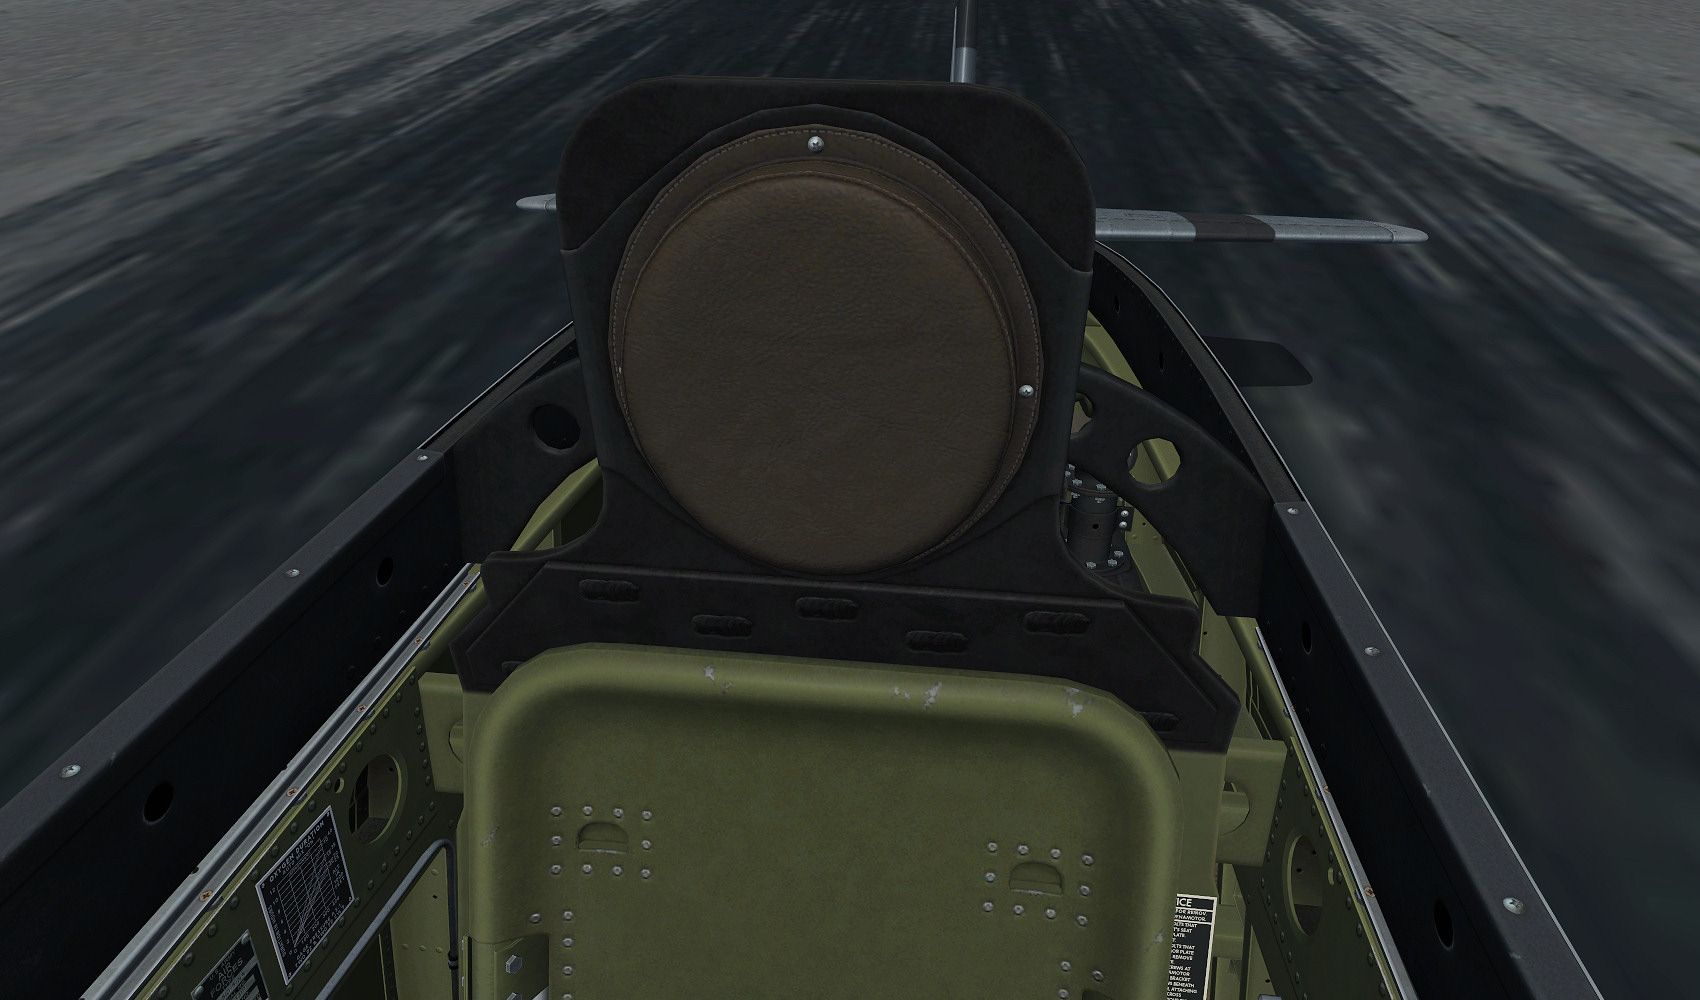
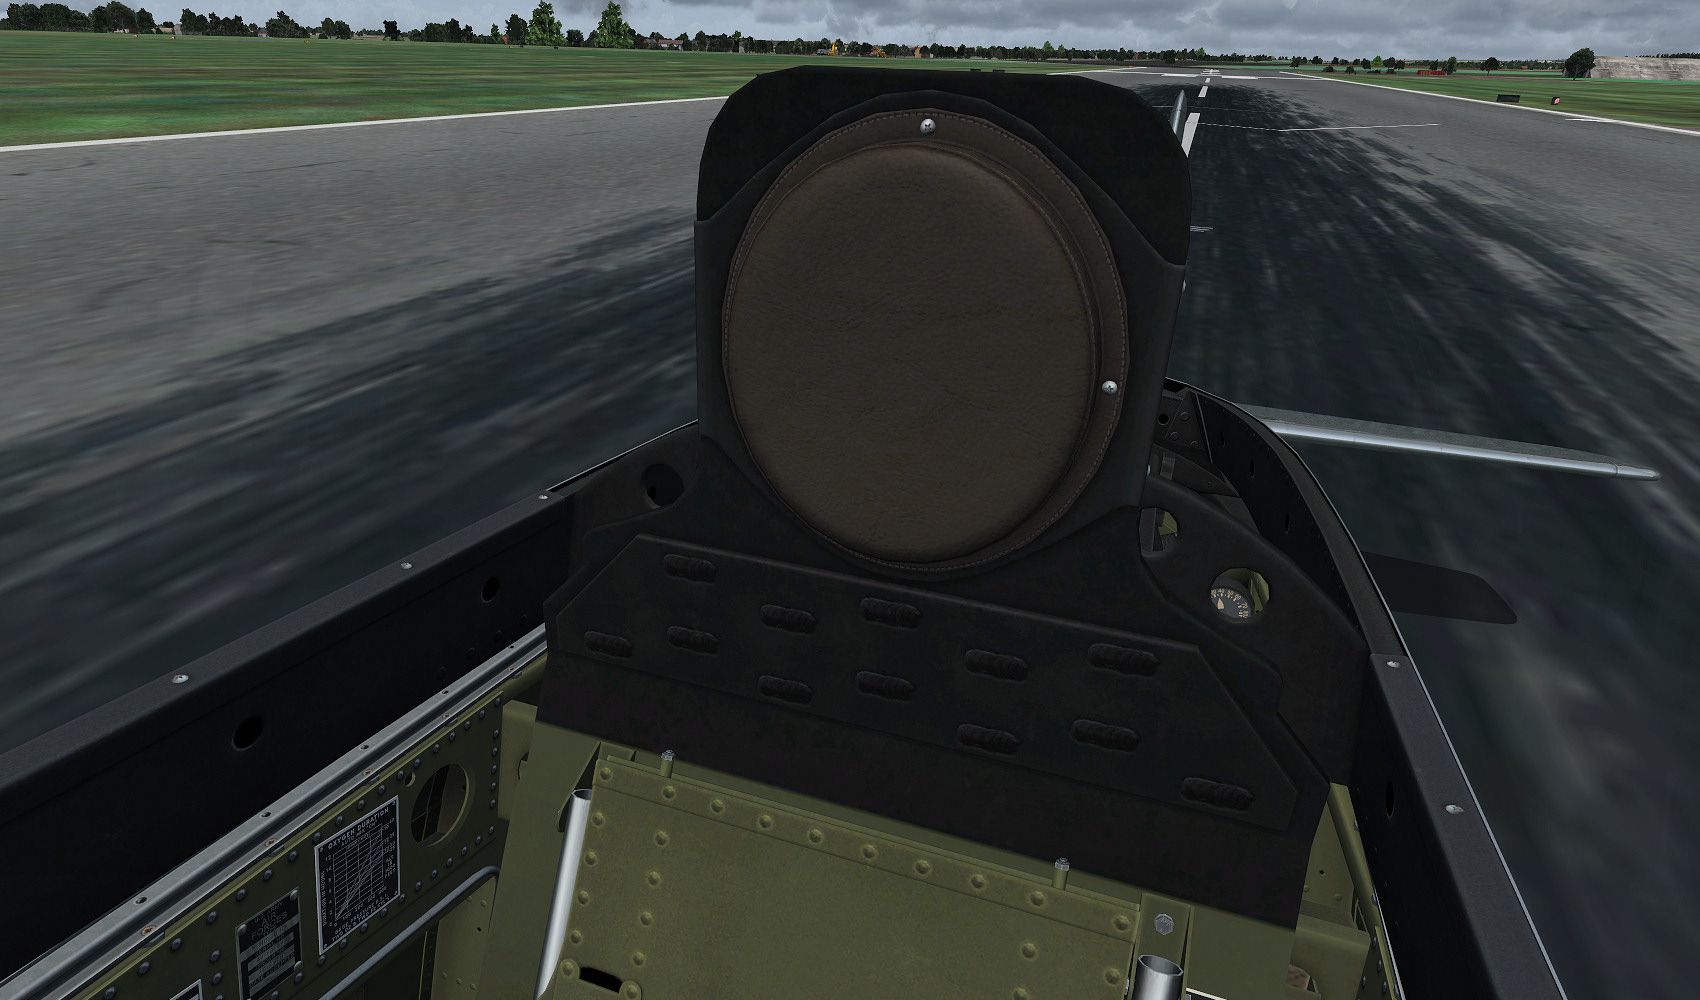
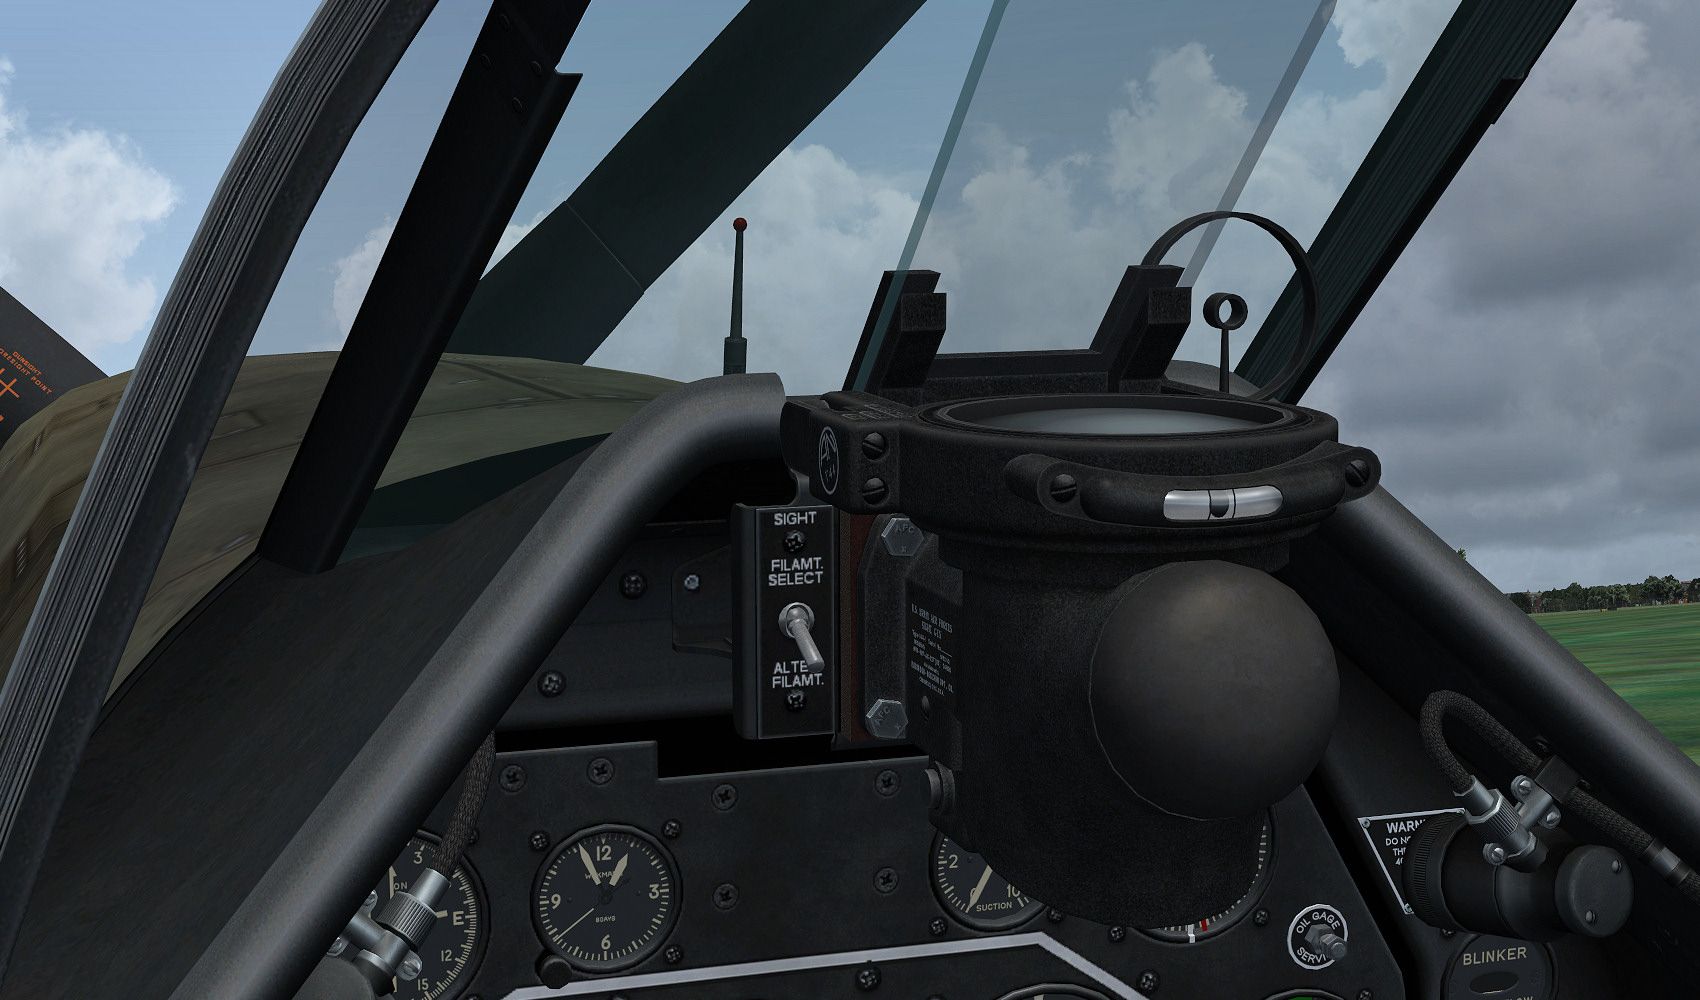
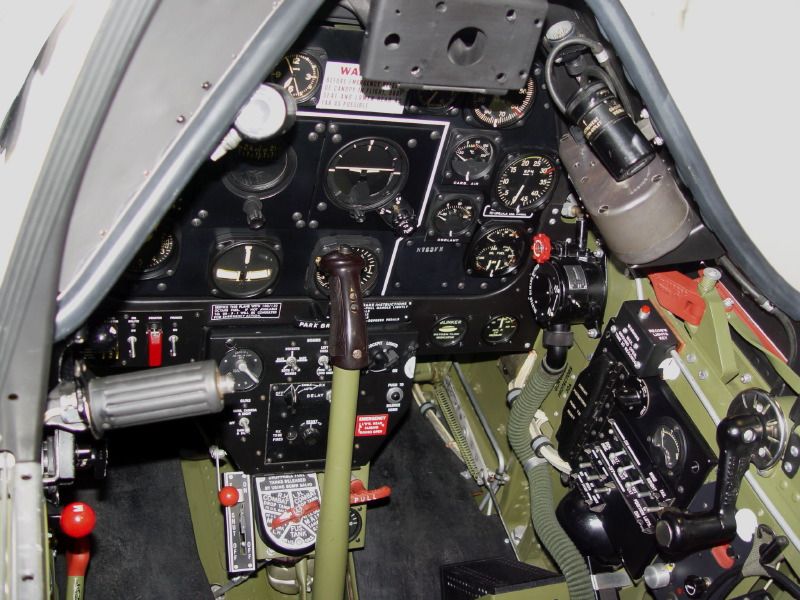
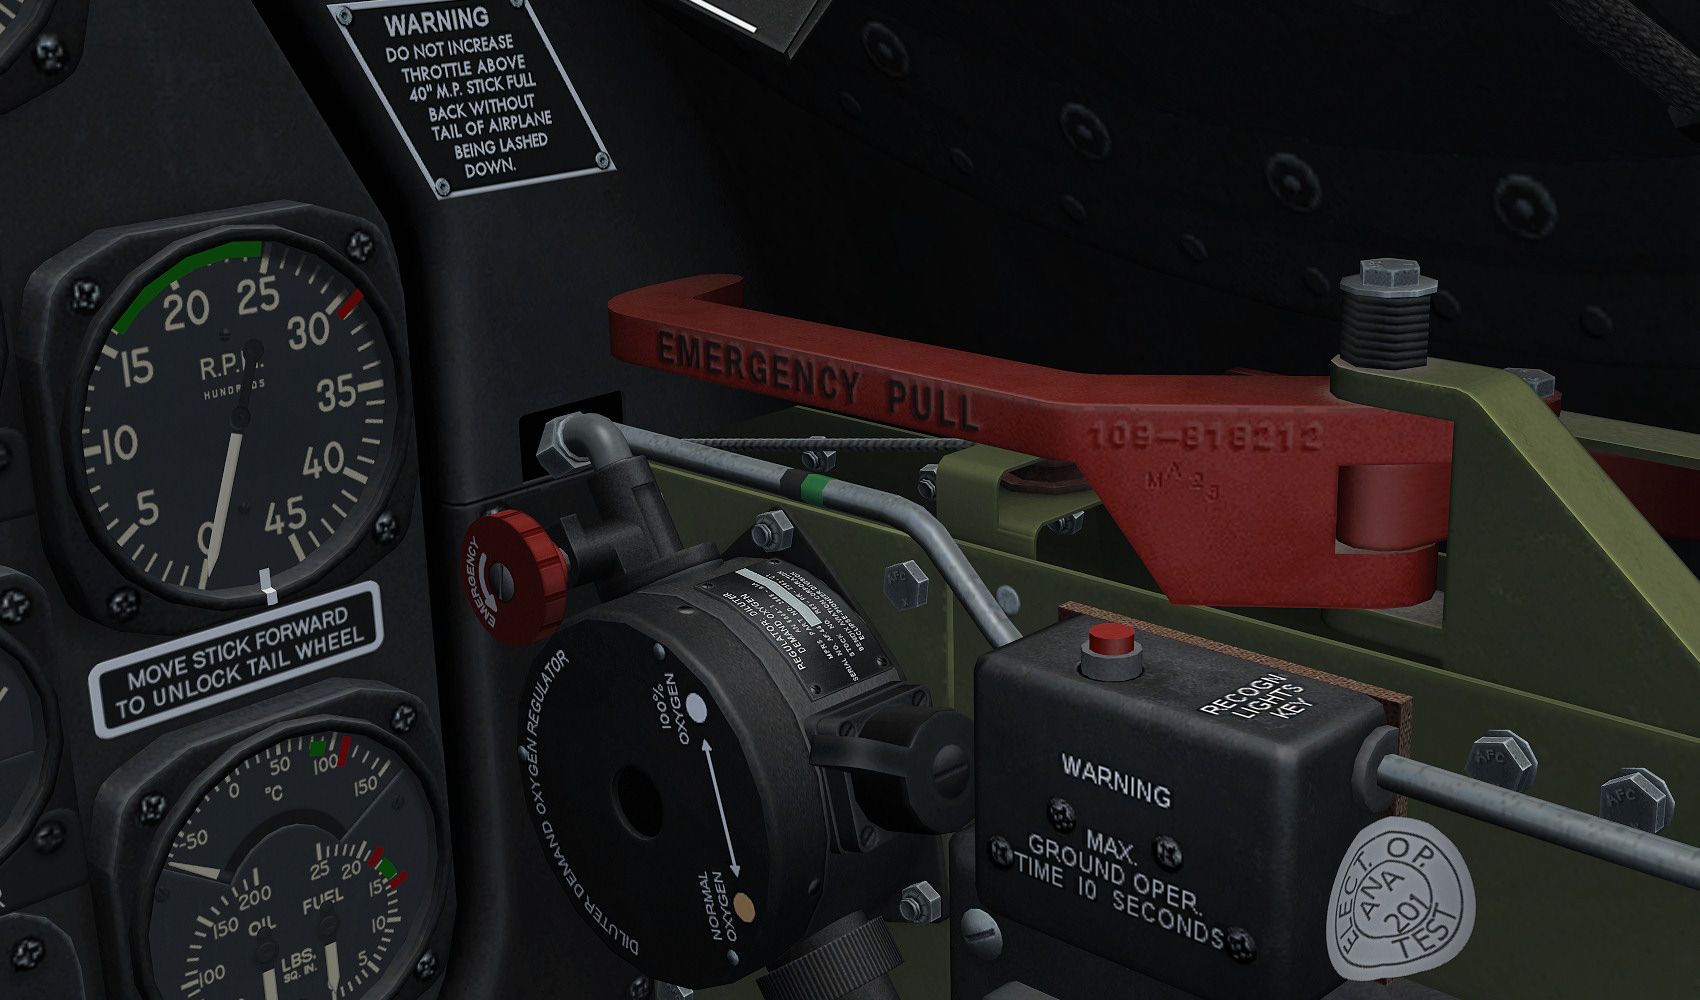
    P-51D-5-NA (featured in "Little Friends II") This, the earliest form of the P-51D, shows the early instrument panel layout, the early position of the oxygen flow gauge, the early engine controls, early switch panels, early landing gear indicator lights and compass card position, the manual primer pump handle, and N-9 gun sight.<o></o>
    <o></o>
    <o></o>
    <o></o>
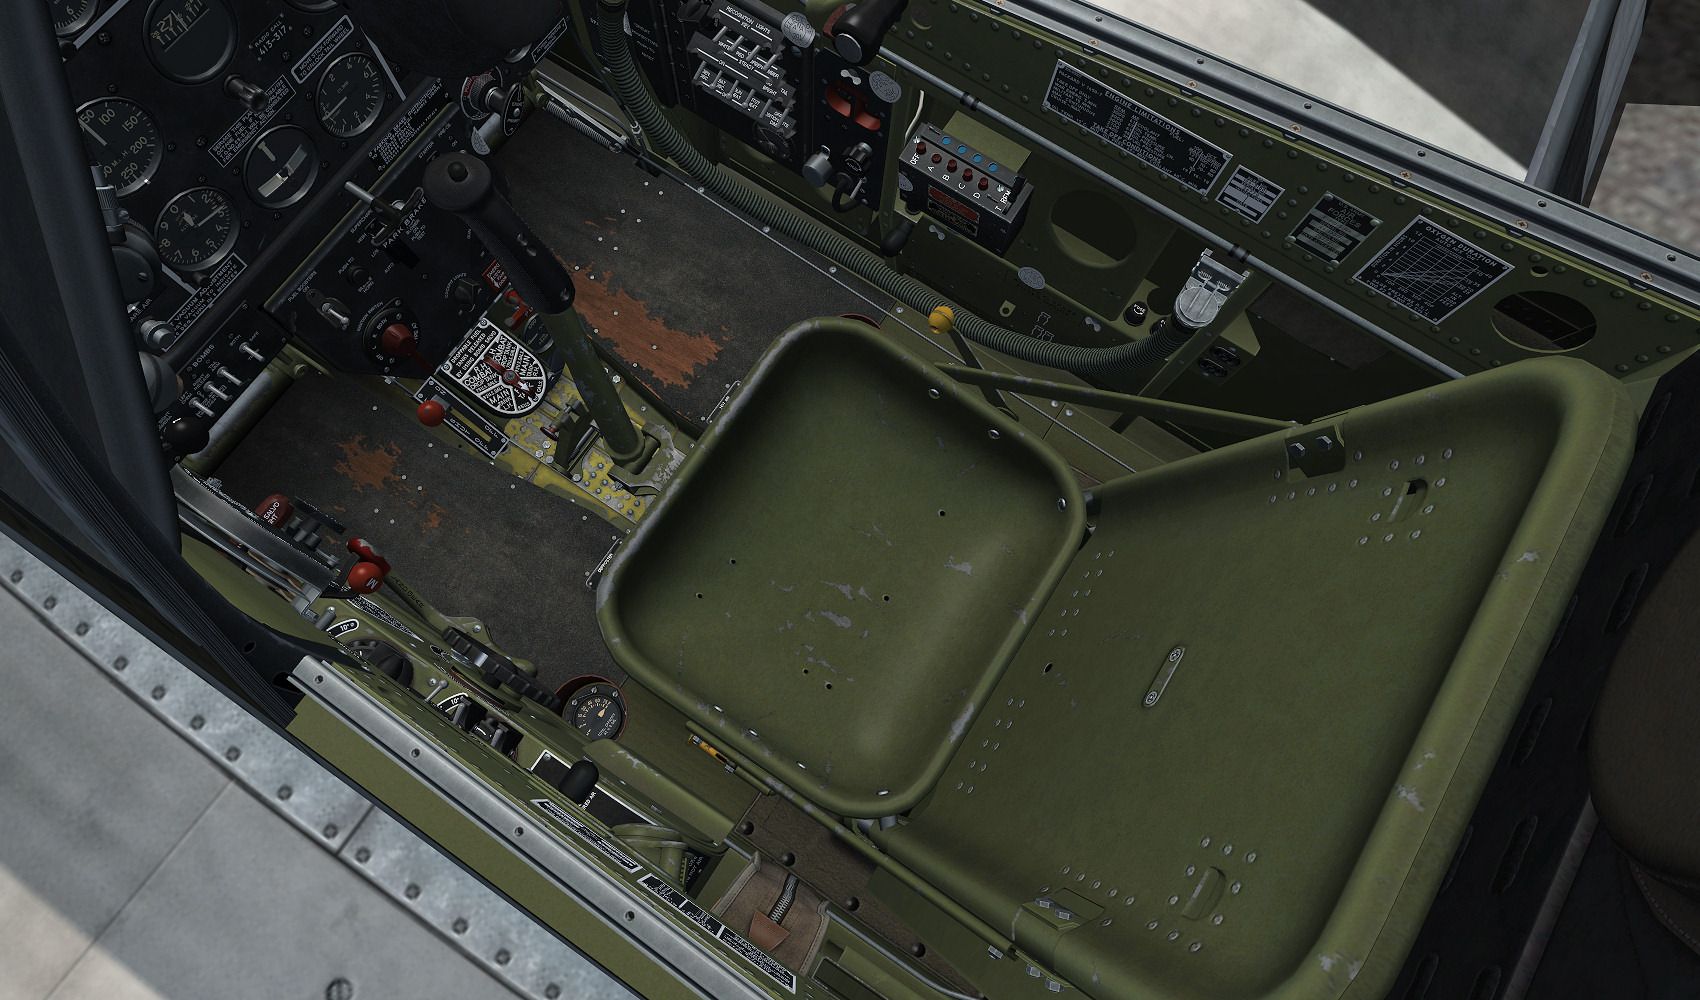
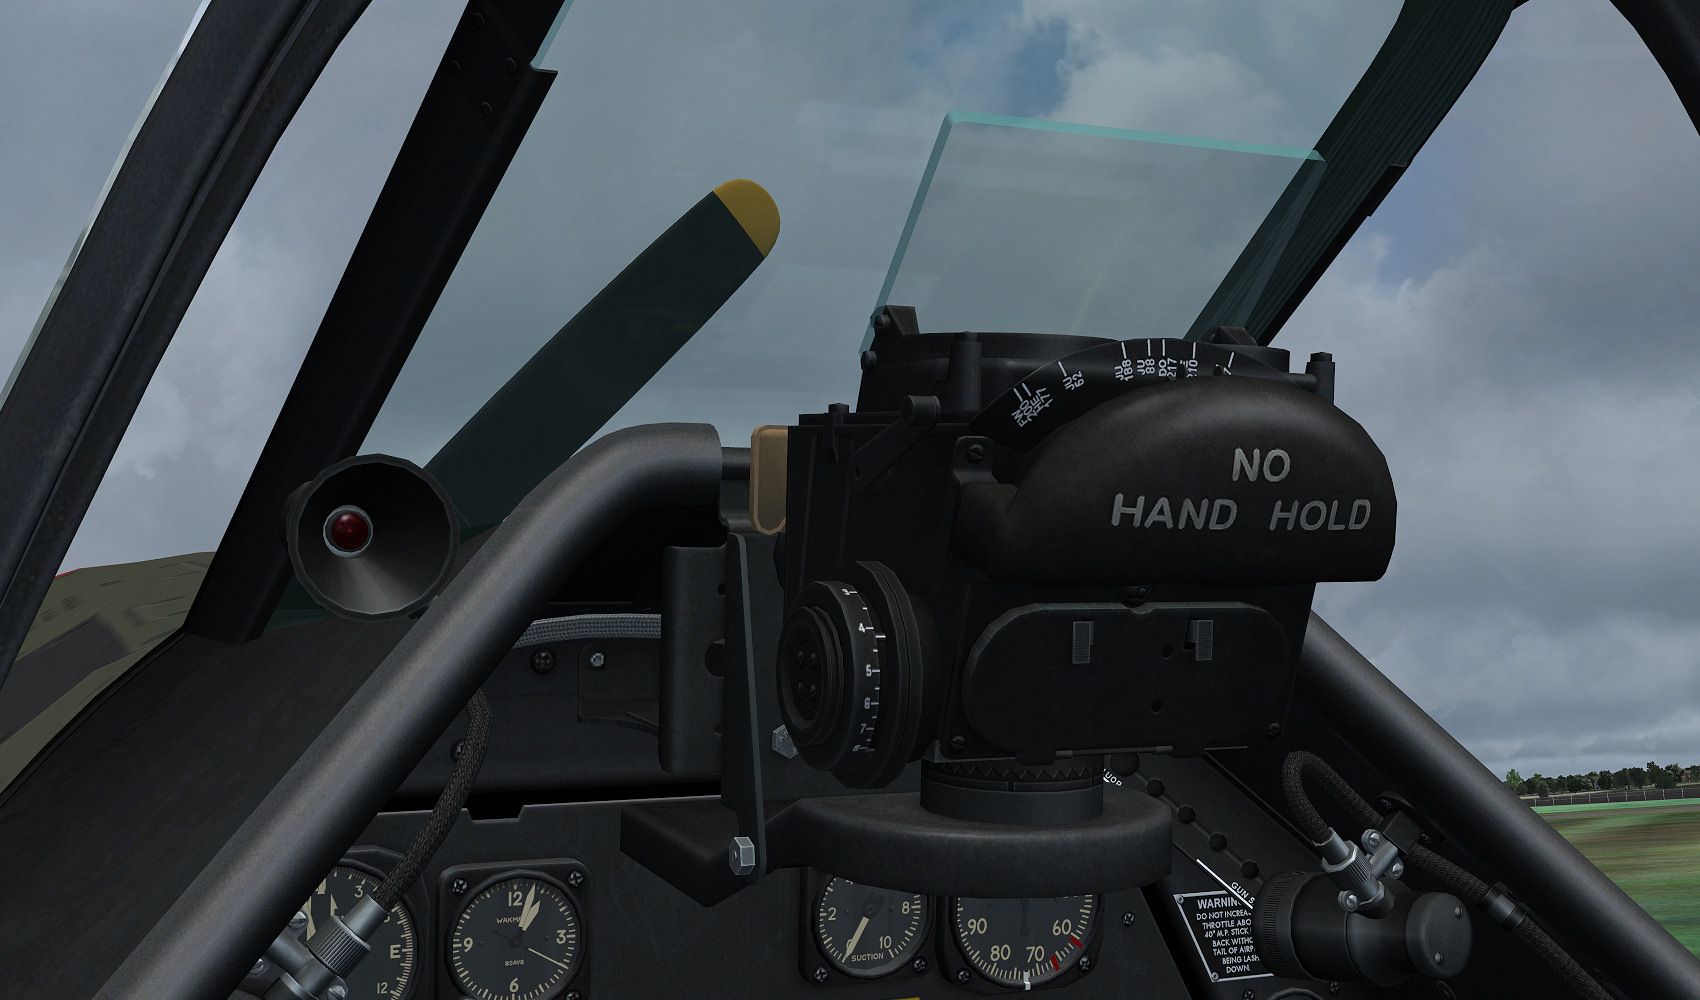
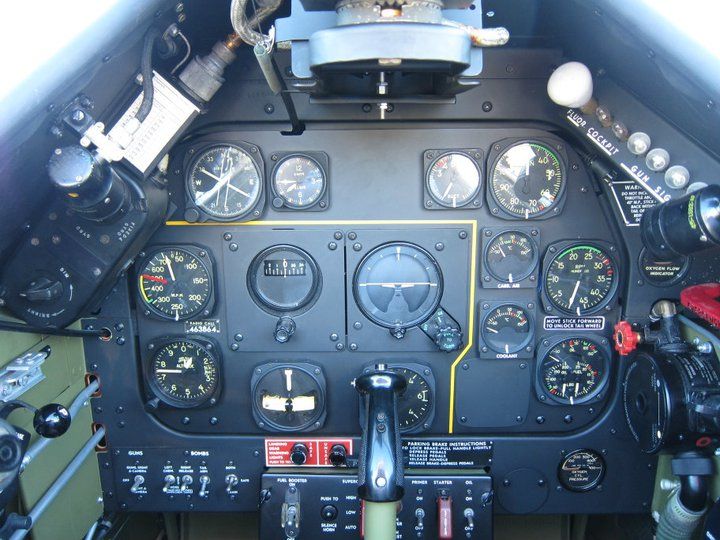
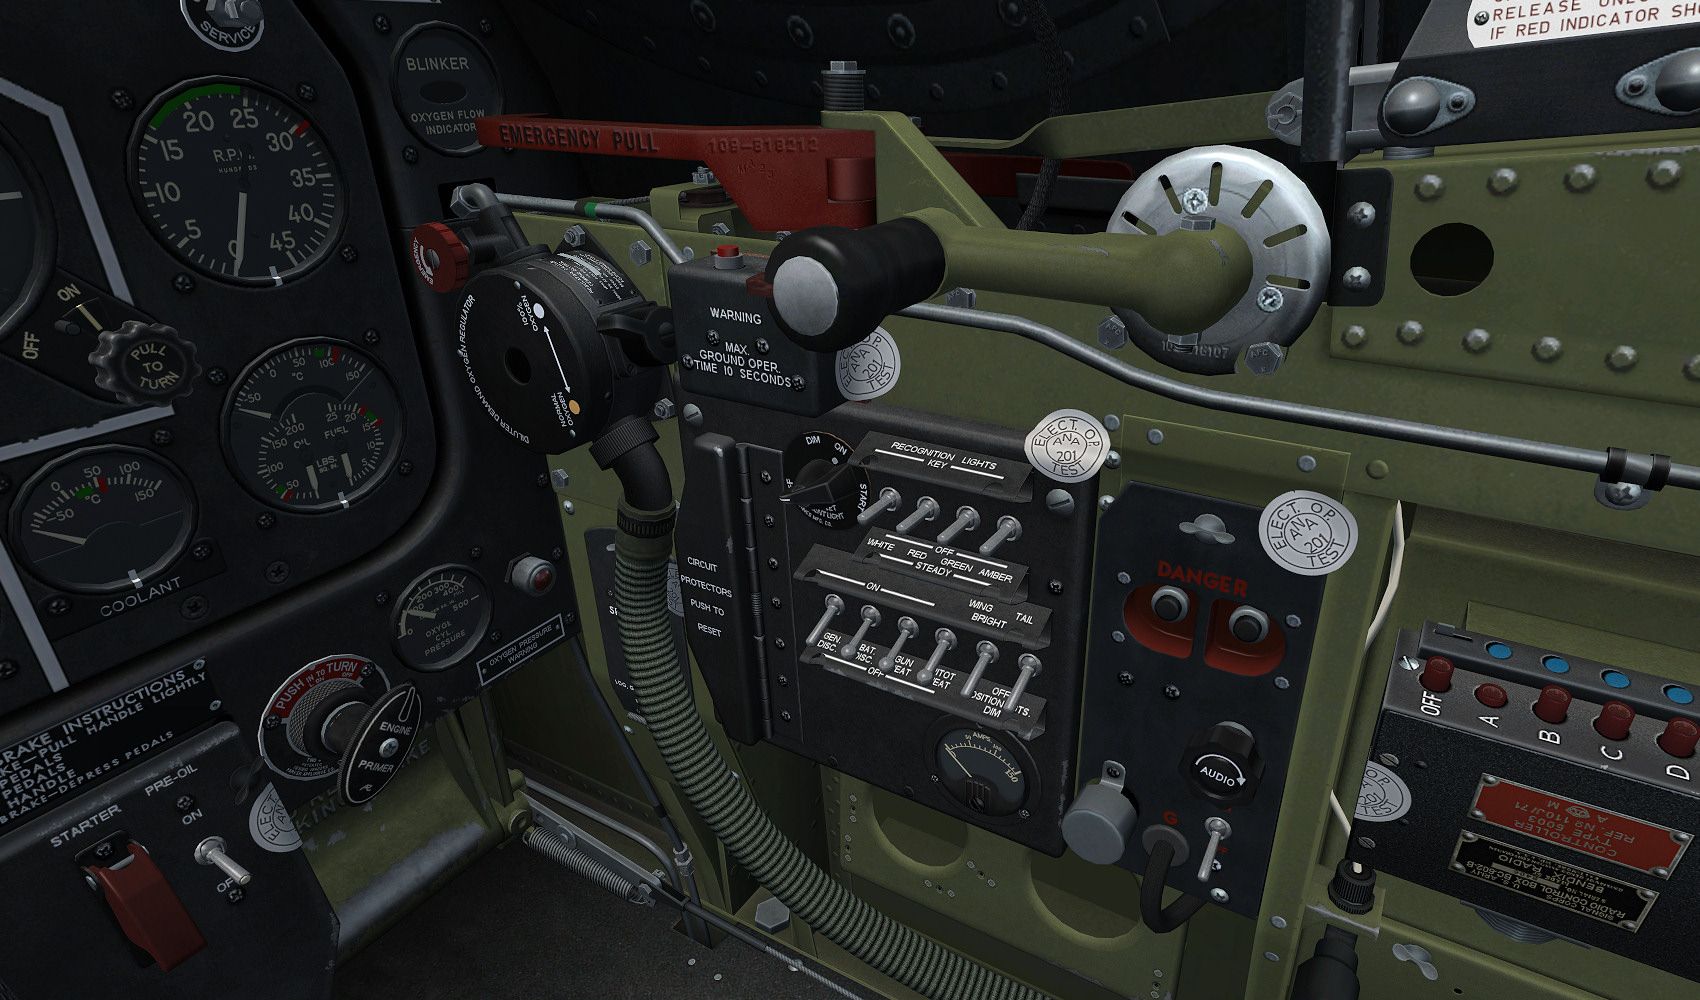
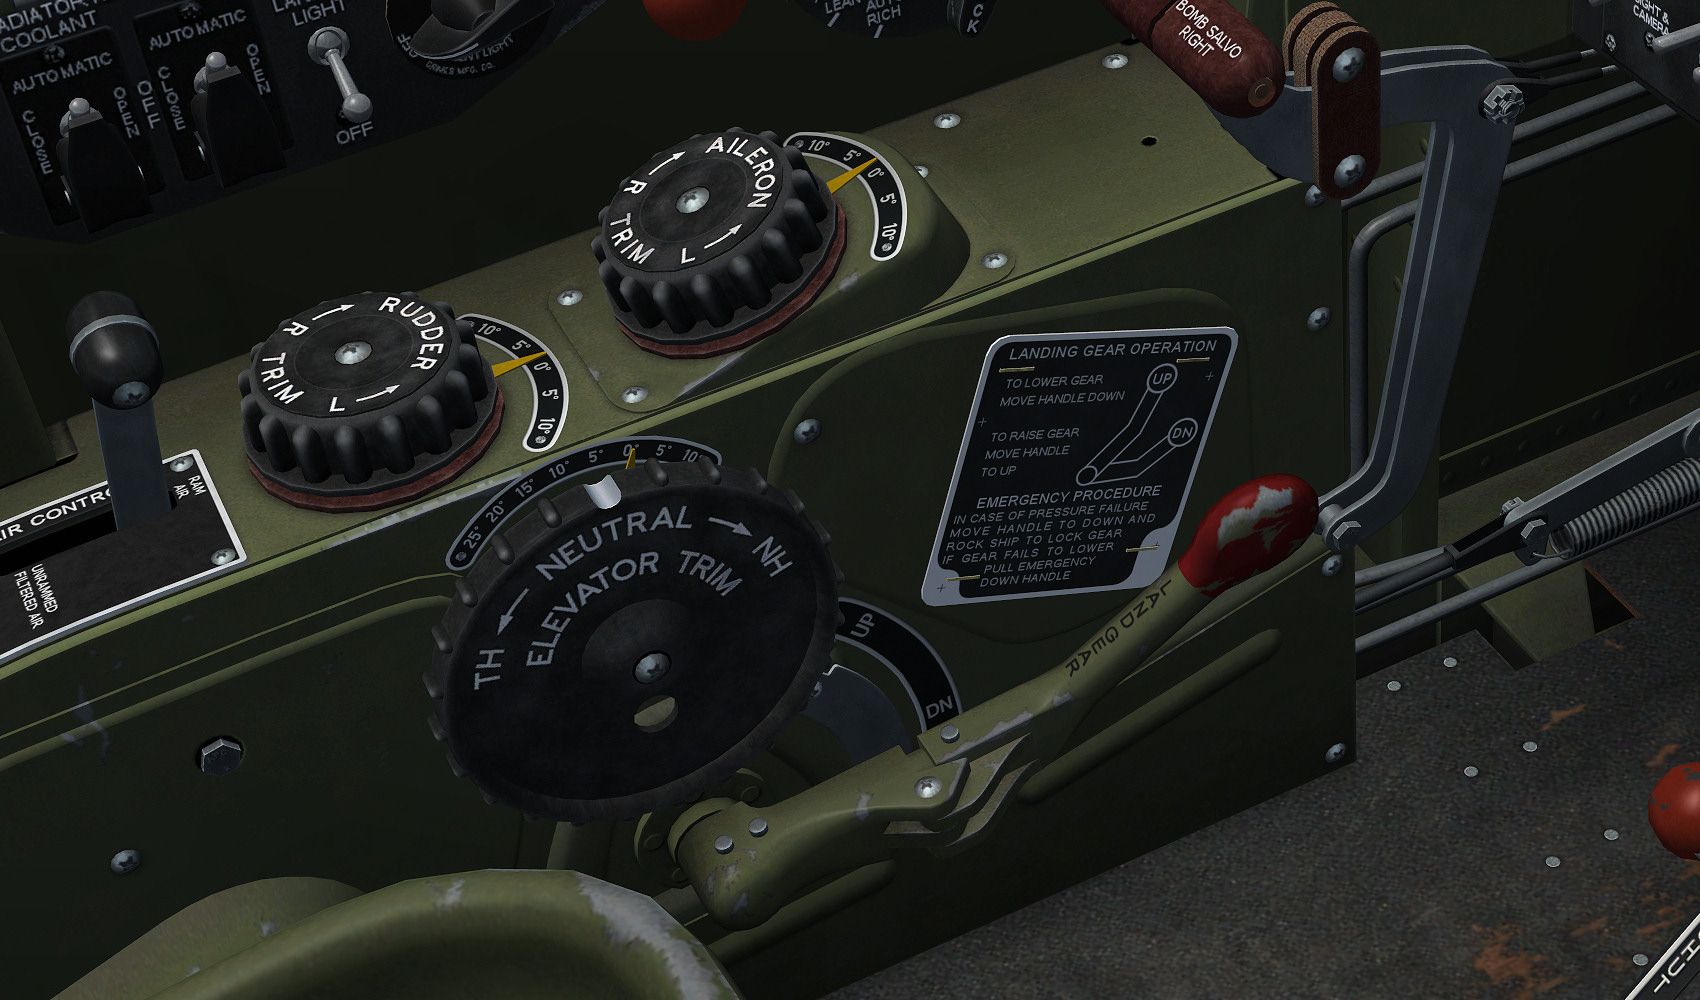
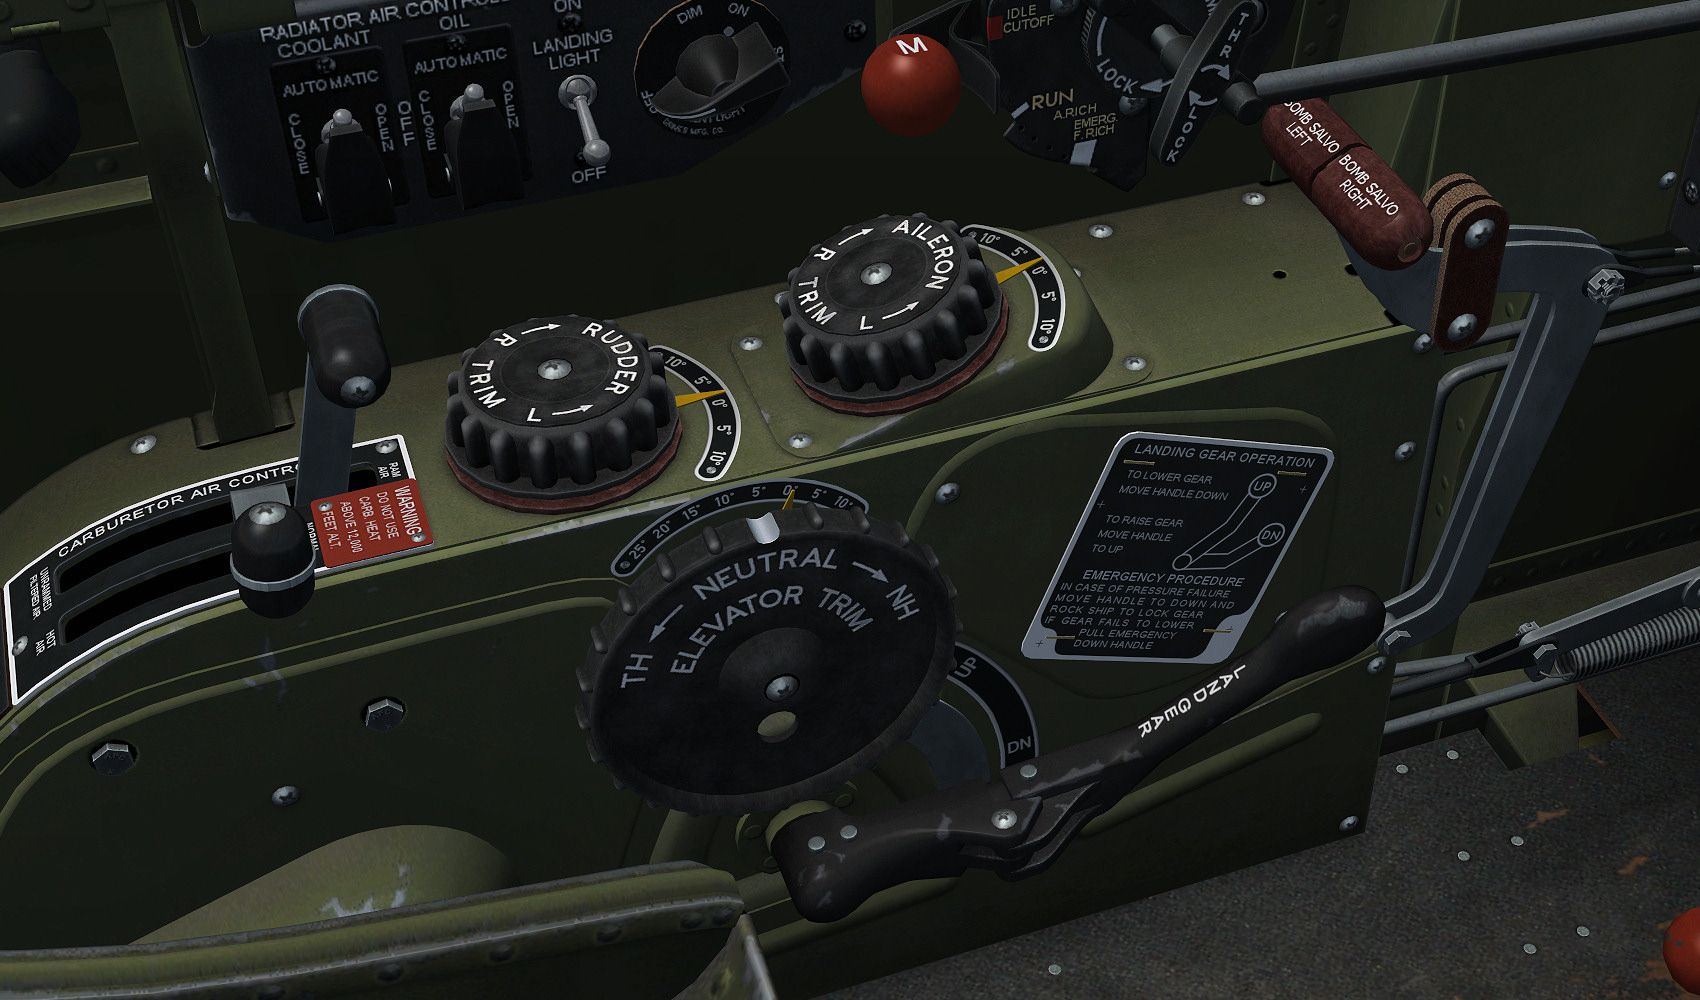
    Early model P-51D-20-NA (featured in "Twilight Tear, Then and Now") Jumping past a few production models, this example is correct to how an early production model P-51D-20-NA looked stock from the factory. The main instrument panel is of the redesigned layout that started on the D-10-NA, but the surrounding panel has remained the same as it was since the P-51D-5-NA. However, by this stage the manual primer pump had been replaced by an electrical primer, with the switch added onto the center cockpit switch panel. Check Cheap as chips Catalogue and Early Settler Catalogue. Also at this stage, P-51D's were still being manufactured with N-9 gun sights in-place, so although the engine controls have been upgraded (emergency rich setting for mixture), the throttle lever remains the standard ball-grip type.<o></o>
    <o></o>
    <o></o>
    <o></o>
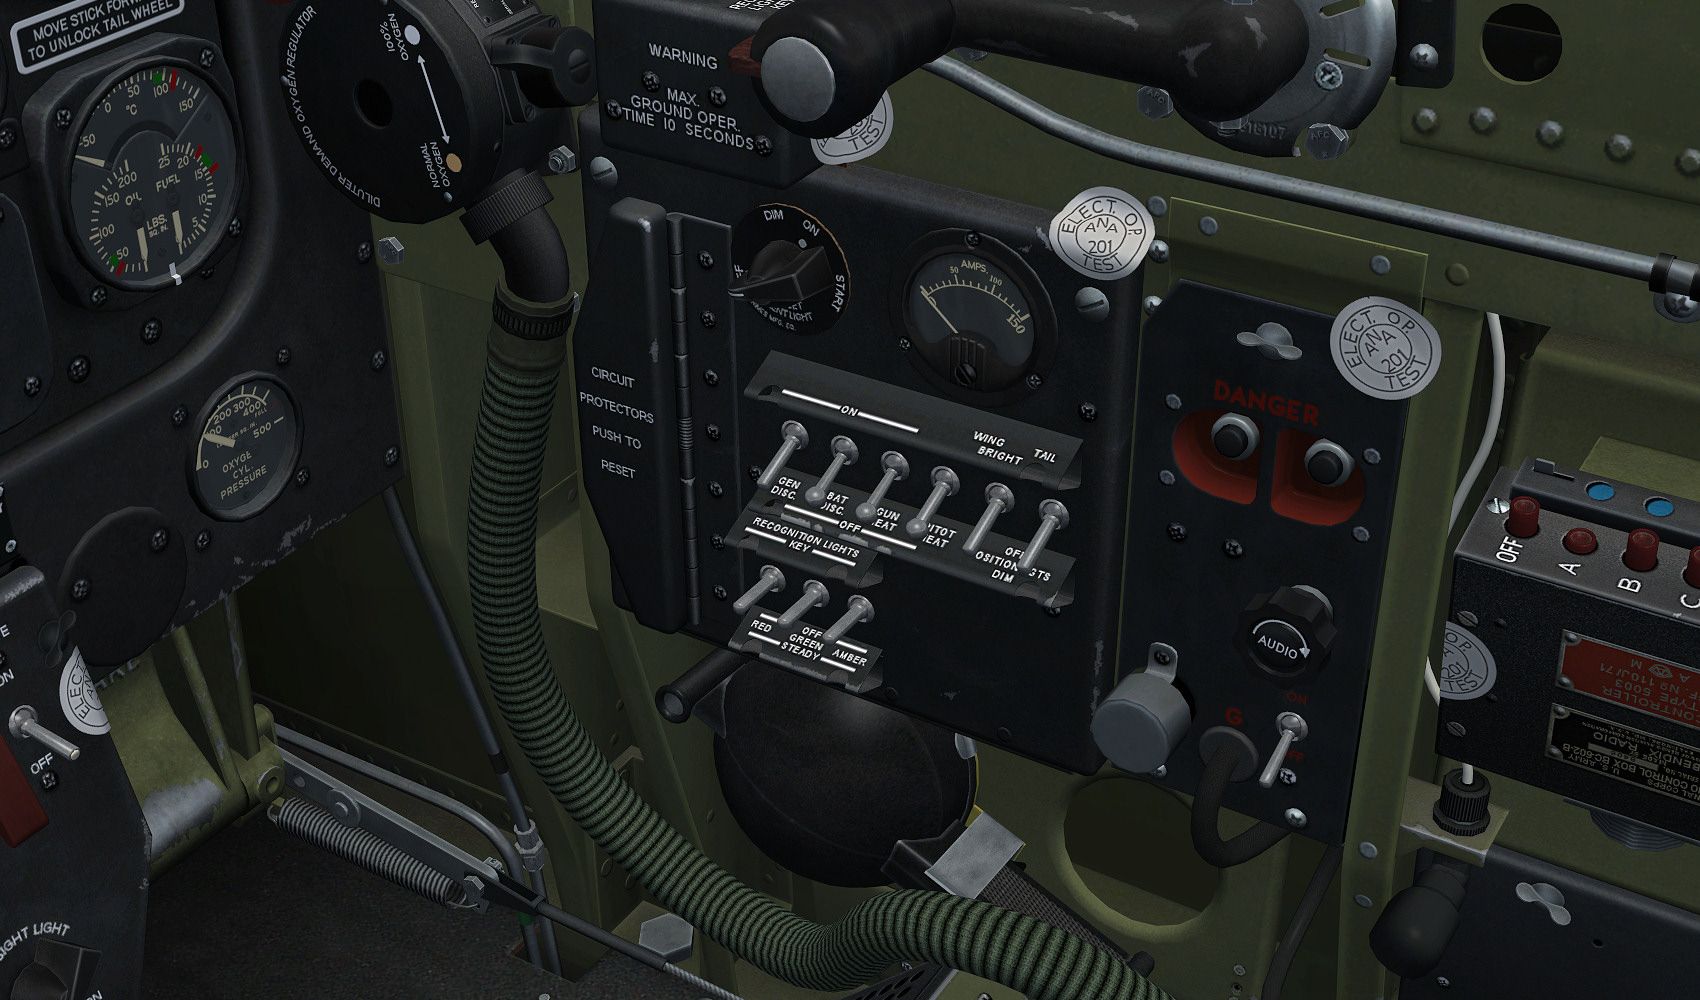
    Late model P-51D-20-NA (featured in "Little Friends I") During P-51D-20-NA production, a number of changes were made, which included the first factory installation of the K-14 gun sight, and the modifications to the wings and cockpit to support the zero rail rocket launchers and controls. From the early D-20-NA cockpit above, to the late D-20-NA cockpit seen here, note that the center switch panel and the switch panel over the left rudder pedal (on the instrument panel surround) have been completely redesigned, in order to mount the rocket control panel in the cockpit. Also, with the early factory installation of the K-14, the throttle lever has been changed out for an early-variant twist handle type, and the K-14 control box has been mounted under the right-side of the instrument panel shroud (this being the first/early position, with the least amount of modifications). The instrument panel surround has also been redesigned, with the oxygen flow gauge being re-positioned to near where the manual primer pump was once mounted.<o></o>
    <o></o>
    <o></o>
    <o></o>
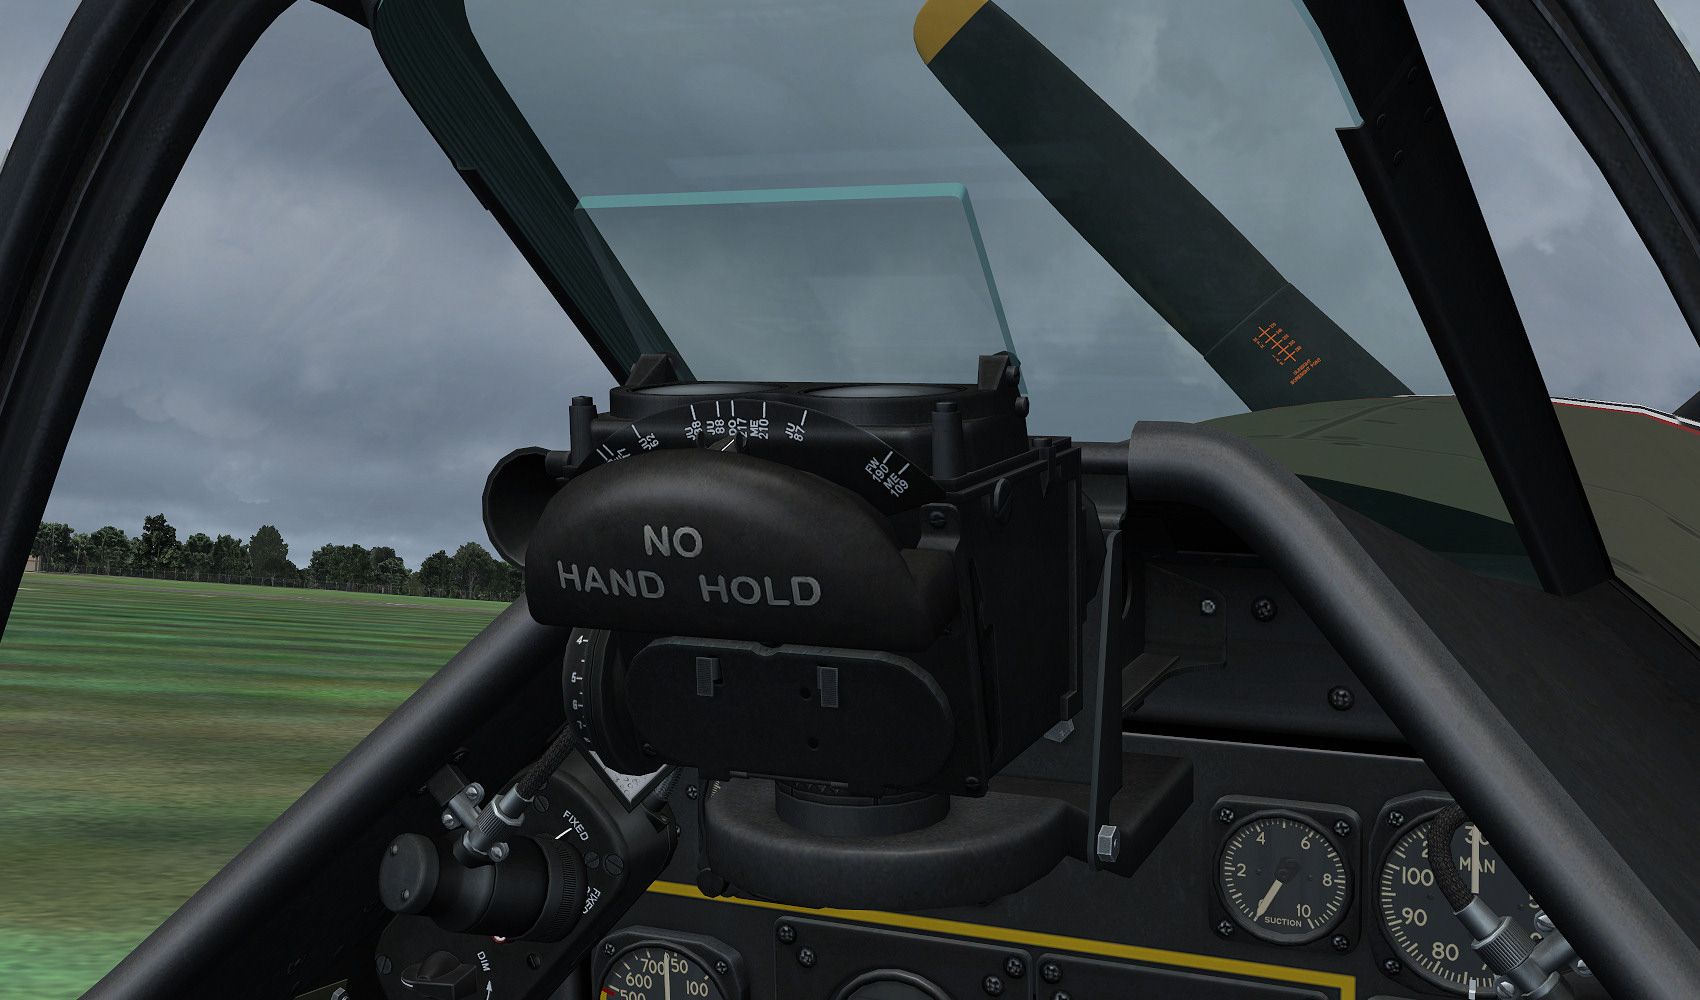
    Early model P-51D-20-NA Field Modified (featured in "Twilight Tear, Then and Now") Within a period of time following the factory introduction of the K-14 on P-51D's, a T.O. was issued which outlined the way to go about installing the K-14 on P-51D's that weren't manufactured with them. The same T.O., which was issued quite late, didn't document the early installation, but rather the later installation which began during P-51D-25-NA production. As seen in the screenshot below, this is an early model P-51D-20-NA, like one of the previous examples shown, but in this case it has had the K-14 installed in the field. Following the T.O., the landing gear indicator lights were moved from the early position to the late position, the compass card was removed, the K-14 control box was mounted to the instrument panel on the left side, the compass card was installed on top of the K-14 control box, a spare bulbs shelf was fitted under the right-side of the instrument panel shroud, and the throttle lever has been switched out for a twist-handle type.<o></o>
    <o></o>
    <o></o>
    <o></o>
    P-51K-15-NT/P-51D-30-NA (featured in "Little Friends I") By the time of the P-51D-30-NA/P-51K-15-NT production (summer of 1945 - too late to see action in WWII), this is how the cockpit looked. Quite similar to the late-model P-51D-20-NA, the aircraft has the late-position gear lights and K-14 installation, as well as the late-type twist handle throttle lever (different than those shown above).<o></o>
    <o></o>

  2. #2
    Seats –
    <o></o>
    In early P-51D production, all throughout the P-51D-5-NA’s, the seat that was fitted was manufactured by the Warren McArthur company, and was a rather early design compared with other seats they would produce. This is the same type of seat that was recovered from the Bill Preddy crash sight, and although the surviving seat has a kink in the front of it (from the control stick upon ground impact), this early seat had a perfectly straight forward edge to it.
    <o></o>

    <o></o>

    <o></o>
    Seen here reproduced (without damage) in original form, featured in “Little Friends II”. There are also late-type Warren McArthur seats found in “Restored Part 1” and “Restored Part 2”.
    <o></o>

    <o></o>
    On many later-model P-51D’s, such as P-51D-20-NA’s, D-25-NA’s, and D-30-NA’s, the seat often used was manufactured by the Schick Johnson company.
    <o></o>

    <o></o>
    Seen here, featured in some form, throughout all of the Warbirdsim products except for “Little Friends II”.
    <o></o>

    <o></o>
    Armor Plate –
    <o></o>
    On the early P-51D’s, the armor plate was mounted quite low, and was later re-mounted several inches higher, to provide better coverage of the pilot.
    <o></o>
    Seen here is the low-mounting position (featured in “Little Friends II”):
    <o></o>

    <o></o>
    And here is the mid-late model higher mounted armor plate:
    <o></o>

  3. #3
    Gun Sights –
    <o></o>
    Starting with the P-51D-5-NA, the N-9 reflector gun sight was chosen for the aircraft. A bracket was designed to mount it to the instrument panel shroud assembly, and was also designed to hold the back-up ring sight, with a bead sight positioned in front of the windscreen. The bracket was also designed to mount a switch for flipping between the different filaments in the gun sight.
    <o></o>
    (Featured in “Little Friends II”)
    <o></o>

    <o></o>

    <o></o>
    On P-51D-15-NA production, the back-up ring and bead sight was deleted, so the bracket hold the N-9 sight was slightly redesigned so that it didn’t have the side-bracket portion that was there before for the ring sight.
    <o></o>
    (Featured in “Twilight Tear, Then and Now”)
    <o></o>

    <o></o>
    When on late-model P-51D-20-NA production the K-14 gun sight was introduced, the previous N-9 gun sight bracket remained, but an adapter bracket was designed for the K-14 to sit on, and mount to the old N-9 gun sight bracket.
    <o></o>
    (Seen here from “Twilight Tear, Then and Now” (Note the tail warning radar indicator light))
    <o></o>

    <o></o>

    <o></o>
    When the K-14 was installed, the first, early installations had the K-14 control box mounted on a shelf under the right-side of the instrument panel shroud.
    <o></o>
    Seen here is a variant from “Little Friends I” with the K-14 removed, in order to show the authentic plug-in receptacle that reached out from the control box:
    <o></o>

    <o></o>
    And a later variant, from “Twilight Tear, Then and Now”, with the K-14 control box in the late position, on the left-side of the instrument panel. Again, the K-14 has been removed in order to show the detail of the receptacle.
    <o></o>

    <o></o>
    <o></o>
    Early K-14 control box position:
    <o></o>

    <o></o>
    Late K-14 control box position:
    <o></o>

  4. #4
    Cockpit Plumbing –
    <o></o>
    You’ll see on some of the plumbing in the cockpit, certain bands of color indicating what they are for. Although I only copied these details from photos, you can look in the P-51D/K E&M manual, and it will tell you what each stands for.
    <o></o>

    <o></o>
    Here we have an oxygen line (running up from the oxygen bottles in the back of the aircraft), and the Airspeed/Pitot Pressure line:
    <o></o>

    <o></o>
    And here is a static pressure line:
    <o></o>

    <o></o>
    Cockpit Equipment –
    <o></o>
    The right-side, rather than the left-side, of the cockpit is what changed the most, from one P-51D variant to another.
    <o></o>
    Here is a look at the right-side of the cockpit of a P-51D-5-NA (featured in “Little Friends II”). This is the first design of the main switch panel, with the recognition lights above the main electrical switches. There is also a fourth recognition light switch on the D-5-NA’s, as there was an additional white light on the spine of the aircraft. You can also see the early spare bulbs locker (below the oxygen regulator), the early G-Band/radio detonation panel, and the early spare-equipment panel below the main switch panel (mounting holes were provided on this panel for an early radio set (that was never fitted to production P-51D’s, and for the signal light (removed in this case)).
    <o></o>

    <o></o>
    And here is a look at the same area of an early model P-51D-20-NA (featured in “Twilight Tear, Then and Now”). The spare bulbs locker is gone, and the main switch panel is of the common type, after being redesigned on P-51D-10-NA production. In this case, the signal light is fitted. One these early-to-mid production model variants, the beacon receiver came mounted to the right floor board, and that is what the oxygen hose is resting on.
    <o></o>

    <o></o>
    Seen here on a P-51D-5-NA (Little Friends II”) is the early active and spare fuses panel:
    <o></o>

    <o></o>
    Here, the panel is the same as above, but has been modified in the field with the installation of the tail warning radar bell, and the panel is finished in black rather than interior green (it went either way, in mid-late production). Note too that the older G-Band/radio detonation panel has been removed, and the AN/APS-13 tail warning radar panel is installed. Seen here from “Twilight Tear, Then and Now”.
    <o></o>

    <o></o>
    Still later yet, seen here is a P-51K-15-NT/P-51D-30-NA (“Little Friends I”). The active and spare fuses panel is of the late design, with radio circuit breaker switches and the tail warning radar bell (and set) installed from the factory. This aircraft also has the I.F.F. and AN/ARA-8 radio set panel. On these late models, the beacon receivers were no longer mounted to the right floor board, and were instead re-positioned to the right wall, below the main switch panel.
    <o></o>

    <o></o>
    From one example to another, mostly based on production block, you could have slight differences in the way in which certain parts were finished.
    <o></o>
    In this case, here is a look at the left-side of the cockpit on a P-51D-5-NA from “Little Friends II”. The gear handle is painted interior green with a red end on it (as seen in original photos). At this early stage, the aircraft also didn’t have a carb heat control.
    <o></o>

    <o></o>
    Then, seen here, is a P-51D-20-NA featured in “Twilight Tear, Then and Now”. The gear handle is painted black this time, with both the over-all black and the green & red being authentic. With this later model, the aircraft has a carb heat control.
    <o></o>

  5. #5
    And behind the cockpit, not much changed throughout the majority of the variants of the P-51D manufactured, especially during WWII. Here you can see the top of the fuselage fuel tank, the radio rack (fully reproduced), the SCR-522 radio set box, the battery positioned behind it, the fuel-in line from the fuselage fuel tank filler cap, and the accurately positioned authentic fuselage fuel tank gauge. (This isn’t an area that is meant to be too over detailed).
    <o></o>

    <o></o>
    And my passion for these aircraft can extend to the smallest details. If you look at the middle placard with the inspection stamps, you’ll see the initials of Albert and I, and authentic touch as the inspectors who put their stamps in those locations had personalized stamps with their initials in them. This is just a little detail that I switched up/added on the “Then and Now” products, where as those before just had generic NAA inspection stamps.
    <o></o>

    <o></o>
    The inspiration came from Midwest Aero Restorations, as when they are restoring Mustangs and Texans, they reproduce that original process with their own initials, in this case Mike Vadeboncoeur and David Young.
    <o></o>

    <o></o>
    And here are just some more photos I thought I would share, that you can spot details in that have shown up within these Warbirdsim projects (and if you haven’t seen them, perhaps now you’ll want to go looking for them).
    <o></o>

    <o></o>

    <o></o>

    <o></o>

    <o></o>

    <o></o>

    <o></o>

  6. #6

  7. #7
    John, your attention to detail and knowledge of these historical informations is nothing short of amazing.

    Cheers :ernae::ernae:

    Mark

  8. #8
    Thank you Mark, though I'm starting to wish I didn't post this thread as I am sure everyone has heard enough about Mustangs. The main reason I thought about posting this, is that I continue to receive questions pertaining to the various products and variants, though PM's, e-mails, and forum posts, that I hope could be answered by directing them to a thread like this.<o></o>
    <o></o>
    Looking for some of the photos I posted above, I remembered how many of these types of photos I have on one of my hard drives, all for the purpose of recreating specific parts and hard to see areas along the way (probably not much use to most):<o></o>
    <o></o>

    <o></o>

    <o></o>

    <o></o>

    <o></o>

    <o></o>

    <o></o>

    <o></o>

    <o></o>

    <o></o>

  9. #9
    All kinds of floor boards in original finish:
    <o></o>

    <o></o>

    <o></o>

    <o></o>
    Hard to see areas and parts that had to be reproduced correctly:
    <o></o>

    <o></o>

    <o></o>

    <o></o>

    <o></o>

    <o></o>

    <o></o>

  10. #10
    Also too, as I mentioned earlier, hopefully by seeing photos and reading descriptions like these, it helps one to be able to see and acknowledge more within the reproduced aircraft in the sim.

  11. #11
    John,

    I am impressed!!!!!

    The one question I have is, how have you managed to cram so much aircraft knowledge into 24 short years?

    Tom

  12. #12
    This is a good thread. Very informative. It seems the questions regarding differences with each of the models seem to pop up semi-regular. It will be helpful to forward those questions to a thread like this for reference. In fact, some real-world historians, and even people that are involved with the restoration of a P-51, could benefit greatly from this type of information! Thanks John!

    Joseph
    VFR Simulations
    www.vfrsim.com


  13. #13
    Thank you Tom, and regarding the information posted, I started the first project in January/February of 2009, with the first P-51D finished (before the entire first project was finished) in early September of 2010, so all of the information I post about the P-51D and variants was gleaned from between those years and now.

    Joseph, going off of what you say, perhaps the greatest compliment I have heard was from one of the individuals involved in leading the restoration of the P-51H "Louisiana Heatwave". After seeing the completed cockpit I had for "Happy Jack's Go Buggy" (the first completed example I made), he mentioned that all restoration companies should use it as a reference to go by, as to how to authentically restore and detail a P-51D. This particular individual is all about striving for the highest level of authenticity, down to getting the type faces/fonts correct on each and every stencil and placard (that was my inspiration to do the same). Also, a lot of the early work was done under the viewing of guys like Mike Vadeboncoeur (Midwest Aero Restorations) and Glenn Wegman (Fighter Enterprises), who both specialize in not only just the restoration, but the authentic restoration of P-51's.

    Currently in the Midwest Aero shop is a project that is nearing completion, painted as "Passion Wagon" of the 357th FG. It should be debuting at Oshkosh this summer. At Glenn's shop in Florida, called Fighter Enterprises, he has been hard at work for a number of years on the restoration of 44-72059, to stock condition, which is a combat vet from WWII, having served with the 364th FG. Glenn took many of the photos above, including all of them with a ruler in them. : )

  14. #14
    I don't know enough English words to fully express how much I'm impressed by your work and passion!

  15. #15
    And in other P-51 news, it sounds like Chris Baranaskas has sold "Glamourous Gal", after the aircraft was involved in a landing accident last October, and hasn't been flown or worked on since.

    The Collings Foundation's A-36 has been having engine runs lately, with an expected first flight in the very near future.

    At Tri-State Aviation, the late Gerry Beck's P-51A is also getting closer and closer to the completion of its restoration/rebuild. The goal, last I heard, is to have it at Reno, this year. Tri-State also has at least three different P-51D projects in various states of completion.

    At Pacific Fighters, the restoration of P-51B "Berlin Express" is very advanced, with last news/photos posted this past December, showing the fuselage and wings very complete (it would be interesting if this made a surprise debut at Oshkosh this summer).

    The restoration of the combat vet P-51D "Sierra Sue II" at Aircorps Aviation in Minnesota is as active as ever (having started last year, with the intention of having it completed next summer). A couple of photos I was sent of it, show the level of authenticity down to recreating the original Alcoa aluminum watermarks on the metal skins, and other parts returned to complete original mil-spec. Once again, the intention is to make this aircraft the most authentic P-51D flying when completed (though it is getting to the point that it is hard to find areas to surpass).

    Kermit Weeks' P-51A has been under restoration at Cal Pacific Airmotive (the same place which restored his P-51C and P-51D). The aircraft, in order to make it unique, is being restored as a P-51 (the type before the P-51A, before there was a designator), which had four cannons in the wings, but no dive brakes (and other unique, early items).

    The Texas based War Eagles Air Museum sold their P-51D-30-NA (very authentic restoration, but not flown). Hopefully we'll see this aircraft flying in the near future.

    If it hasn't already, Jack Croul's second P-51D, 44-74202, should be flying this summer. The aircraft has taken several more years to complete than original thought, but it is absolutely perfect (becoming regarded as the most perfect P-51D in existence - far better than they ever were from the factory - and is simply a work of art to behold).

    The P-51A "Polar Bear" was recently sold, and is moving from California to Kansas.

    Brent Hisey, owner of P-51D "Miss America", has recently talked about his P-51C 42-103740 restoration. Being done assembly by assembly, hopefully it will be completed within the next year or two. It has been in his interests for quite some time to finish it as 1st Lt. John F. Thornell's (same initials as me) "Patty Ann II", of the 352nd FG (complete with the faux gun ports painted on the wings), though listening to him talk about the project a few weeks ago, it sounds like that hasn't yet been confirmed in stone.

  16. #16
    Master of Disaster
    Join Date
    Jul 2005
    Location
    Worthless Blue Contributor!
    Age
    59
    Posts
    2,354
    John put your knowledge into a book and sell it!! I will buy the first copy!! AWESOME & Thank You!
    If government was the answer, it was a stupid question!

  17. #17

  18. #18
    John, thank you for passing this on to the community. This is invaluable information, and shows the extent to which you have dedicated your work to be as accurate as possible. Not only that, but your passion is why these mustangs in my mind are true collectors items. They are painstakingly rebuilt to exacting standards. Looking forward to the next ones!

  19. #19
    Thank you very much for this insight.

    This really highlight the detail that Warbirdsim has put into their product lines. I'ld wish to have a accu-simmed Warbirdsim P51D. That would be the mother of all P51D for FSX

    Cheers
    Martin

  20. #20
    Thanks for the time and effort to do that.:salute:

  21. #21
    As I've been told/asked before, "aren't you done working on Mustangs for a while?" The hard part for me, is that I find interest in sometimes the smallest details, and wanting to recreate those on yet another project. For instance, I was looking at some photos of a particular 352nd FG D-model again the other day, and here is an aircraft that came from the factory with the N-9 gun sight and back-up ring and bead sight. However, the N-9 sight was removed, in the field, and a K-14 was installed - but, the back-up bead sight, positioned out in front of the windscreen, was simply left there, despite it being of no use. To me, that would be a cool little detail to reproduce, by having the K-14 there, and that bead sight still remaining for no apparent reason.

    Another thing I have been wanting to do, for quite some time, is try out something that was passed on to me via one of the Mustang restorers, from Bud Anderson, regarding the installation of the K-14 gun sight. As the bumper guard on the front of the sight should tell you alone, the sight sticks out from the instrument panel by an aweful lot, to the point that when you are seated in the cockpit, it is pretty much right in your face. (The bumper guard is there, because whenever you bend forward your head is destined to strike the gun sight. They always stenciled on the "No Hand Hold" because when you are climbing in and out of a Mustang, you are looking for anything to put your hand on to hold onto, and the bumper guard looks like the perfect thing to wrap your hand around. However, with much pressure on it, the foam guard will break in half, where it is thinnest, as shown in an old period photo I'll try to dig up. It was even worse in P-51B/C's, with the N-3 sight, as it had no bump guard, and many guys, both then and now, have skinned their head on it, when bending forward in the cockpit.) Anyway, according to Bud Anderson, it was common practice, in the field, to remove the K-14 and bracket, and cut into the top center of the instrument panel shroud, by about 3-inches forward, and cut-up and re-fix the gun sight mount, so that the K-14 was now positioned several inches further forward, so that it was no longer so much in the pilot's face. This is something that you'll be able to see (and bennefit from) on one of the very next projects in the "Then and Now" series. More than just not having the K-14 right in your face, it also allows you to view more of the instrument panel without having to duck down underneath the sight. There is a P-51K, preserved in the Netherlands, that served with the 78th FG in WWII, that was modified in the field with the installation of the K-14, and it still has this same in-field cut-out in the instrument panel shroud.

    This photo shows Col. Don Blakeslee in his aircraft - note the detail of the cut-out and re-positioned K-14, as well as the detail of the battery seen behind the armor plate, markings and stencils, and general wear.


    Oh, and here is photo like the one I was mentioning about the 352nd FG P-51D-5-NA, though is not the same one nor the same aircraft, but shows a P-51D-5-NA (note the instrument panel) with a K-14 added in the field (with the K-14 twist grip throttle) but still has the useless (with the K-14) bead sight in-place. I think this one too had the cut-out in the instrument panel shroud done, with the K-14 positioned forward more than the stock installation.


  22. #22
    Oh, and these are extremely important fly overs to check that the gear doors and ammo doors are remaining flush in-flight (or so I'm told).


  23. #23
    And just one more photo for now - it's fun to look at this photo, and then compare it. Note too the plug at the front of the spinner, which is always in-place to cover over a hole that serves as a hand-hold (more like a thumb hold) when removing and fitting the front half of the spinner.


Similar Threads

  1. How did he walk away from this!
    By noddy in forum Ickie's NewsHawks
    Replies: 7
    Last Post: May 7th, 2010, 18:24
  2. I'd rather walk!
    By Nick C in forum Ickie's NewsHawks
    Replies: 12
    Last Post: April 26th, 2010, 15:26
  3. Any one want to go for a walk?
    By safn1949 in forum Ickie's NewsHawks
    Replies: 32
    Last Post: April 8th, 2010, 13:51
  4. My Scenery Progression, So Far
    By jackedwardmorris95 in forum CFS2 General Discussion
    Replies: 9
    Last Post: January 13th, 2010, 00:32

Members who have read this thread: 91

Bookmarks

Posting Permissions

  • You may not post new threads
  • You may not post replies
  • You may not post attachments
  • You may not edit your posts
  •