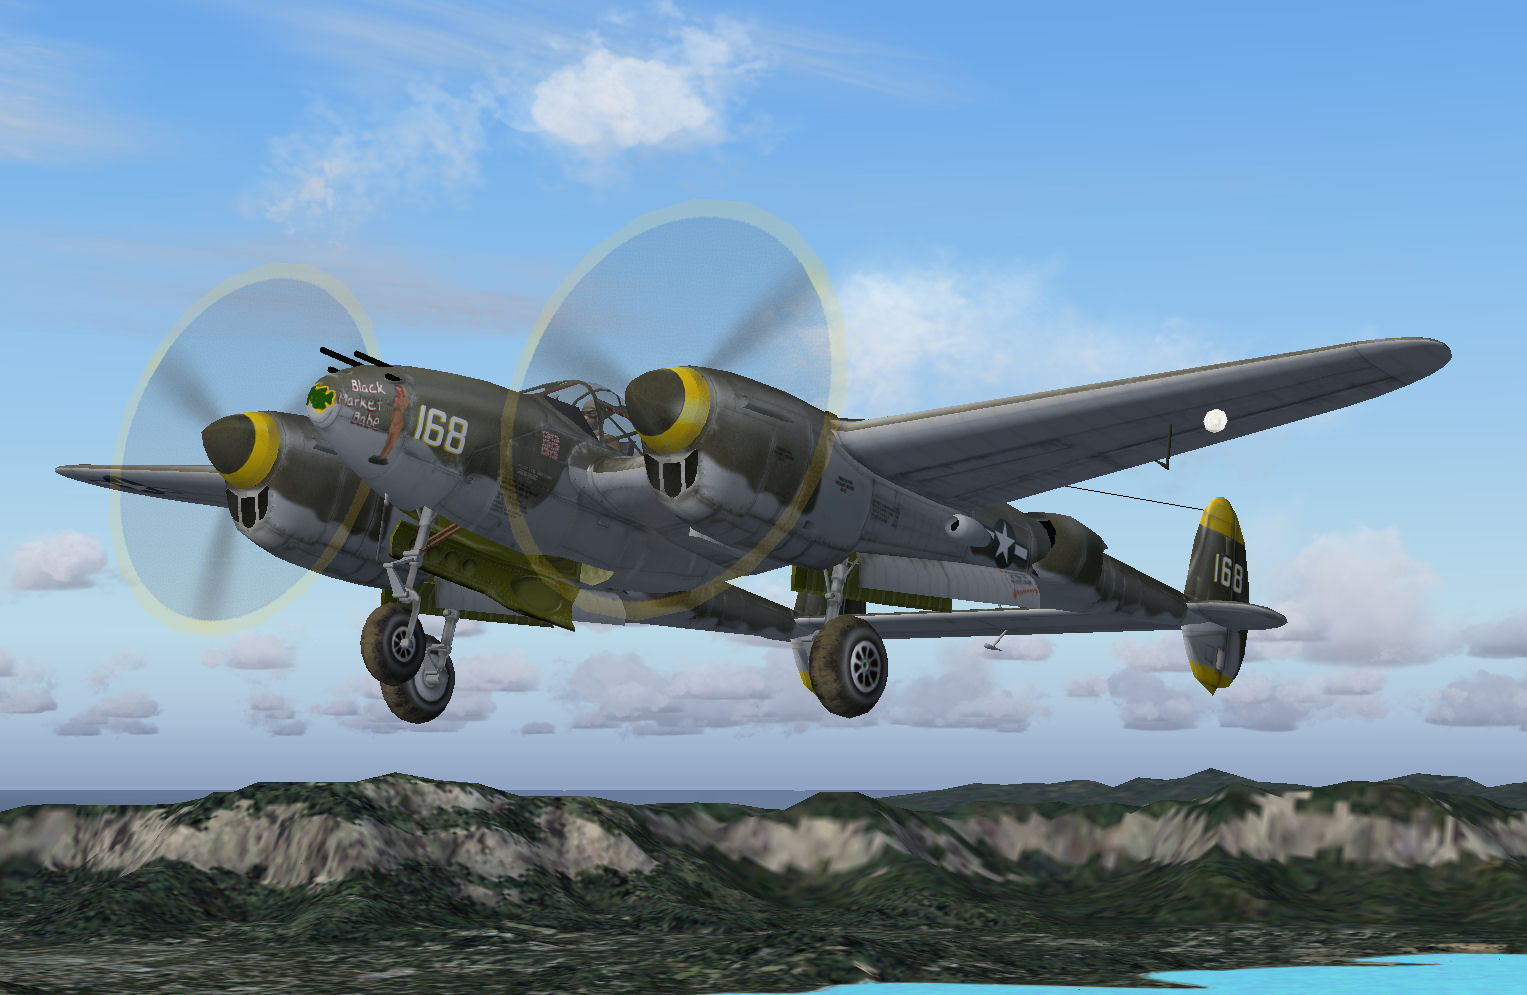
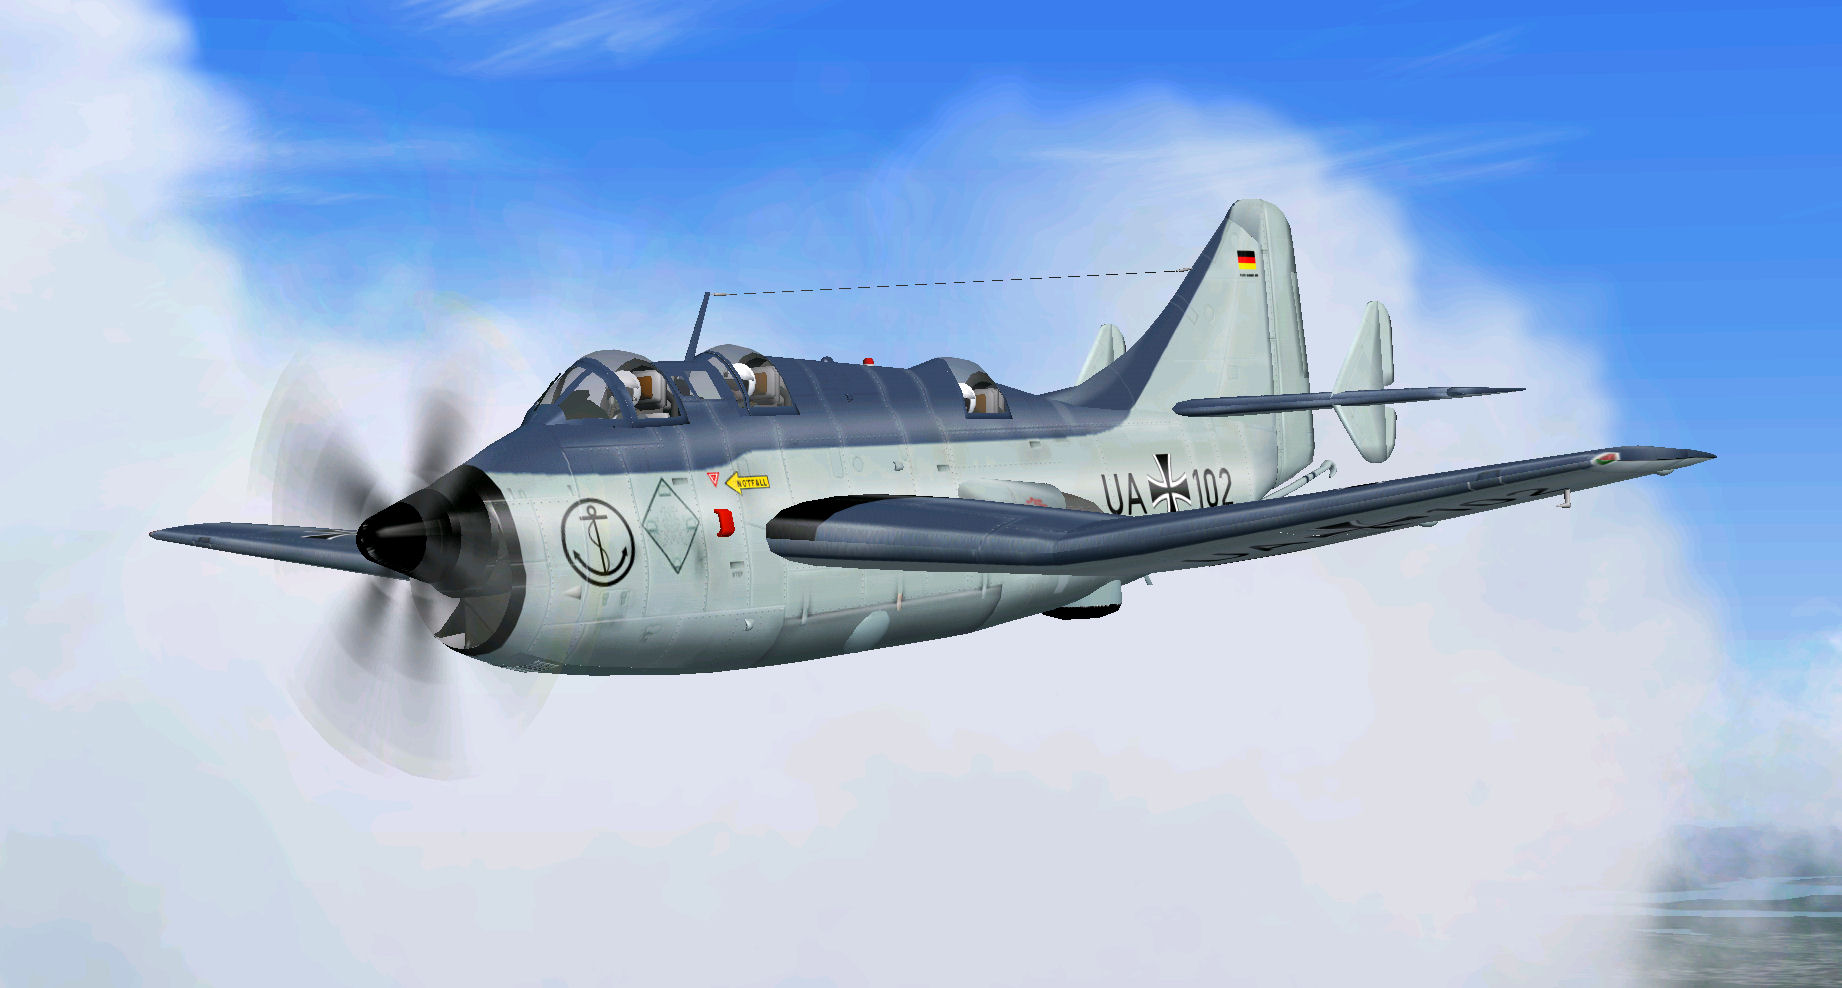
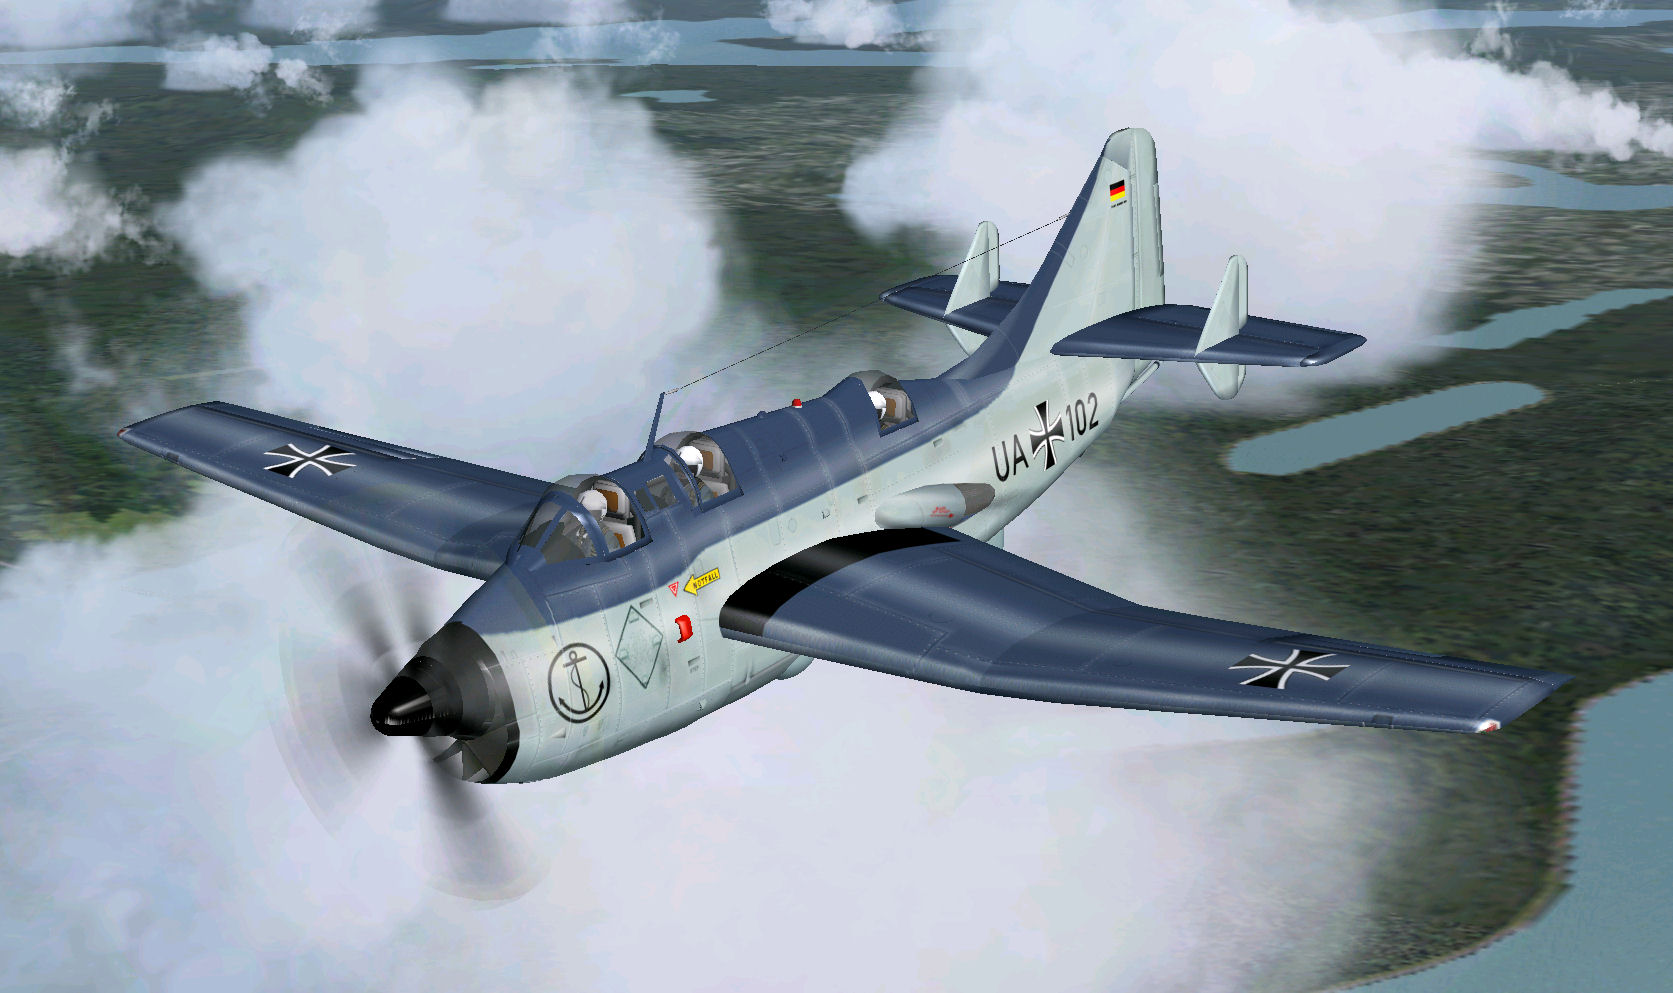
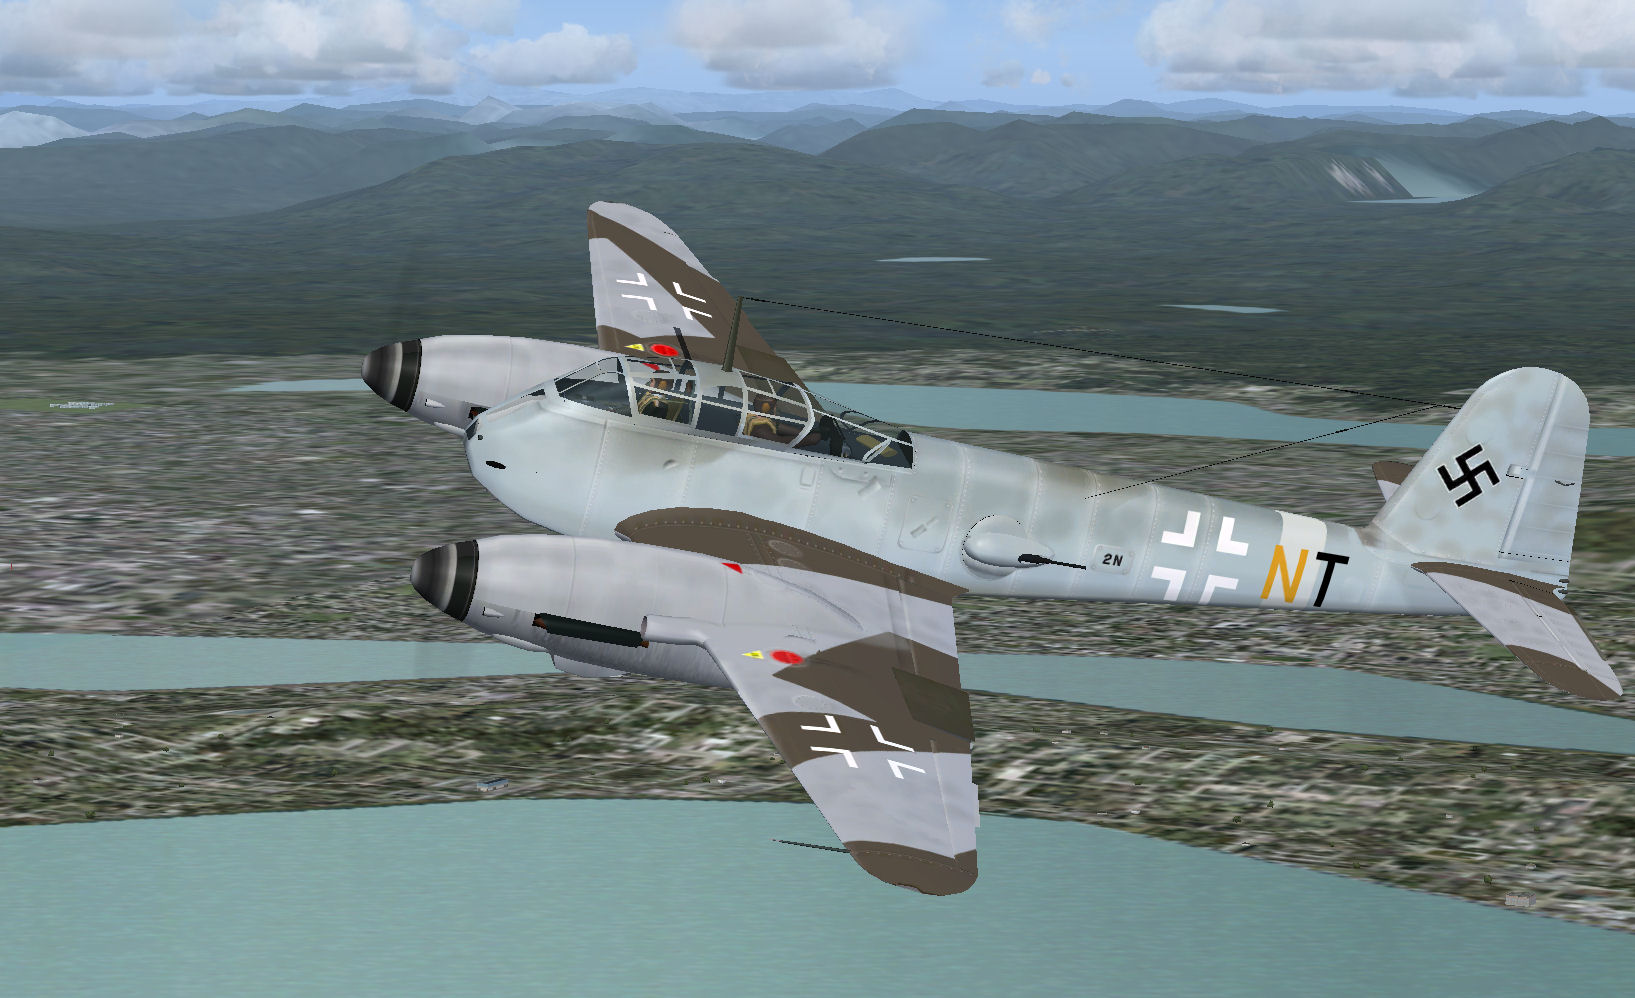
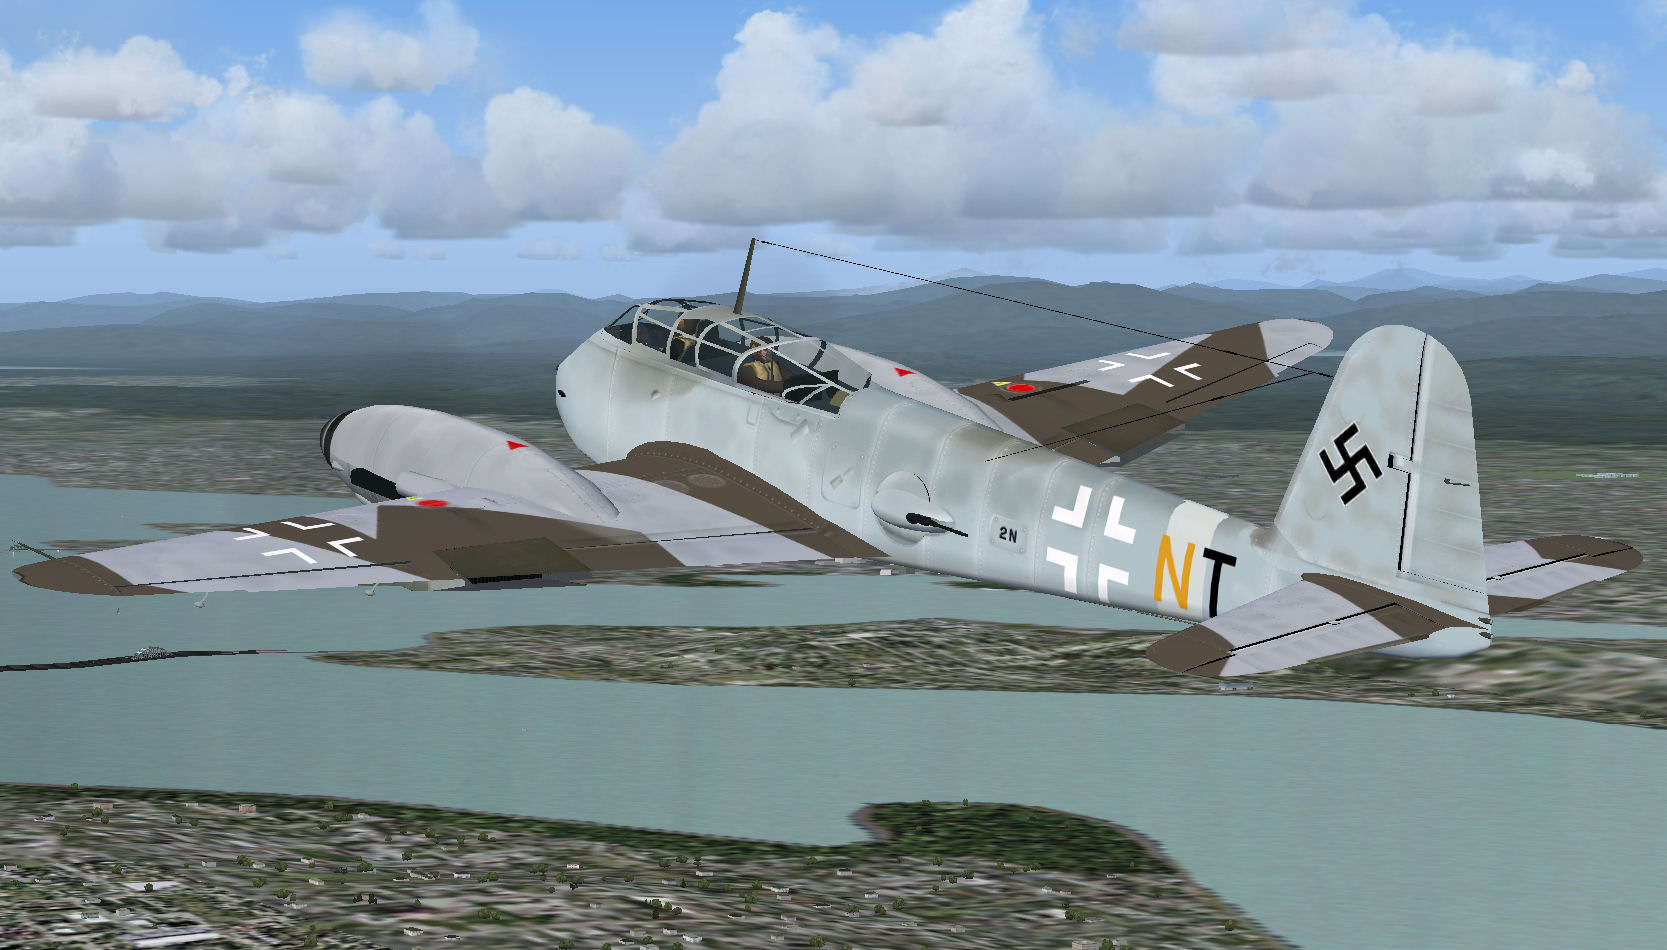
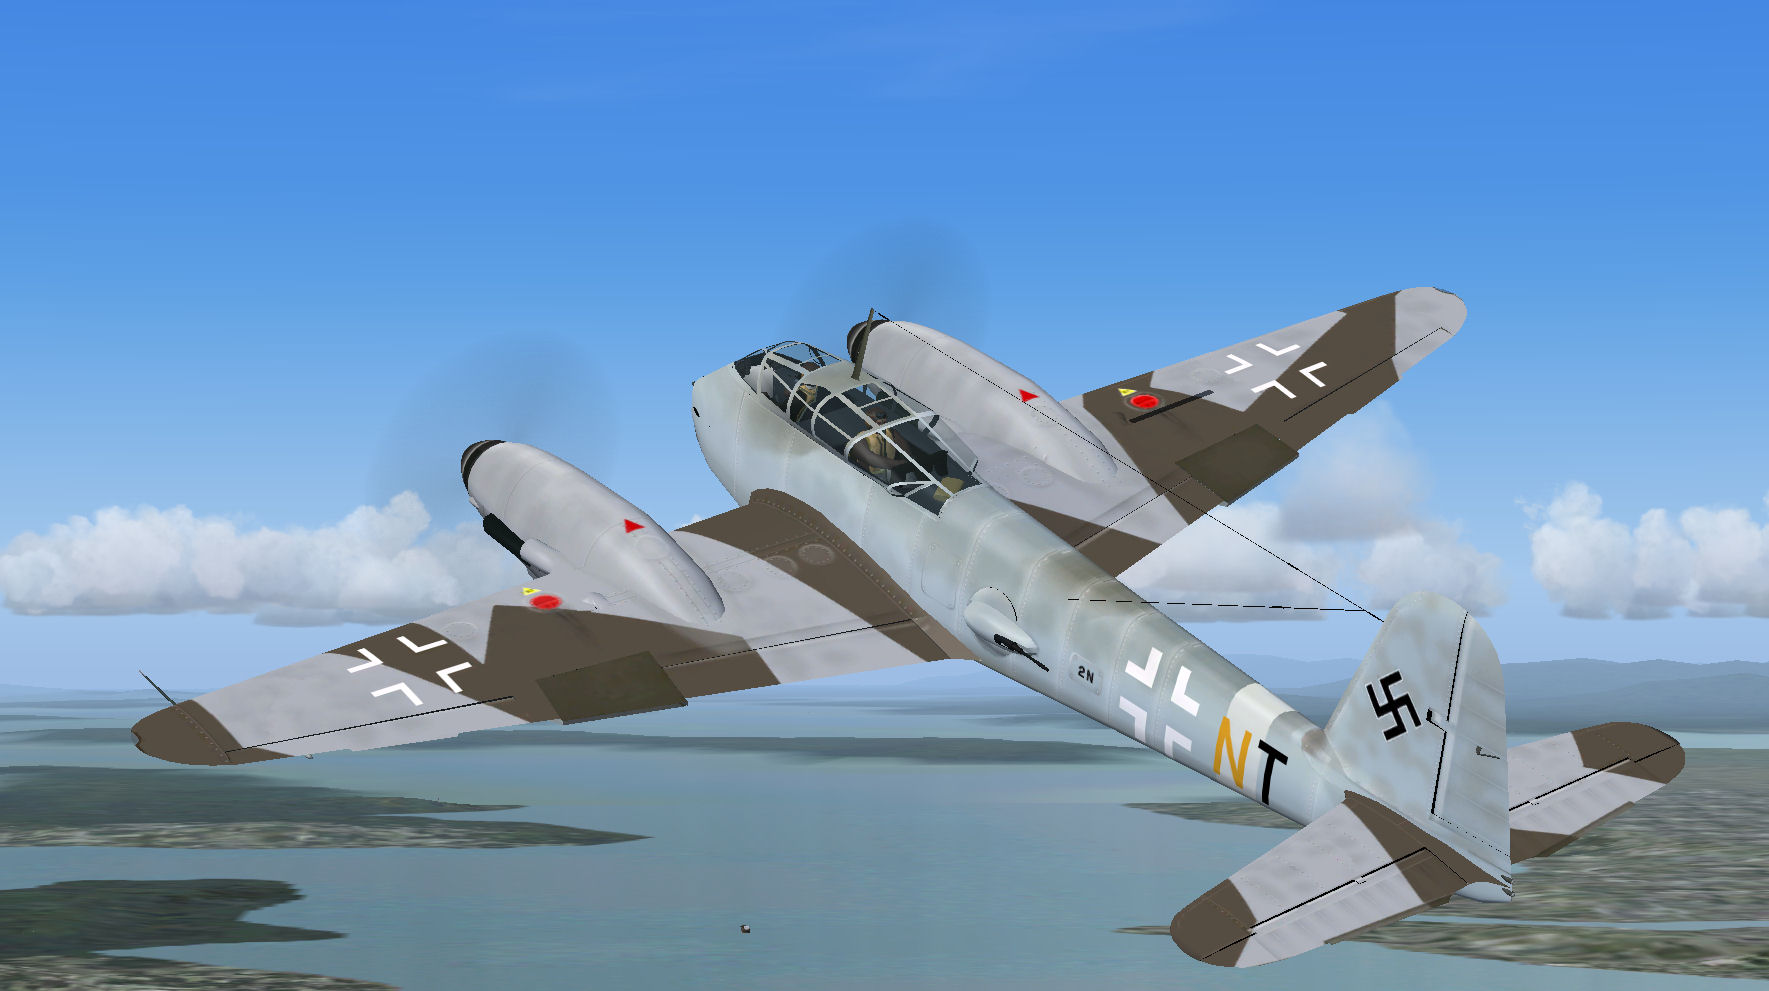
Just finished a new 2D panel for the Storch.. - Page 18
Page 18 of 47 FirstFirst ... 8101112131415161718192021222324252628 ... LastLast
Results 426 to 450 of 1173

Thread: Just finished a new 2D panel for the Storch..

  1. #426
    Member gaucho_59's Avatar
    Join Date
    Jan 2009
    Location
    Indio, California
    Age
    86
    Posts
    2,491
    Blog Entries
    1

    Here's the Boston Paul Defiant panel...

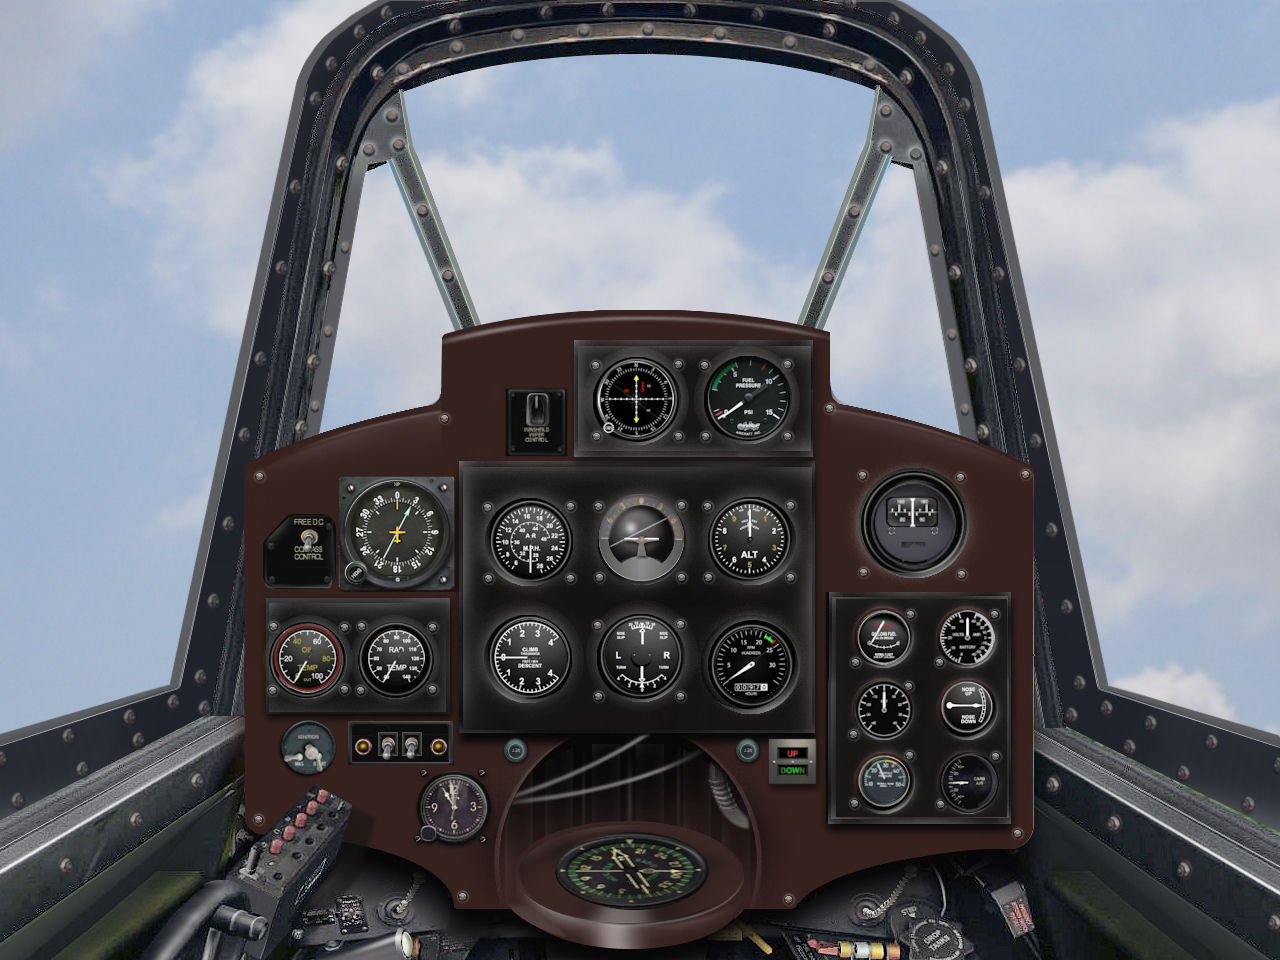
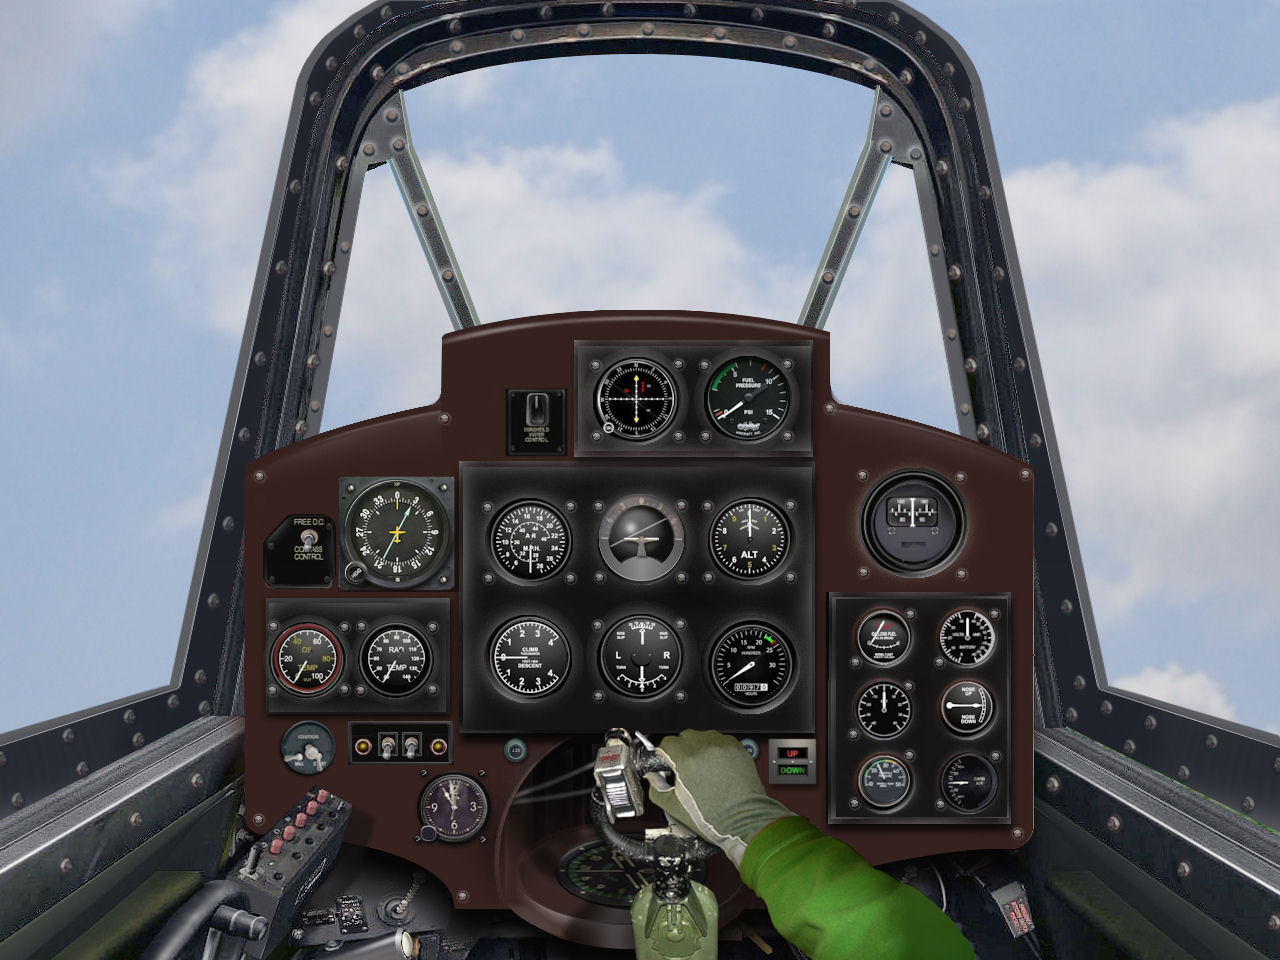
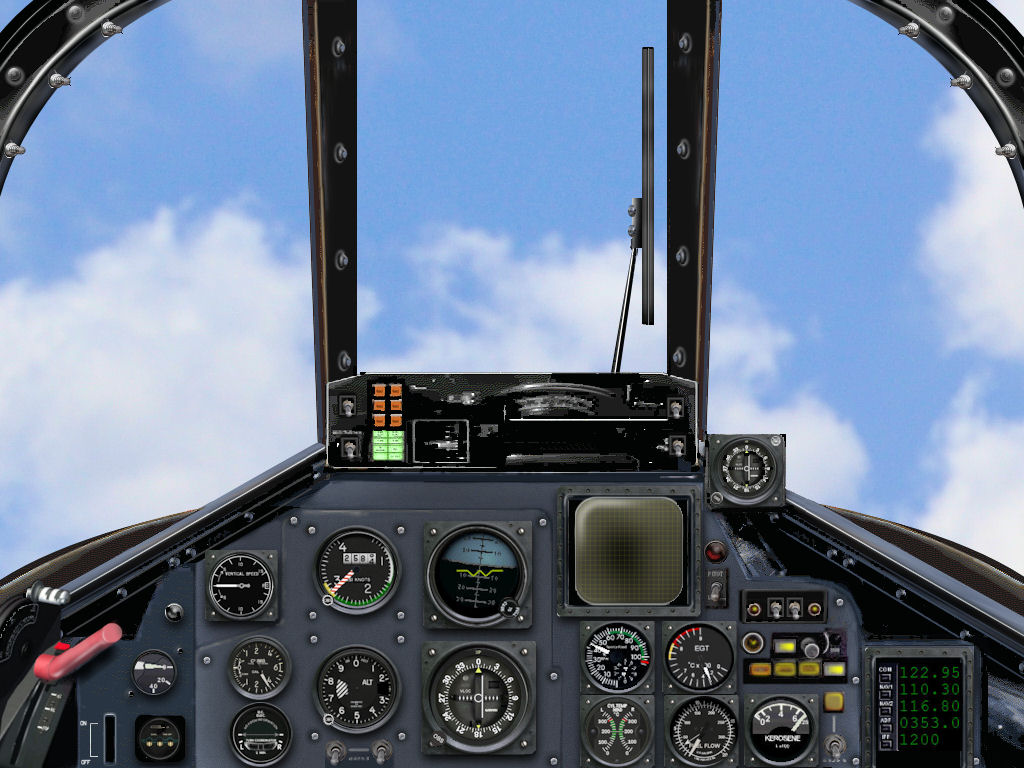
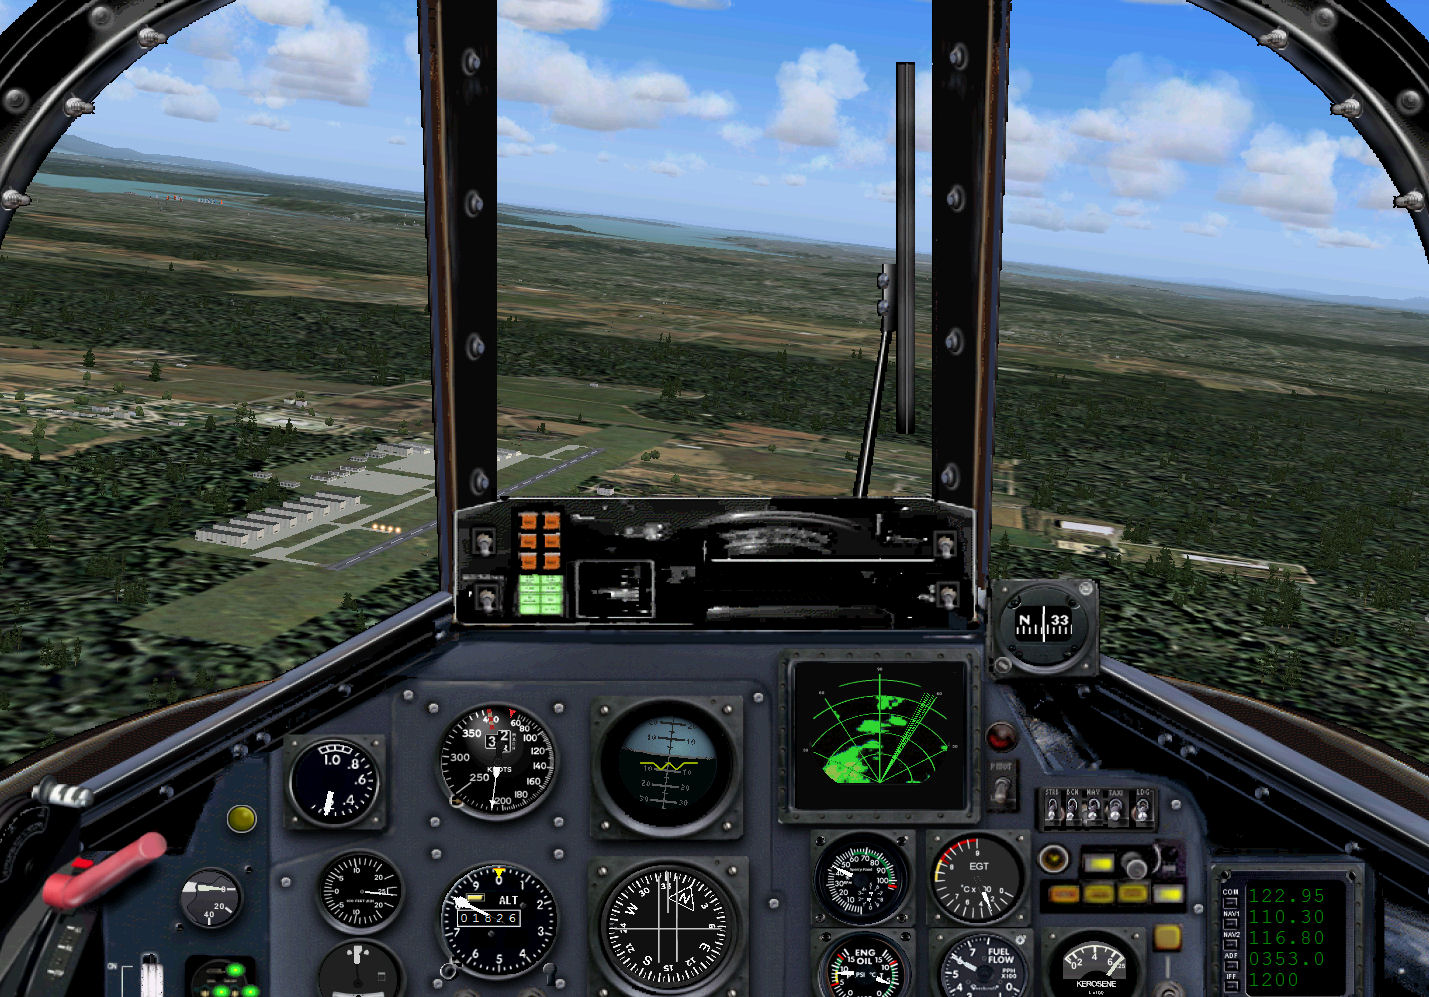
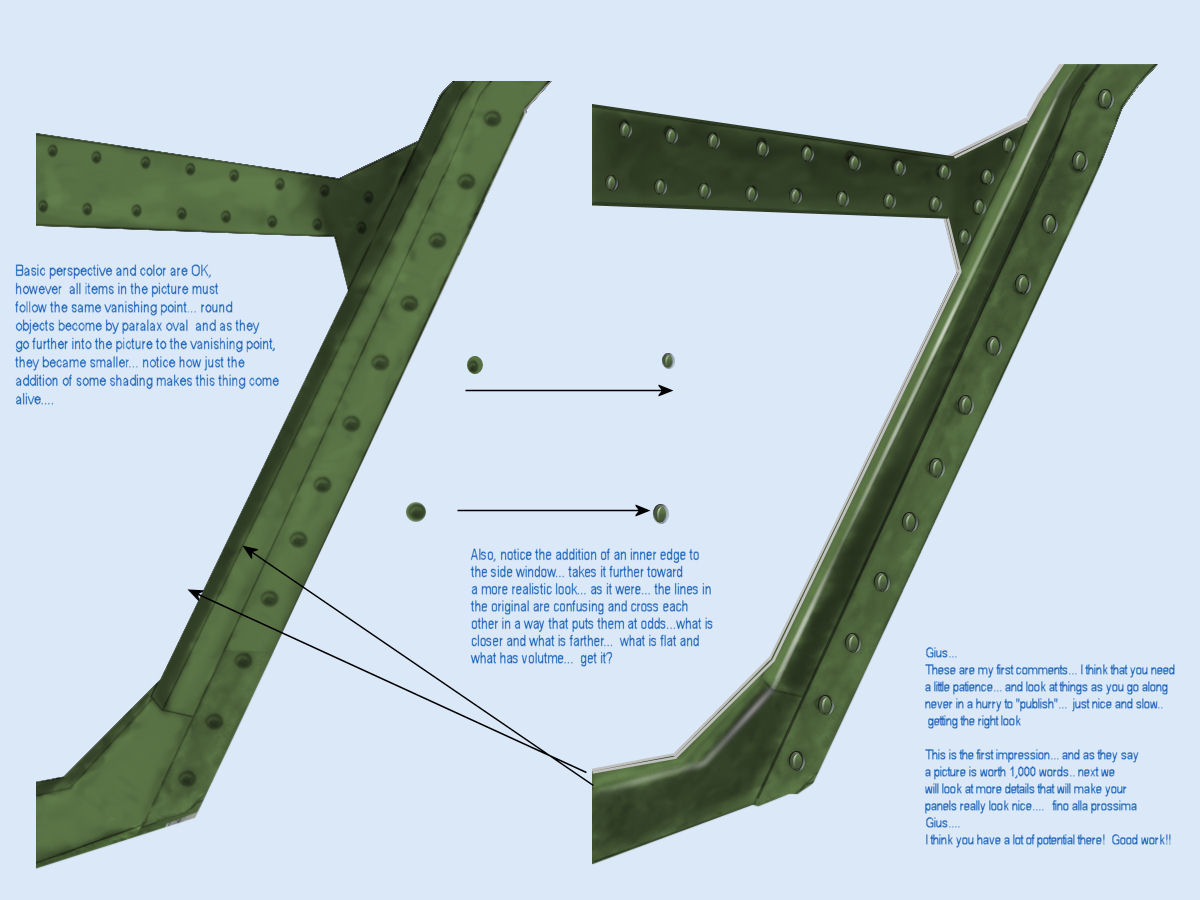
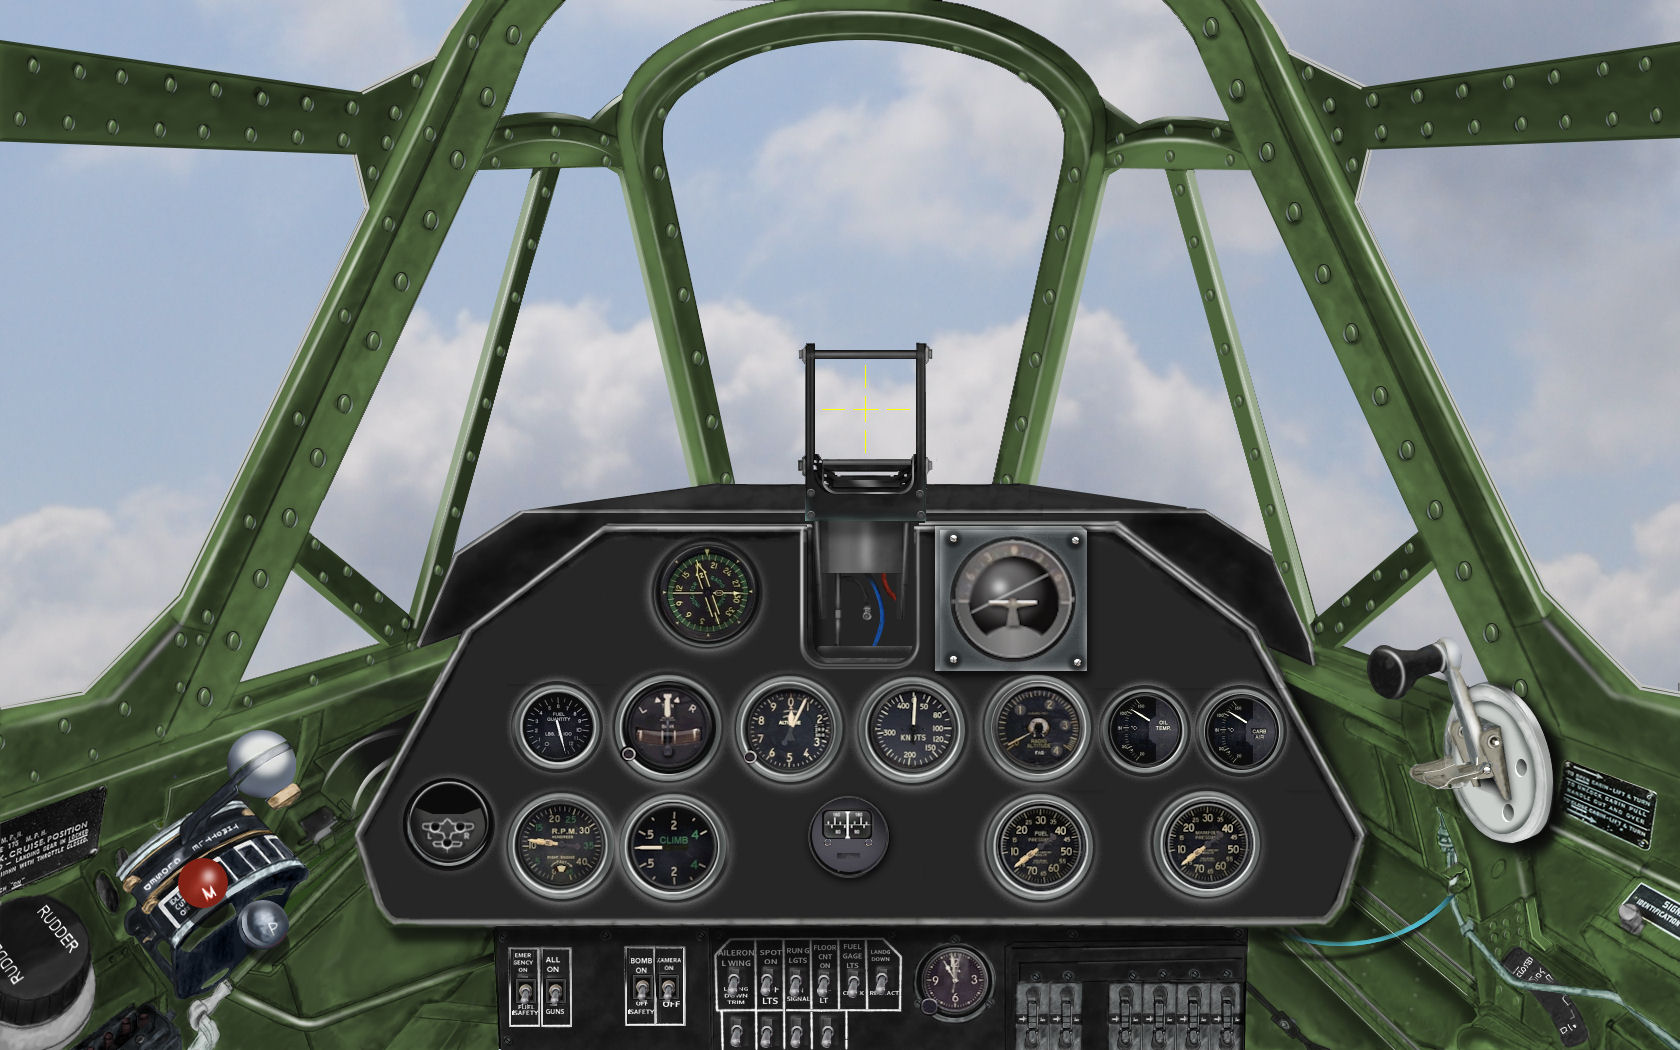
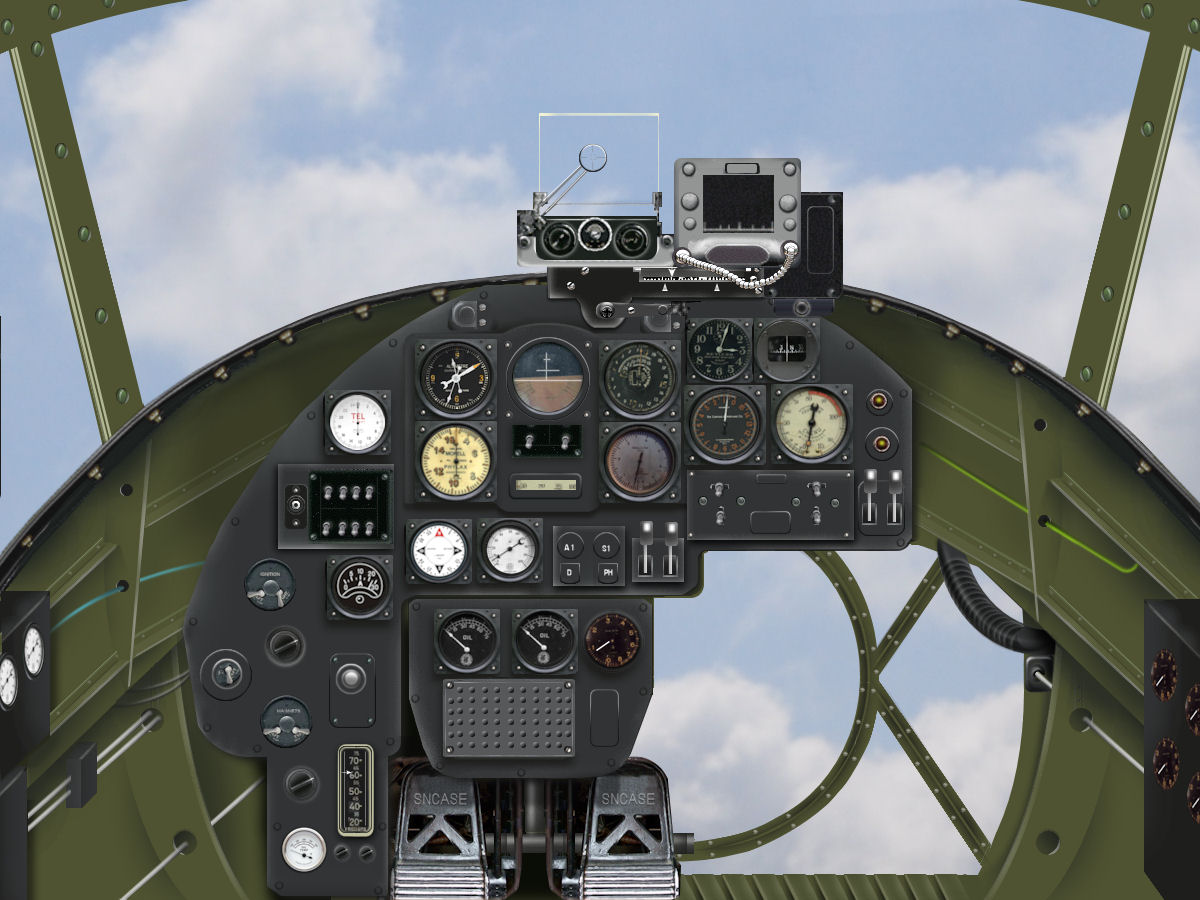
    As I said, I was working on a new panel for Ito's BP Defiant too... here it is....
    available with or without the control column and arm... via PM....
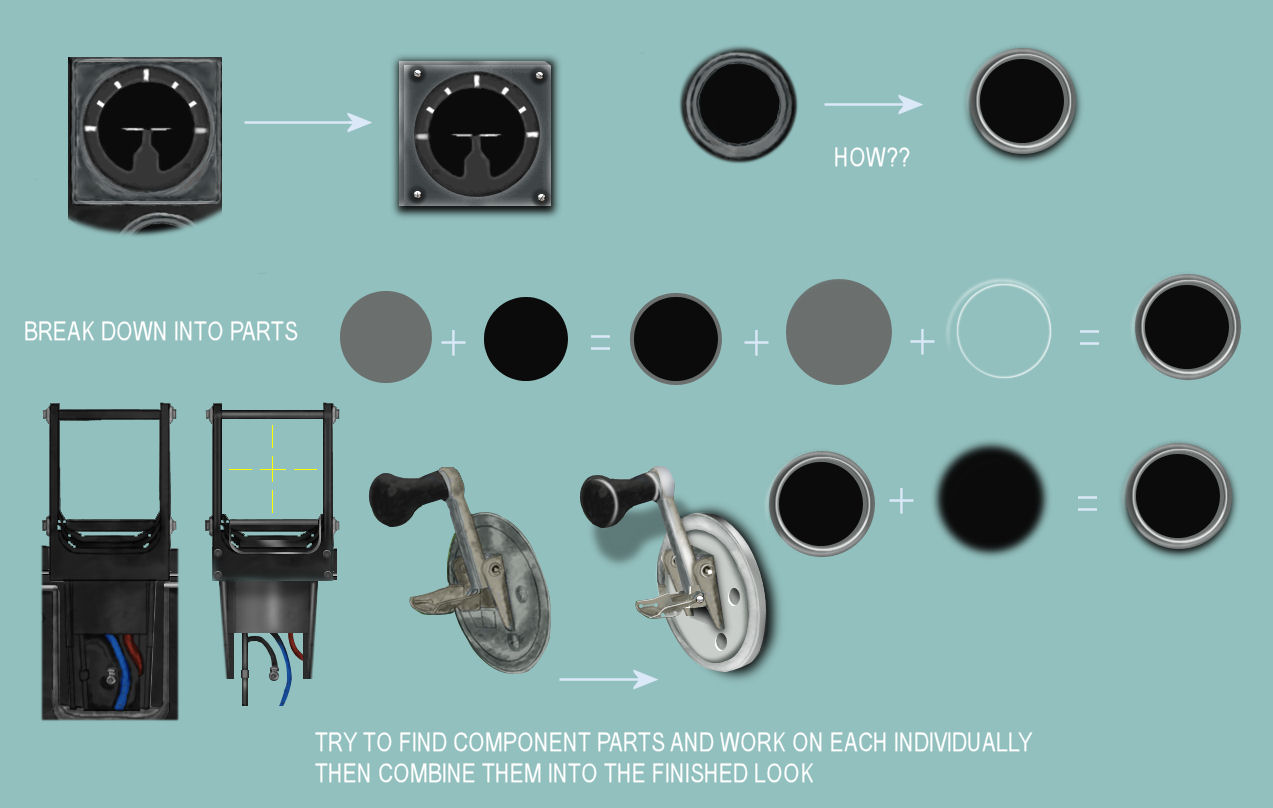
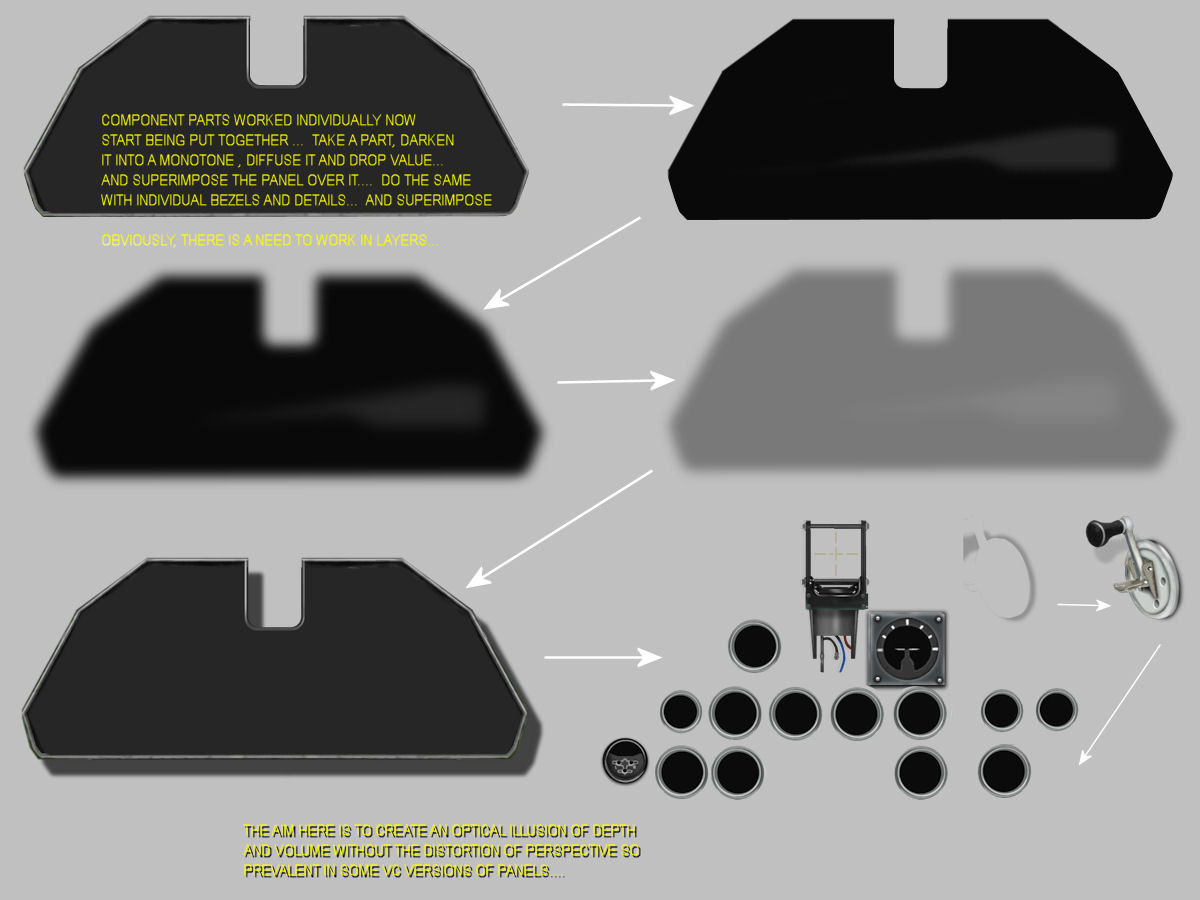
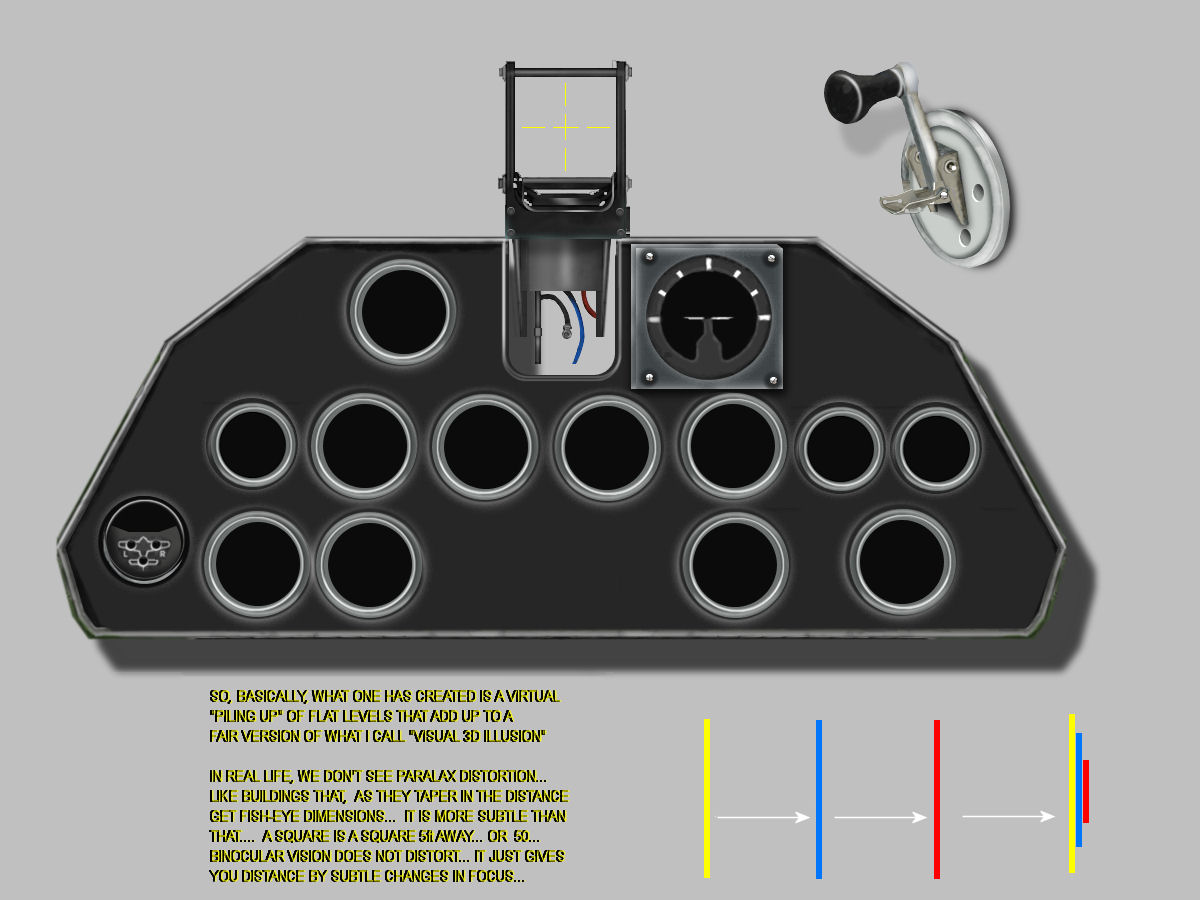
    Comments welcome... I couldn't find a single photo or pic of the cockpit... had
    to rely on a grainy pic from a plastic modelers' forum... lol


  2. #427
    Member gaucho_59's Avatar
    Join Date
    Jan 2009
    Location
    Indio, California
    Age
    86
    Posts
    2,491
    Blog Entries
    1

    Paint tweaking...

    This old model by Bruno surely has possibilities... for many interesting liveries...
    actually as good as they come compared to the stock B-24 Guy's conversion....
    This is just a "quick and dirty" go at it... redoing a template for other liveries...


  3. #428
    Member gaucho_59's Avatar
    Join Date
    Jan 2009
    Location
    Indio, California
    Age
    86
    Posts
    2,491
    Blog Entries
    1

    Redo of Ito's Fairey Gannet and panel

    This is another old model by Ito with great possibilities... for many interesting liveries...
    Started with just a "quick and dirty" go at it... redoing a template for other liveries...
    and did a real change to the original panel...


    Last edited by gaucho_59; March 24th, 2014 at 09:43. Reason: forgot title

  4. #429
    Member gaucho_59's Avatar
    Join Date
    Jan 2009
    Location
    Indio, California
    Age
    86
    Posts
    2,491
    Blog Entries
    1

    The panel for it...

    Here's the real change to the original panel... and a view of it in the sim


  5. #430
    Member gaucho_59's Avatar
    Join Date
    Jan 2009
    Location
    Indio, California
    Age
    86
    Posts
    2,491
    Blog Entries
    1

    A desert worn panel for the SM 82

    As usual available....

    Sorry... something is wrong... either here or my source...
    will post pic later... when I figure out what is going on...

    Last edited by gaucho_59; March 26th, 2014 at 11:49. Reason: picture not showing

  6. #431
    Member gaucho_59's Avatar
    Join Date
    Jan 2009
    Location
    Indio, California
    Age
    86
    Posts
    2,491
    Blog Entries
    1

    Problem solved with SM 82 post....

    Now the pic shows

    [/QUOTE]

  7. #432
    Member gaucho_59's Avatar
    Join Date
    Jan 2009
    Location
    Indio, California
    Age
    86
    Posts
    2,491
    Blog Entries
    1

    Hey Mark! Started to repaint the 410

    Plan on doing some others... there are many interesting liveries...
    any chance of cooking up some variants?


    available when finished.... by PM


    Cheers,
    G.

  8. #433

    Carlos,
    Very nice my man!

    TF has done an excellent job with the paint kit, and I really like your weathering and panel lines, great stuff.......................and please no added shine!


    Here's what I've done, a 50mm cannon armed destroyer, a rocket and extra cannon armed destroyer, and a night intruder, not much left to do. I just want to get some paint down and you can have them.

    Cheers

    Shessi

  9. #434
    Hello Gaucho, rather impressive work with that fuel covers you did for the 410.
    If you do not mind, I could use the psp file in my repaints.

    Thanks in advance

    Ascua
    Born to Fly

  10. #435
    Member gaucho_59's Avatar
    Join Date
    Jan 2009
    Location
    Indio, California
    Age
    86
    Posts
    2,491
    Blog Entries
    1

    mmmmm!!!!

    Quote Originally Posted by Shessi View Post
    Carlos,
    Very nice my man!

    TF has done an excellent job with the paint kit, and I really like your weathering and panel lines, great stuff.......................and please no added shine!


    Here's what I've done, a 50mm cannon armed destroyer, a rocket and extra cannon armed destroyer, and a night intruder, not much left to do. I just want to get some paint down and you can have them.

    Cheers

    Shessi
    They look fantastic... please let me have them even before you post them... via email... can't wait...
    btw... are you going to get back to that He 115...? Pleeeaaaase.. do sometime... it is sorely needed...
    Hey, where are the tyres and the exhaust tubes mapped on the 410?

    To Ascua: PM me your email address and I will let you have those caps ipso facto
    Last edited by gaucho_59; March 30th, 2014 at 05:53. Reason: addendum

  11. #436
    Member gaucho_59's Avatar
    Join Date
    Jan 2009
    Location
    Indio, California
    Age
    86
    Posts
    2,491
    Blog Entries
    1

    While at Bayerische Flugzeug Werke aircraft...

    Quote Originally Posted by gaucho_59 View Post
    They look fantastic... please let me have them even before you post them... via email... can't wait...
    btw... are you going to get back to that He 115...? Pleeeaaaase.. do sometime... it is sorely needed...
    Hey, where are the tyres and the exhaust tubes mapped on the 410?

    To Ascua: PM me your email address and I will let you have those caps ipso facto
    I am working on some Bf 110 liveries... and have another 410 almost ready also...

    they will be available via PM ...or I can repaint any particular livery anyone wants...


  12. #437

    G,
    Re-the tex mapping. The tyres are on the top left hand corner and the exhausts are the small rectangle of rust colour near the centre of the 410bandp.bmp.

    Re the He115...YES! I will get back to, that is a definite. But there are one or two ac I'm dealing wih first...

    Cheers

    S

  13. #438
    Member gaucho_59's Avatar
    Join Date
    Jan 2009
    Location
    Indio, California
    Age
    86
    Posts
    2,491
    Blog Entries
    1

    I got the wheels...

    Quote Originally Posted by Shessi View Post
    G,
    Re-the tex mapping. The tyres are on the top left hand corner and the exhausts are the small rectangle of rust colour near the centre of the 410bandp.bmp.

    Re the He115...YES! I will get back to, that is a definite. But there are one or two ac I'm dealing wih first...

    Cheers

    S
    I detailed the wheel rims...and they came out nice and weathered... btw... they are in the upper R side... as you look at the texture!
    now... the exhaust shields... I can't quite figure out where this rust color rectangle is.... is it the whole rectangular area in the middle?
    It is a problem because in this version they are grey like the rest of the cowling...
    Also... the version I am doing has a black spinner with a spiral white band... where are the spinners mapped?
    Having some problem with the curvature of the outboard cowlings... can't seem to place the holzshue (sabot or wooden shoe) emblem
    It is very frustrating... either too high or to low... and deformed... after many, many retries...

    To those nice folks who PMd me...
    I just became aware of the limit on PMs... and it does not seem to allow deleting batches of them.... just empty the folder... so I did, and now I am unable to answer the messages I got today... cause I lost them....
    To those who PMd me today... sorry... need to resend PMs... From now on, I am deleting them as I answer... so at least I can delete single ones
    and keep single ones for reference ... (my fault, I had not emptied the PM box in a long, long time...lol) Gius, if you can read this,
    Scusame... te rispondero via PM appena riprendo il tuo indirizzo di PM... mi riferisco ai commenti sul tuo nuovo panello...

    Tschuess... G.

  14. #439
    Member gaucho_59's Avatar
    Join Date
    Jan 2009
    Location
    Indio, California
    Age
    86
    Posts
    2,491
    Blog Entries
    1
    Gius,

    Here are some initial comments as I promised... btw... I think that this can be
    part of a "hands-on" tutorial on how to create 2D panels... even creating items
    for VCs... Often times VCs have that Hodge podgy look because the same
    items we comment on here are not paid attention to... I think we can all improve
    our drawing and painting skills.... and learn from each other...
    If folks are interested... and Gius approves... we can do it here... otherwise,
    Gius and I can do it privately....

    Cheers,
    G.

    PS: I believe on that old saying... Give a man a fish (publish) and it will quash his hunger for the day... teach him how to fish and he will never be hungry again...


    Once you learn a few tricks... and used them it is a breeze... then you make a
    collection of little creations... screws, bolts, gauges, levers, etc. that you can
    place with just a click... a change of hue.... you name it... and these things can
    but turned like sausages...
    Last edited by gaucho_59; March 31st, 2014 at 17:48. Reason: addendum

  15. #440
    Member gaucho_59's Avatar
    Join Date
    Jan 2009
    Location
    Indio, California
    Age
    86
    Posts
    2,491
    Blog Entries
    1

    For Ascua...

    I lost your email address... send me a PM with it and will email you
    the PSP file with the stuff you want...

    Cheers,
    G.

  16. #441
    Member gaucho_59's Avatar
    Join Date
    Jan 2009
    Location
    Indio, California
    Age
    86
    Posts
    2,491
    Blog Entries
    1

    Continuing to refine details...

    Gius,

    I reiterate, you have a great beginning with this panel...
    here are some more pointers to help you refine your approach... One of the key maneuvers, is to treat
    each item by itself, instead of trying to do the whole panel at one time... the advantage of digital "painting" over
    regular painting is that one can do isolated items and then combine them for a very effective look... For example,
    you can do the gun sight or that cranking handle by itself... clone it... blacken and diffuse it.. and then put it on a layer behind itself...
    and voila' you have a thrown shadow... that really makes it come alive and look realistic...
    no more instruments or panel items floating in mid-air with "no visible means of support" so to speak...


    Once you learn these few tricks... to use them is a breeze... and the collection of these little creations... screws, bolts, gauges, levers, etc.
    comes in very handy to quickly produce a panel from a photograph or line drawing that will be very effective....

  17. #442

    Cool

    Carlos,
    i'm appreciating very much your tutorial: i suggest you to keep it as public, so that other folks too could use the tecniques for their own creations, not only me, and for the benefit of whole community, one comment:GREAT
    Best wishes,
    Giuseppe

  18. #443
    Member gaucho_59's Avatar
    Join Date
    Jan 2009
    Location
    Indio, California
    Age
    86
    Posts
    2,491
    Blog Entries
    1

    Containuing the tutorial...

    So here is a next installment on the tutorial Giusi... and I hope this is not boring...but, as you will see
    the finished product encourages to reach for further perfectioning of your skills... at least it does for me...
    I think that with a modicum of patience and some basic painting skills, ANYONE can obtain satisfactory results...


    I'll give you time to digest this... and on the next installment we will put things together for a final look...

  19. #444
    Member gaucho_59's Avatar
    Join Date
    Jan 2009
    Location
    Indio, California
    Age
    86
    Posts
    2,491
    Blog Entries
    1

    Just to keep things interesting...

    Dear Gius,

    just to whet your appetite to pursue further perfectioning of your skills...
    here is the stage when things start taking shape.... This is what I have done
    so far with your initial bmp... which you should be able to accomplish with a
    little practice... the addition of more detail will give fertile ground to show a
    few more tricks and techniques... as I add the details, I'll explain the method
    use to get the desired effect...

    The addition of faces on the bezels...I usually cover all holes...then on the
    config. file one decides which and how many instruments will be covered with
    active ones... and the rest are dummies... that still lend a modicum of credibility to
    the panel... preferably... you want to use gauge files that DO NOT have securing
    screws of that misplaced with relation to the artwork... add up to that hodge-podge
    look... in other words... let the screws in the artwork stand instead... the ones in
    the gauges are usually the product of non-artistically inclined technological folks
    who are more interested in the instrument that what it look like...
    but more about that later... when we get to that adding of details...


  20. #445
    GREAT!!!!
    PLEASE PROSECUTE IN EXPLAINING....

  21. #446
    Member gaucho_59's Avatar
    Join Date
    Jan 2009
    Location
    Indio, California
    Age
    86
    Posts
    2,491
    Blog Entries
    1

    A new panel for the Liore' et Olivier 45 just posted....

    Gius,

    Got distracted from the tutorial by the posting of the Liore' et Olivier 45 by Dombral
    and could not resist cooking up a fast new panel for it...

    To wit....


    in a way it fits with the tutorial because it shows how my methodology lets one cook
    a panel pretty darn fast... I just used a line drawing and applied the stuff I have been
    illustrating
    Last edited by gaucho_59; April 4th, 2014 at 08:38. Reason: spelling error

  22. #447

    Question

    Quote Originally Posted by gaucho_59 View Post
    Gius,

    Got distracted from the tutorial by the posting of the Liore' et Olivier 45 by Dombral
    and could not resist cooking up a fast new panel for it...

    To wit....


    in a way it fits with the tutorial because it shows how my methodology lets one cook
    a panel pretty darn fast... I just used a line drawing and applied the stuff I have been
    illustrating
    Carlos,
    can i grab this bitmap to make a panel for this beautiful French bomber?
    Thanks in advance,
    Giuseppe

  23. #448
    Member gaucho_59's Avatar
    Join Date
    Jan 2009
    Location
    Indio, California
    Age
    86
    Posts
    2,491
    Blog Entries
    1
    Quote Originally Posted by gius View Post
    Carlos,
    can i grab this bitmap to make a panel for this beautiful French bomber?
    Thanks in advance,
    Giuseppe
    I'll email you the bmp with black background... no problem... now I got
    your email address...

  24. #449
    Member gaucho_59's Avatar
    Join Date
    Jan 2009
    Location
    Indio, California
    Age
    86
    Posts
    2,491
    Blog Entries
    1

    Now back to detailing panels.... bezels

    Dear Gius,

    Picking up where we were before... here is a simple but convincing method to create
    instrument bezels... as you experiment you will see how easy it becomes...
    You need to keep a good collection of ready made bezels and instrument faces...
    On our next installment... we can go into creating transparent glass lenses for them...
    The only limits to this endeavor is your own creativity and desire to excel at it....


    Last edited by gaucho_59; April 4th, 2014 at 12:39. Reason: omission

  25. #450
    Member gaucho_59's Avatar
    Join Date
    Jan 2009
    Location
    Indio, California
    Age
    86
    Posts
    2,491
    Blog Entries
    1

    Containuing the panel detailing tutorial...

    Dear Gius,

    Picking up where we were before... we add some more details to the panel project....


    and incorporate a control column... (that can be made into a "pop up".. or just
    stay there to give the panel an "inhabited" look...


    now all that is left is a little "weathering or wear and tear" to.. without exaggerating...

    Next installment we'll do that to finish the "dressing up" of the original panel bmp.

Members who have read this thread: 36

Bookmarks

Posting Permissions

  • You may not post new threads
  • You may not post replies
  • You may not post attachments
  • You may not edit your posts
  •