Evolution of a bump map...
Page 1 of 2 12 LastLast
Results 1 to 25 of 30

Thread: Evolution of a bump map...

  1. #1

    Evolution of a bump map...

    OK... evolution of a bumpmap.

    This is just sharing an experience with you. The thing about default FSX bumps is the way they reflect light. Awful, isn't it? Stripey, streaky, UNREAL. The most common way to reduce this is for painters to create an orange peel effect on the bumpmap sheet - and the problem with that is that it really does look like orange peel. Oh, it fixes all those striations (the ghastly stripey reflections in FSX) but it is just a "fiddle" and not a fix. And besides, I have sprayed a few helis up and I hate orange peel - it looks soooo unprofessional.

    I've been doing shiny skins for quite a while now and I think I have a better solution than orange peel (I'm still not where I want to be, but I am away from orange peel at least). I've done it on a few paints, but it is time consuming. Anyway, I thought I'd share it here - maybe someone can pick up on the idea and improve it?

    Basically, if you look at a plane at an angle, you'll see it isn't really smooth. There's loads of small imperfections that give the finish some unevenness, whether this be rippling of the panels caused by aerodynamic and physical beating about, or if it is dimpling caused by rivets and screws, or dents caused by heavy feet. Anyway, I thought I'd share some pictures and words with you. Just for the fun of it.

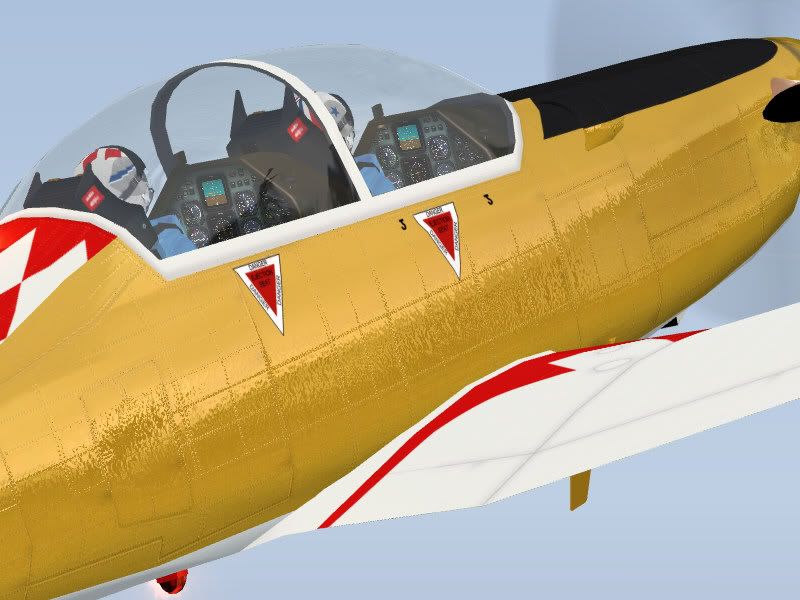
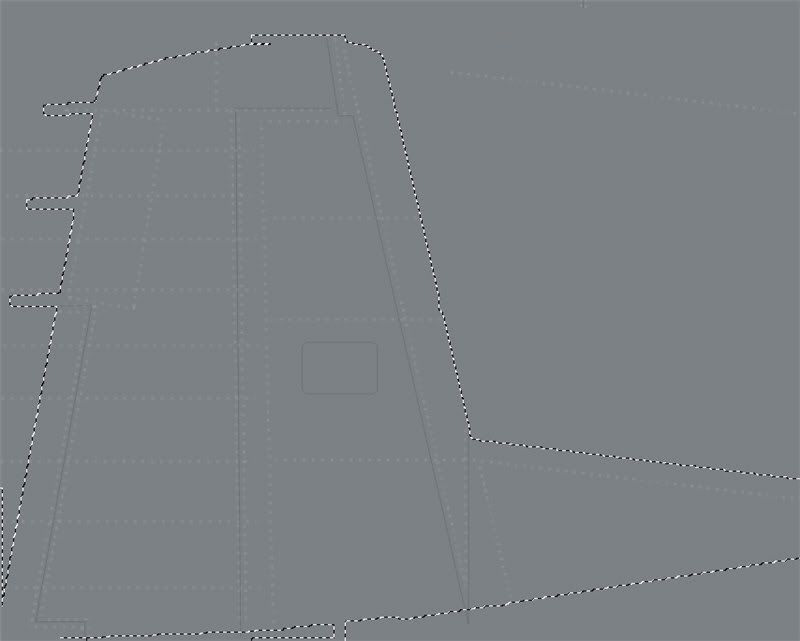
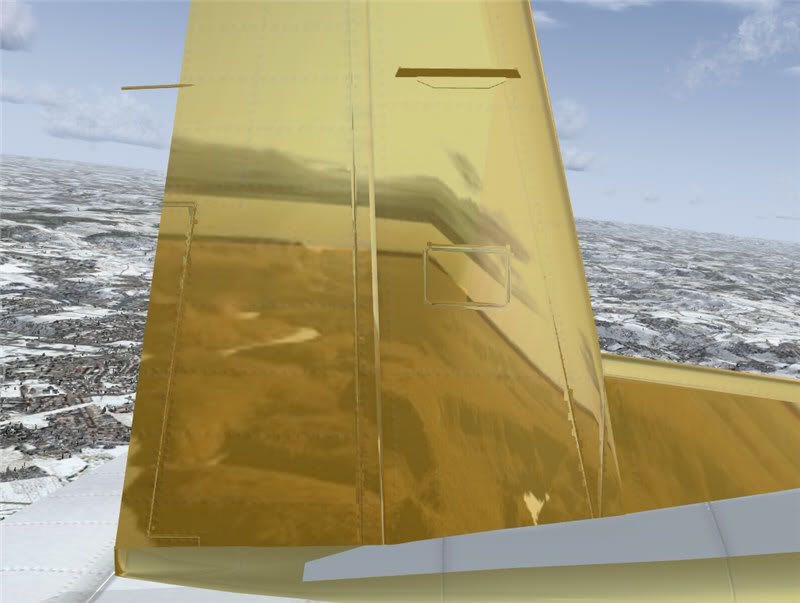
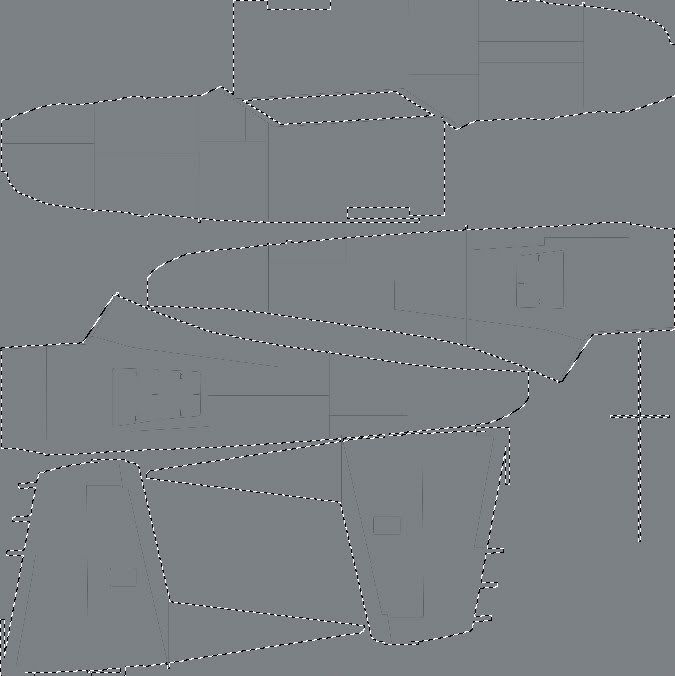
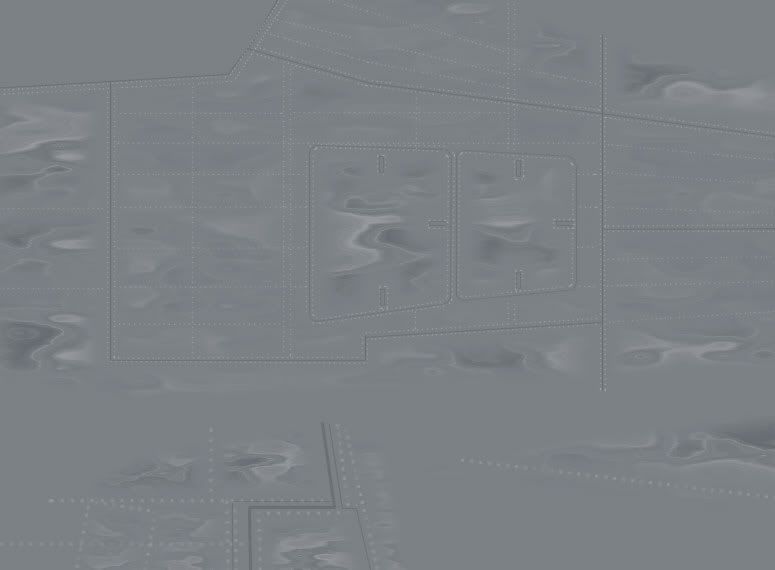
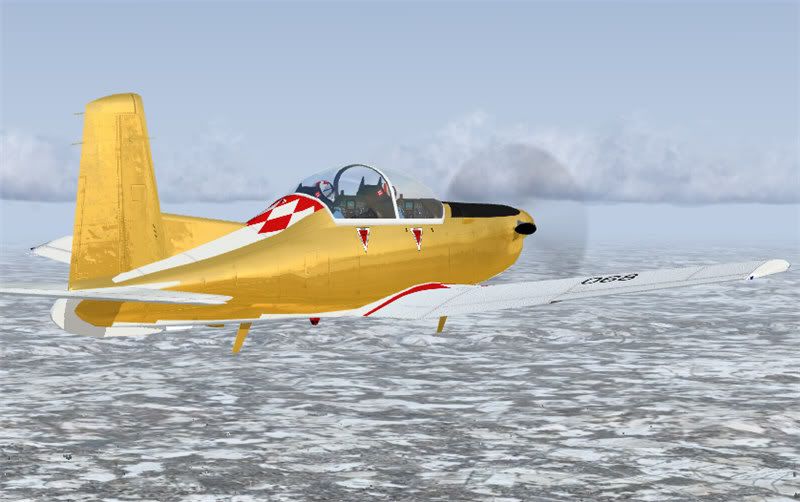
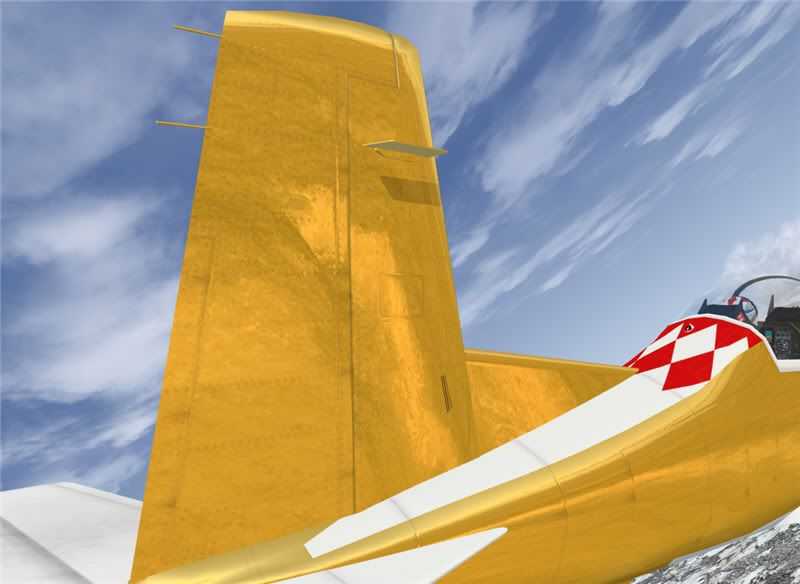
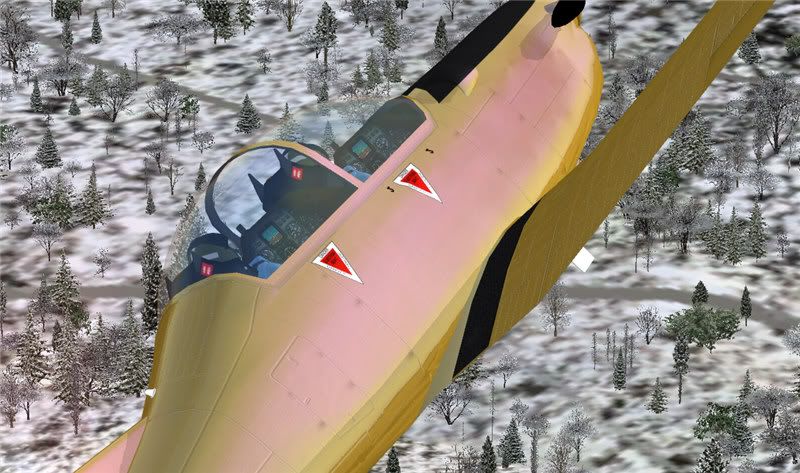
    Picture one coming right up - the FSX skin with just the lines, rivets and screws bumped:


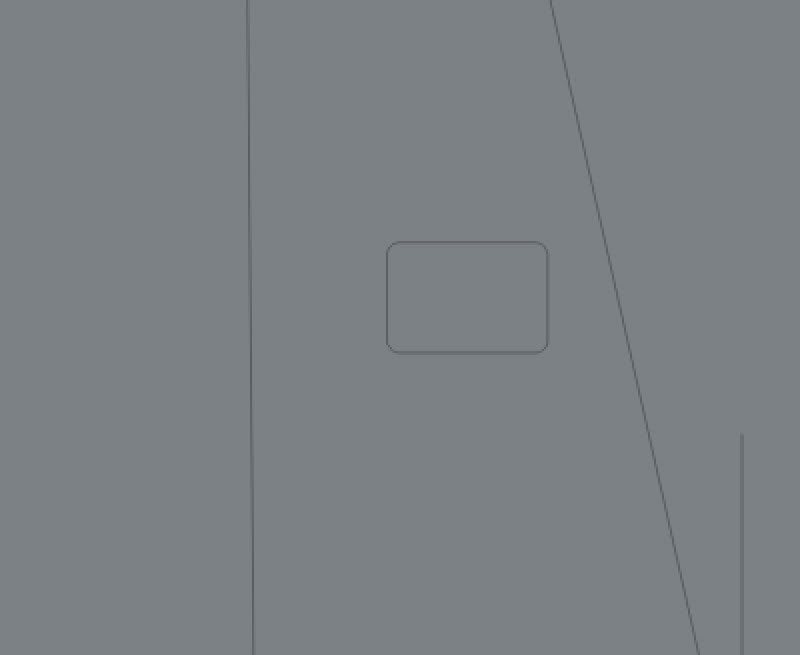
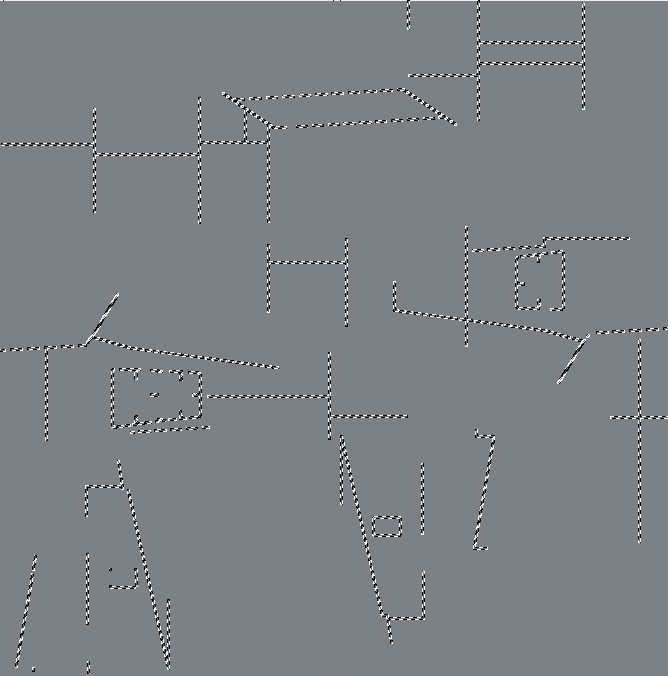
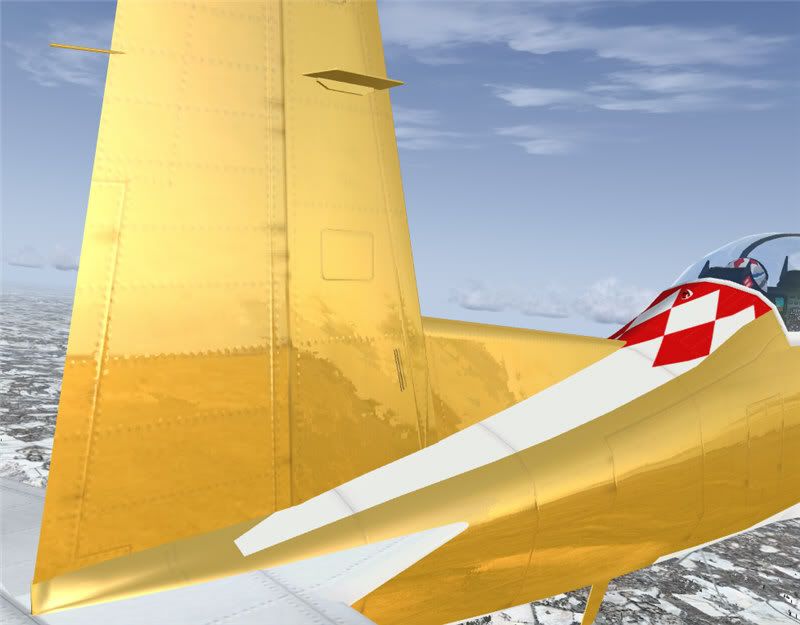
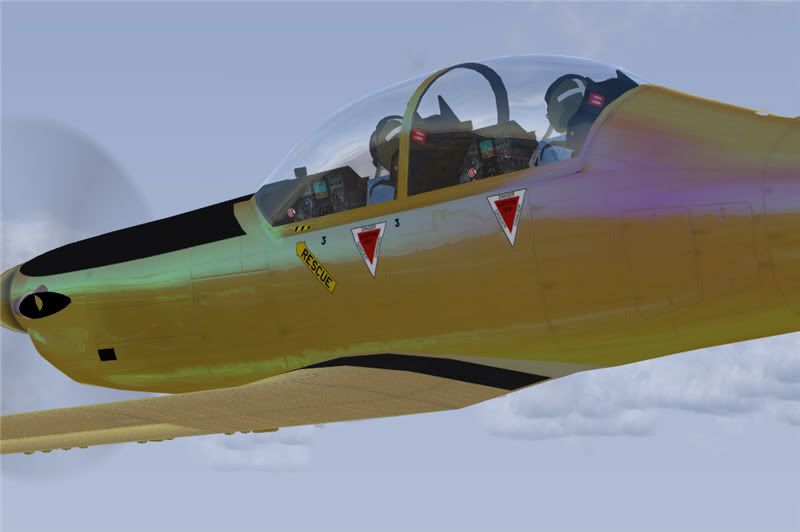
    ...and you can compare that to the "orange peel" effect so popular among painters:


    See the difference? The shot-peened surface looks a bit better because it breaks up the large plane surfaces and spreads the light.

    So if it is the surface that distorts the light, why not add more bumps - but larger and smoother than orange peel?

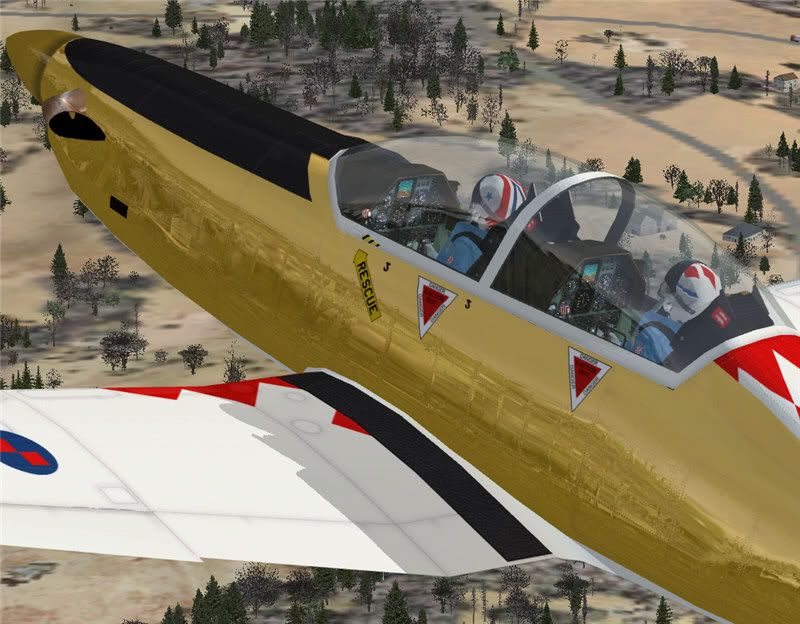
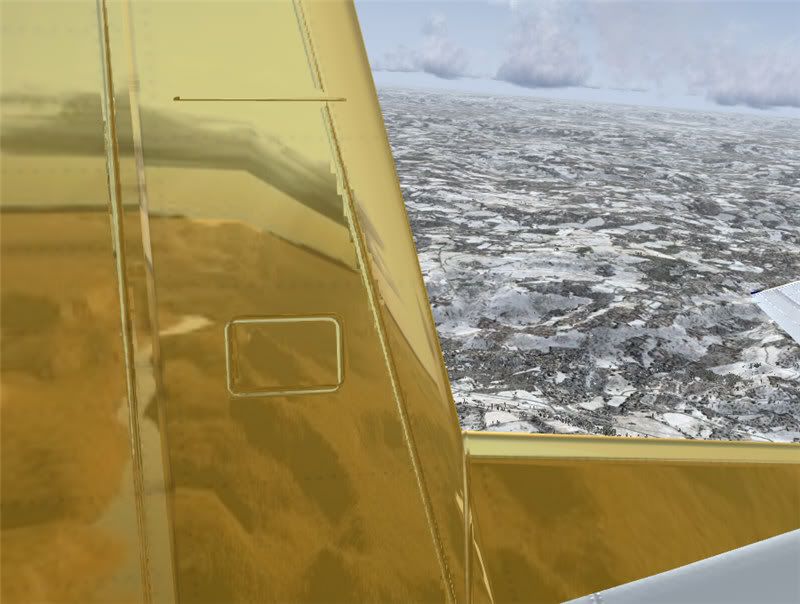
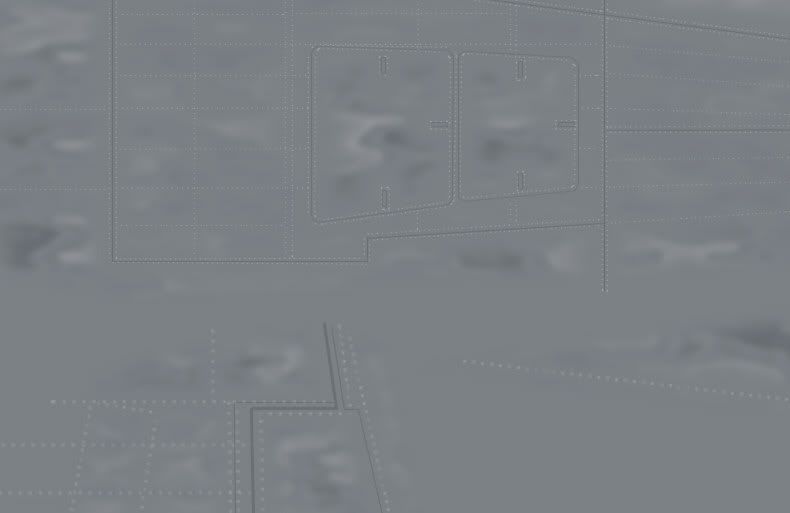
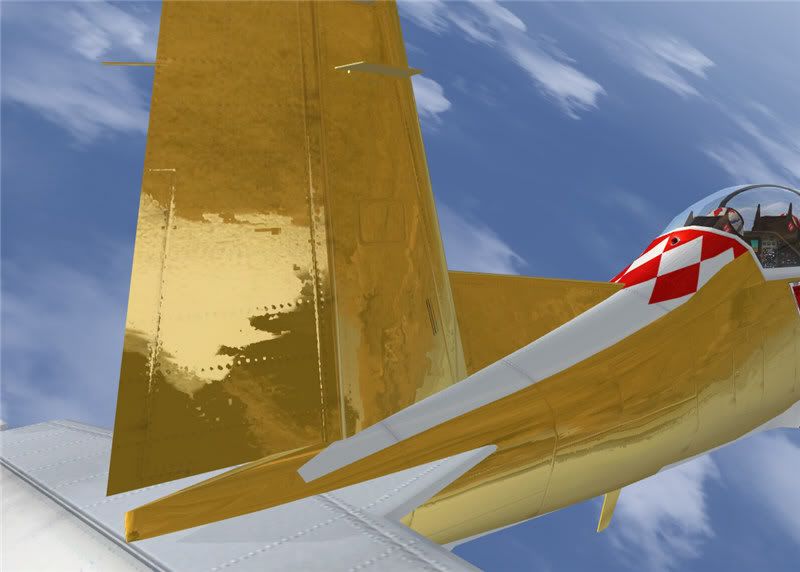
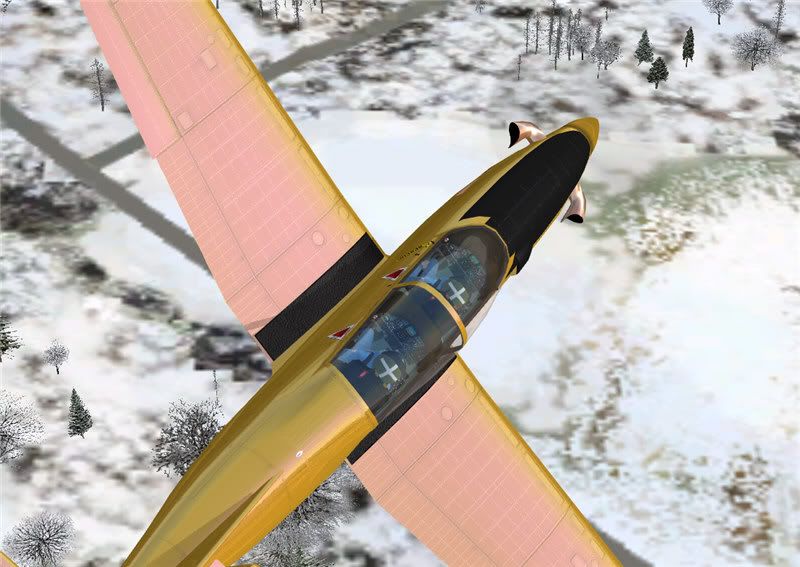
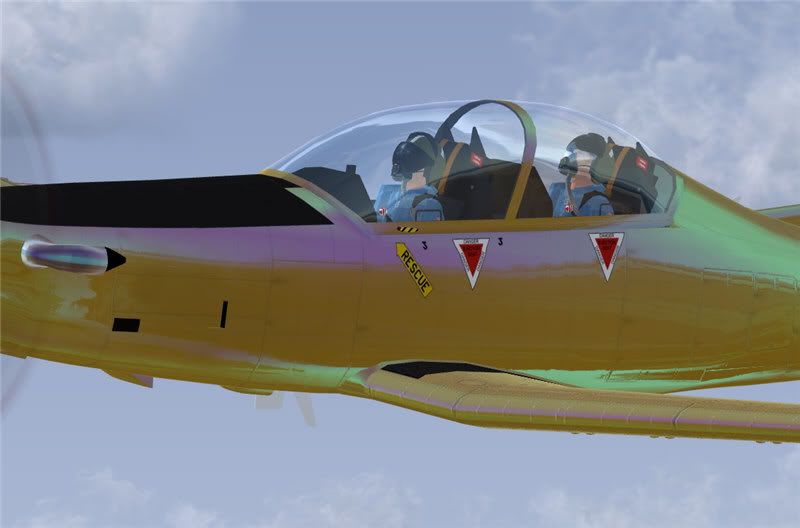
    OK - in the next piccie I have overlaid a very slight, washed out ripple effect:


    It's better, but I think it looks too "new" and too FSXy. But if you go too far, you could end up with this:


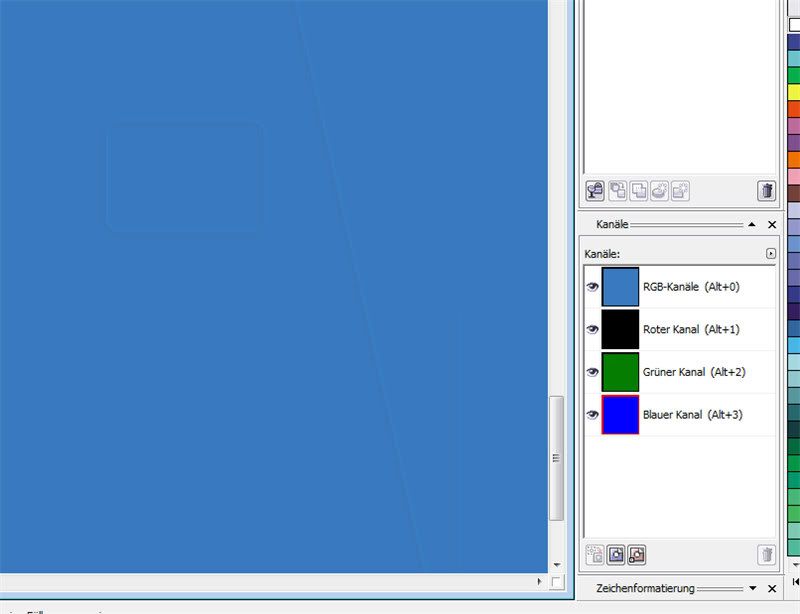
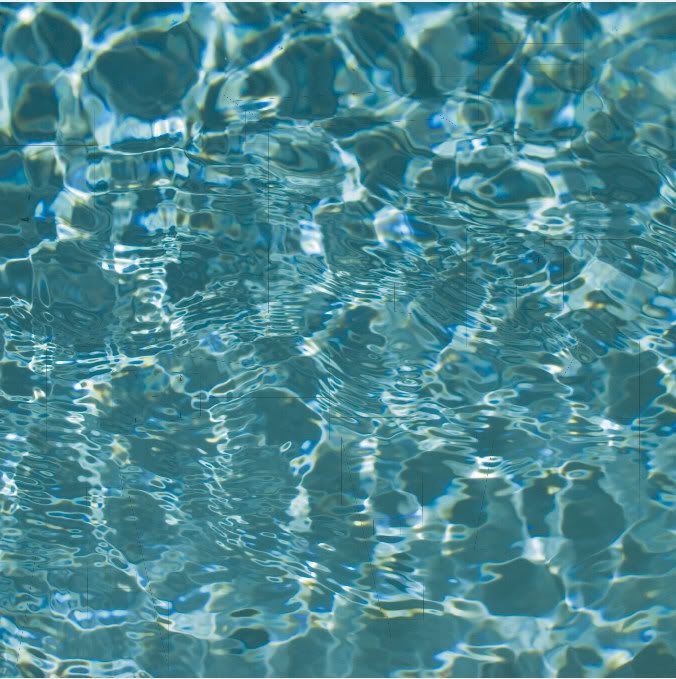
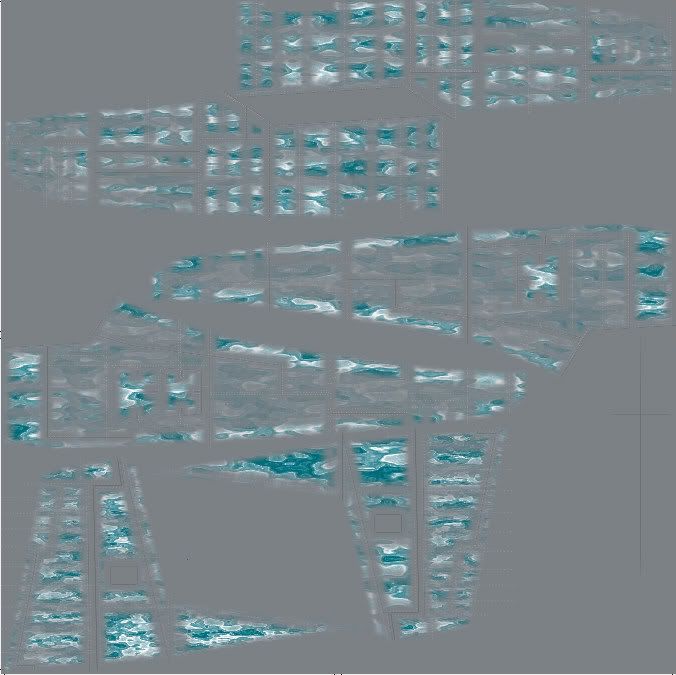
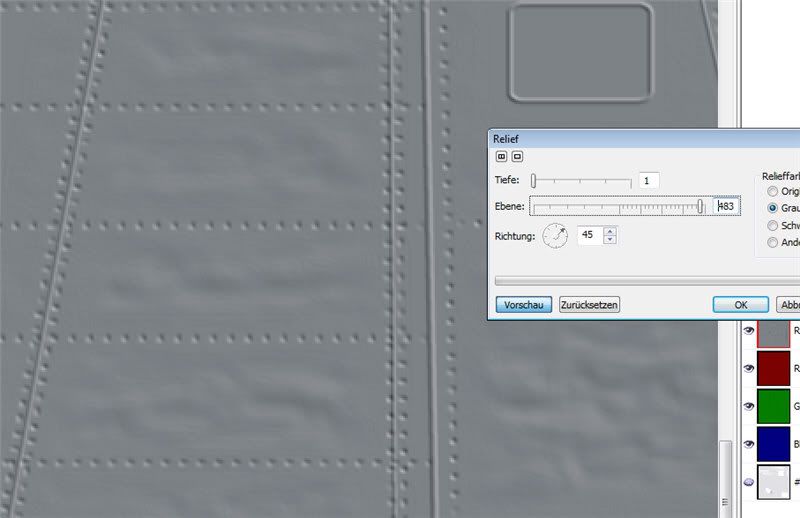
    So what I have actually done is to create two separate bumpmaps and alphas. The first is the standard aircraft flat, shiny skin with just rivets and panel lines bumped. Then I created another bumpmap of a water effect. Ripples on a swimming pool sort of stuff.

    Then I just overlaid the two "blue" bumpmap textures over each other using my painter program's merge function "screen overlay". I did the same with the respective red-channel alphas and ended up with a third bumpmap which is the sum of the first two.

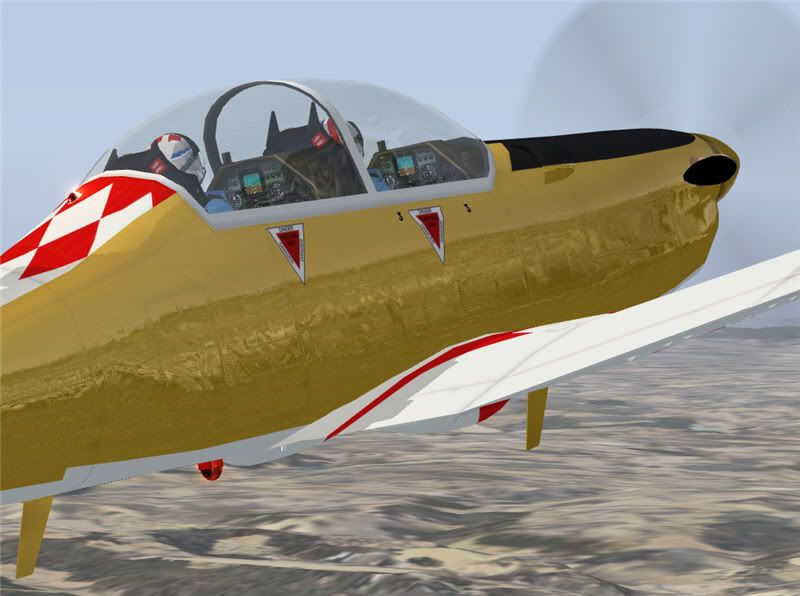
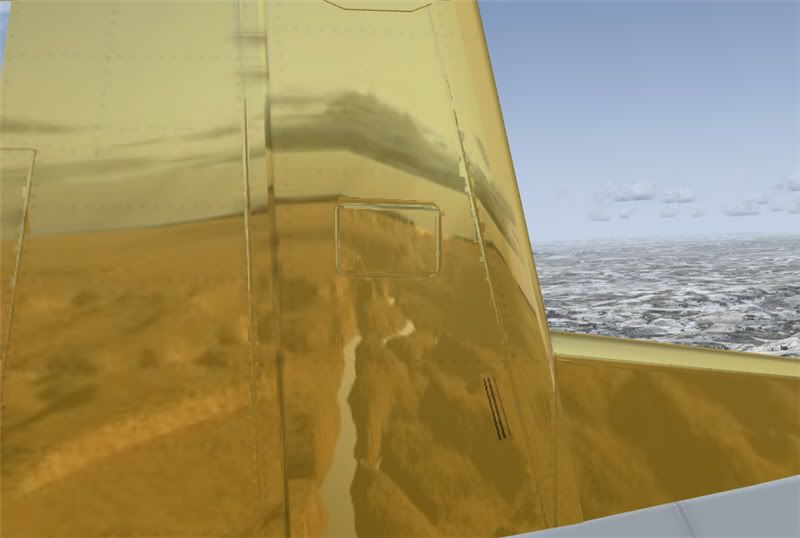
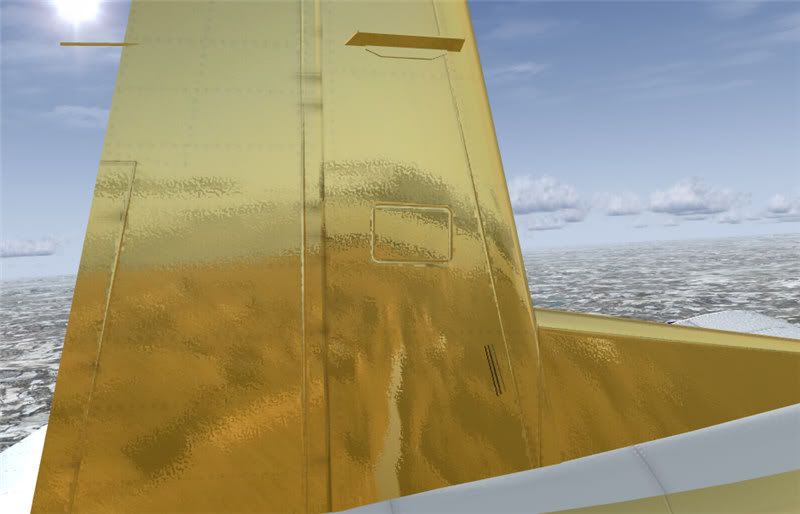
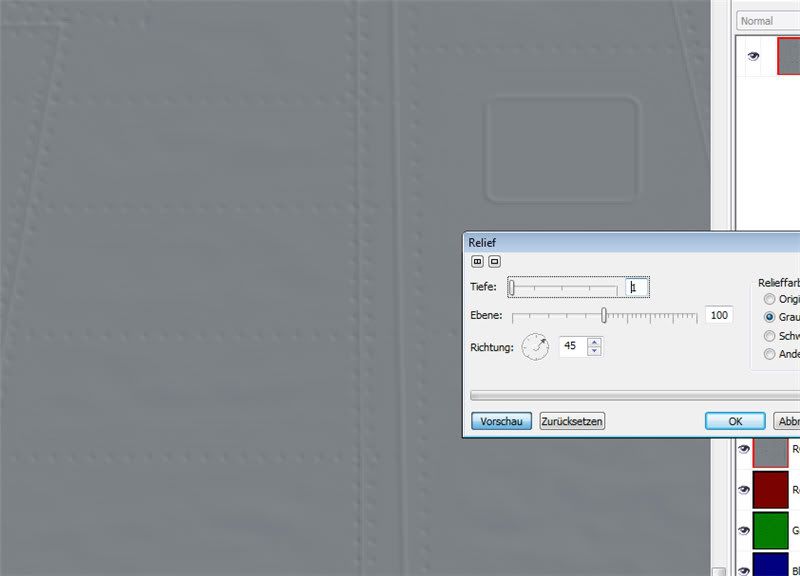
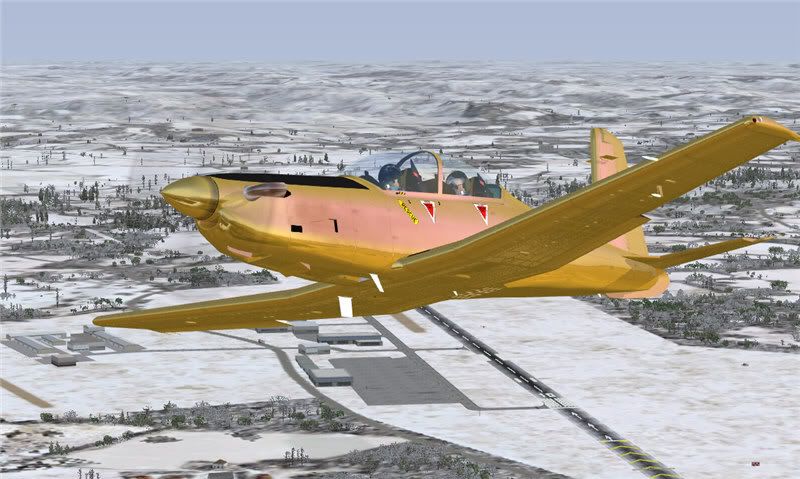
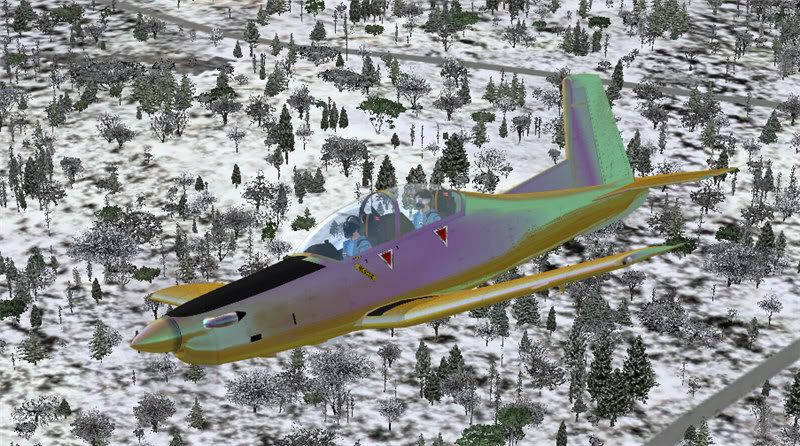
    Why two separate images? Because the ripples have varying depths and need different "height map" settings to the rivets. After a little fine tuning, it starts to look better. Like this:


    But when you look, you can see I haven't done the rivet dimpling yet and the ripples cross rivet lines. The panels on real planes only ripple over gaps behind them. That's where we'll be headed in my next postings.

    All Greek to you? Don't worry, if you have never made a bump map, then I wouldn't be surprised. I haven't taken any pix from my painter yet. Basically because I haven't actually done anything special yet.

    When I get relly going, you'll see that I will be creating several bumpmaps for each kind of surface effect. There'll be:

    - a "depth map" for panel lines
    - a "height map" for access panels etc.
    - a "mixed map" for surface ripples, but with the edges running to flat
    - another "depth map" for the dimples caused by the rivets

    and I'll discuss the lighting angles and how to fix them before exporting your bump maps.

    Oh, and I might even explain the basics of how to create a bumpmap...

    The SDK says you can't manipulate bumpmaps - easily. The SDK is right. So why bother, just make more bumpmaps and merge them until you get something real...

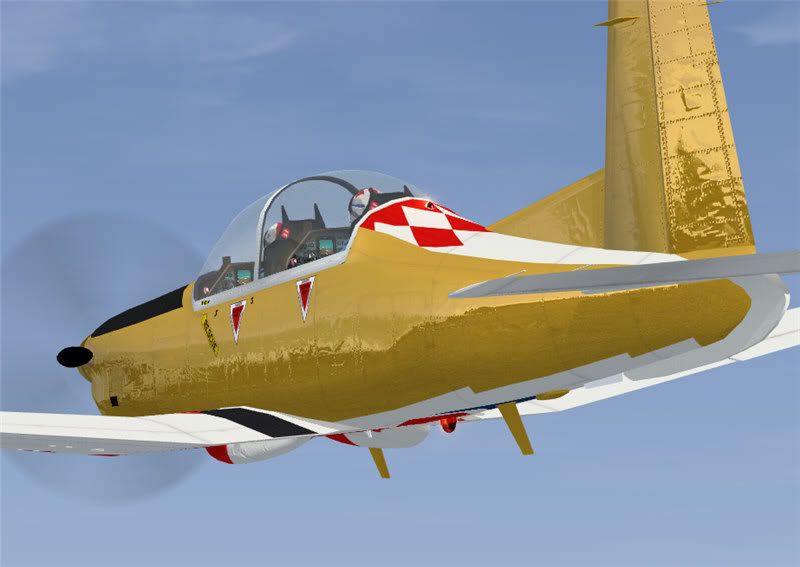
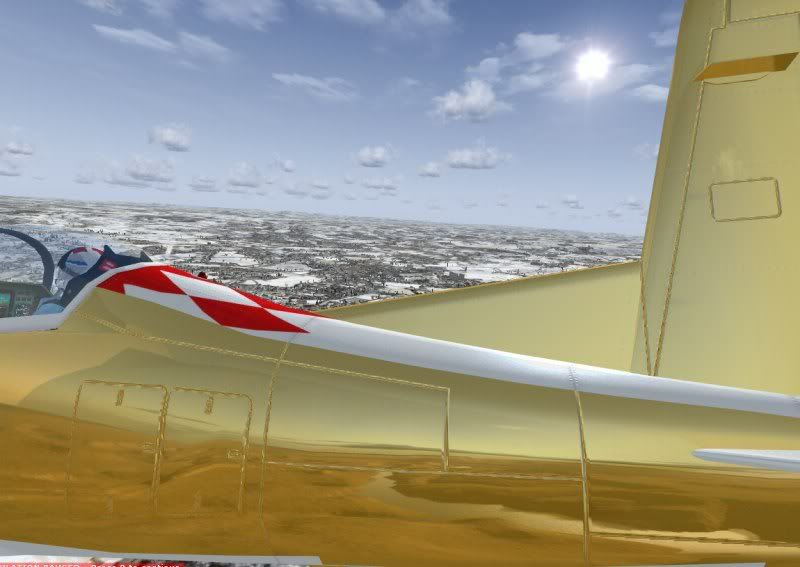
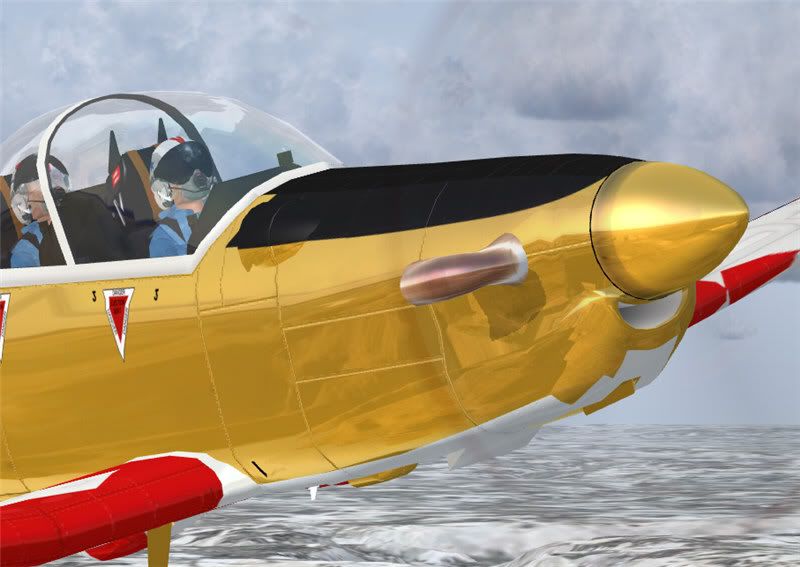
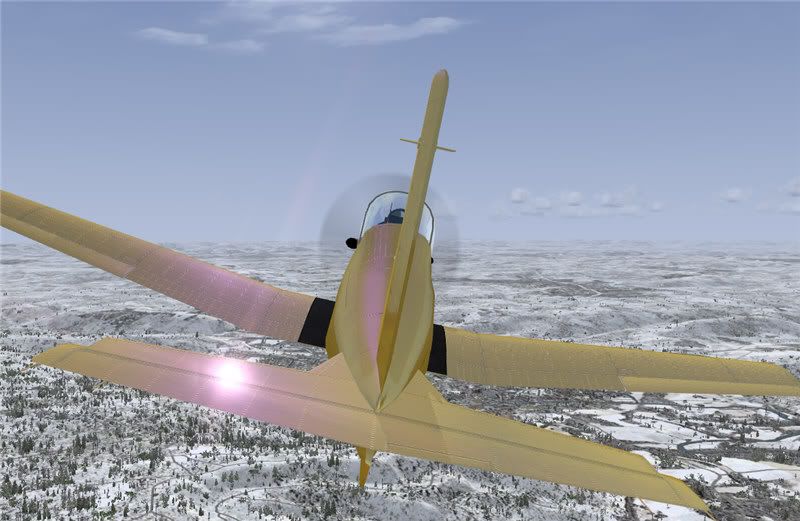
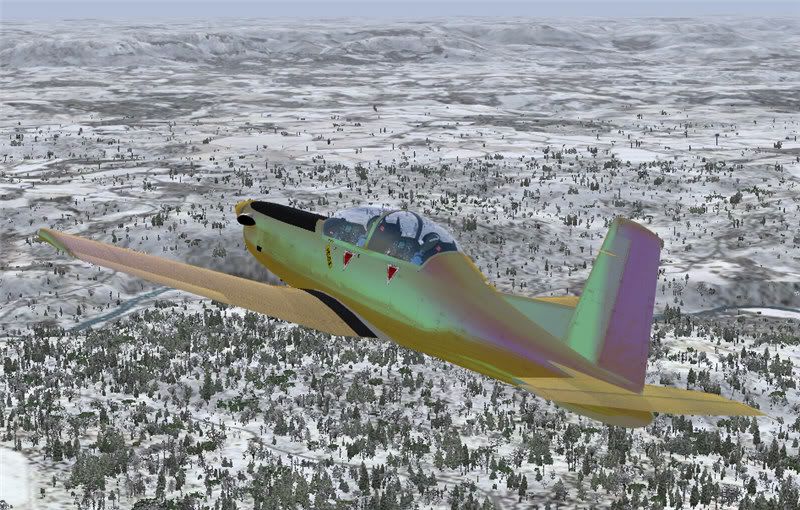
    Oh... that 'gold' effect? an ochre-ish yellow on the paint and an orangey colour on the spec. I'll look at specs another time.

    ...and there is a different cubic envelope map in that plane's texture folder too - to improve what's reflected. I didn't overly like seing snow capped peaks reflecting when the plane is flying over non-mountanous country.

    Until then...
    Greetings from Chris Brisland a.k.a. "Eagleskinner" a.k.a. "Dances with brushes" a.k.a. "Old One-Eye". I've not come unravelled yet and I am painting again.

    My paints can now be found on my website

  2. #2
    Oh sorry - I mentioned a different envmap and forgot the pictures - here they are.


    In these two pictures, you can see I have started rebuilding the bumpmaps. Here I have only the panel lines textured and if you could see the flight images, you'd see that the angle of inherent lighting varies from area to area of the skin. This is simply because the modeller maps all the segments to fit into as few texture sheets as possible. We're going to have to correct this.

    More in another post!
    Greetings from Chris Brisland a.k.a. "Eagleskinner" a.k.a. "Dances with brushes" a.k.a. "Old One-Eye". I've not come unravelled yet and I am painting again.

    My paints can now be found on my website

  3. #3
    SOH-CM-2024
    Join Date
    Oct 2005
    Location
    Ringgold, Virginia, United States
    Age
    77
    Posts
    5,656
    Well, it looks like the new envmitmap fixed thing hunky-dory Chris. Nice little lecture professor. :friday:

    Caz

  4. #4
    Great stuff Chris ... thanks for sharing these ideas and points. Certainly re-/painters can benefit from this.
    Milton Shupe
    FS9/FSX Modeler Hack

    My Uploads at SOH - Here
    Video Tutorials - Gmax for Beginners

  5. #5
    Mr Shupe, Sir! Thanks for those words

    Well I guess it's time for some more...

    The one thing that does come out from this is that you need to experiment with the "Height Map" settings when you create your Bump textures. I am learning as we go along here (You think I knew all this stuff?)

    There's two major problems still involved with the bumpmaps above. The biggest one is the way the bumps are rendered. It could be down to the way Corel handles height mapping, but in the shots above, I find the panel edges too rounded and if you were to look very closely, you'd see some artefacting of the lines. But in PC graphics, your smallest common denominator is still the pixel.

    Today we'll actually look at the nitty gritties of making the bump maps. As far as I can tell, height and depth on the surface of a model is rendered from a grey-scale image where height is represented by all shades lighter than 50% grey and depth is represented by darker.

    All you need for the bump map then, is a grey sheet of paper with dark depths and light heights. So lets try to sharpen things up and add some rivets too.


    Here's the basic texture I am working on. Another Problem. The height map works with lighting - and you can only use one direction. At the moment I have set it so that the light is from Top Front when looking at the right side of tail fin. Remember that, because onde we have established the bump map, we'll be cutting and pasting. Back to the texture...

    As you can see - here is the texture with lines and rivets visible. The lines are dark and the rivets light.

    Let's just use the lines for now, darken them a tad and re-make the texture.

    Darken the lines:


    Add the 3D effect (relief map / height map - whatever your paint program calls it):


    Notice that the program creates a duplicate of the dark bits and creates a "light" shadow - high right in this case...

    Now go to the RGB channels and select the red channel:


    Export this as a bitmap and name it so that you know it is the alpha channel.

    Now comes the fun part - FSX only uses two tones to create bumps - the red channel is the alpha and the blue/green channels are the colour texture. We've saved the red channel, so now we need to hide it. Select your bucket tool and flood fill the red channel with black. Now select the blue channel and flood fill it with white. Finally select all channels and you will see the familiar pale blue colour texture you know from the other bump maps.


    Export the colour texture as bitmap as well

    Using whatever tool that comes to hand (I use the latest DXTbmp with the fixes to allow dds export) and make your "****_t_bump" texture and let's go fly the panel lines....

    (post to save and pause while I start the sim)
    Greetings from Chris Brisland a.k.a. "Eagleskinner" a.k.a. "Dances with brushes" a.k.a. "Old One-Eye". I've not come unravelled yet and I am painting again.

    My paints can now be found on my website

  6. #6
    Having saved the "new" bump texture, let's take a look at how it looks on the model...


    Not bad, but I am not too happy about the depth of the panel lines. The depth depends on a couple of factors when you prepare the bump map. First of all, the darker the line is in comparison to the middle grey tone, the deeper it will appear. Also you can set "depth" using your 3d relief map tool in your paint program's "effects" menu. Also in that tool, you can set the strength of the effect. In the image above, depth was set at 1 and the strength of the effect at 60

    Here's another picture with depth at 5 and strength at 100


    ...as you can probably see, the line appears wider (deeper) and there is a certain amoun of artefacting visible. This "strength" doesn't appear to affect lines as much, but as you will see later, ripples and dents do get affected.

    Those "artifacts"... not pretty, are they? As far as I have beenable to discern, these are remnants caused by the anti-aliasing. Angled lines are stepped without AA, but even the AA smoothed lines still have "steps" - it's a fact of life. We'll only really see the end of this when graphics cards let us display vector graphic lines on a 3D model. Very unlikely - so until then you have to try to get your paints as smooth as possible - or use the orange peel technique.

    Oh - on that subject - I didn't really know how to duplicate that until I explored further this morning.

    If you take your layered 'paint' texture and select the background, there's a handy tool in the effects menu called "noise" or "add noise". Another one of these strange computer graphic artist tricks designed to confuse us all. Experiment with it. Here's a couple of mine...

    You apply noise to the image background, before merging your layers and adding the 3D relief map (depth/height effect). The same rules as for the bumps apply. Darker on the colour texture means depth. You can also adjust density and intensity of noise in the effect menu.

    Here's a fairly low density/intensity addition of noise - you can hardly recognise the odd dimple on a static shot.


    Now with more density/intensity:


    Hey, did I hear someone ask why we have to flood fill the blue channel when we save our bumps?

    This is why.


    Adding the third layer confuses the rendering engine because there are only two dimensions looked at by the FSX engine for rendering the bump effect - the green channel (with a white fill blue) on the colour texture and the red channel saved to the alpha.

    I don't know the technical terminology or reasons - these are just educated guesses. If someone with the real know-how would add his or her input, I'd be very gratefulful.

    Next it's the turn of the ripples...
    Greetings from Chris Brisland a.k.a. "Eagleskinner" a.k.a. "Dances with brushes" a.k.a. "Old One-Eye". I've not come unravelled yet and I am painting again.

    My paints can now be found on my website

  7. #7
    Let's evolve some more...

    OK, we've looked at lines and orange peel. Rivets can be hadled much the same way as lines, except you need to "paint" the rivets lighter than the neutral mid grey background so that they appear to rise above the surface.

    Oh, while I am on the subject of height - you can of course reverse the colours so that you use darker colours for high bumps, only you would then need to simply reverse the lighting direction on the bump render stage...

    Anyway... let's look at the alternative to orange peel. If you look at pretty shiny planes at an air display and if you look at a flat angle, you'll see that the surface is not perfectly smooth. In fact it appears rippled. This is because aircraft metal skins are made very thin aluminium and the only places that the skin is supported are where it is rivetted to stringers, longerons and frames (remember that fact!). So now we need to do some masking on the texture so that only the panel centres are identified...

    Here's the whole sides masked:


    ...and here's the panel lines masked up:


    OK, I'm not going to teach you masking techniques, just bear in mind, you need to make a mask of all your lines and rivets and extend the mask outwards a few pixels (that way you can mask out the supported part of the skin - remember I told you a few lines back to remember?). When you have masked out the areas where the skin is firmly supported (flat) you can then extend the mask further outward using a fade - 10 to 20 pixels.

    Why? the skin gets "looser" as you get further from the supported edges, so any rippling is stronger at the middle of the panels.

    You'll end up with something like this:


    Now we need some RIPPLES!

    Here we go!


    Extract a mask's worth please...


    Now greyscale it:


    Add some Gaussian Blur


    Play around with the height map...


    Or maybe...


    Or even


    Then go fly!
    Greetings from Chris Brisland a.k.a. "Eagleskinner" a.k.a. "Dances with brushes" a.k.a. "Old One-Eye". I've not come unravelled yet and I am painting again.

    My paints can now be found on my website

  8. #8
    Ohhhh

    What would that all look like?

    I haven't the slightest idea... :costumes:


    Greetings from Chris Brisland a.k.a. "Eagleskinner" a.k.a. "Dances with brushes" a.k.a. "Old One-Eye". I've not come unravelled yet and I am painting again.

    My paints can now be found on my website

  9. #9
    SOH-CM-2024
    Join Date
    Oct 2005
    Location
    Ringgold, Virginia, United States
    Age
    77
    Posts
    5,656
    Simply remarkable Chris, I do enjoy getting on the inside of the art some of you people do. Consider this copied and pasted and saved for posterity.

    Caz

  10. #10
    I'm having a couple of days off from this project to do a "requested" job or two. I haven't forgotten you here...
    Greetings from Chris Brisland a.k.a. "Eagleskinner" a.k.a. "Dances with brushes" a.k.a. "Old One-Eye". I've not come unravelled yet and I am painting again.

    My paints can now be found on my website

  11. #11
    OK, just to take a break away from the bumps...

    Who saw and remember's Gibbon's car in XXX 2? The one triplex gives to his girlfriend? A nice blend of gold, purple, green and blue...

    That's Dupont's chromalusion paint and depending on how you layer it, you can get different effects. In FSX too. It is worth experimenting with.

    NOW BEFORE SOME COMPLAIN ABOUT MY COLOUR SENSE... This is only an example here. I just wanted to see if I could even get a three tone chroma effect - I have done two-tone flip-flops often enough, but now I have three tone - and four is possible at a guess.

    Two tone chroma:


    Three tone chroma:


    Greetings from Chris Brisland a.k.a. "Eagleskinner" a.k.a. "Dances with brushes" a.k.a. "Old One-Eye". I've not come unravelled yet and I am painting again.

    My paints can now be found on my website

  12. #12

  13. #13
    OK, now having faffed around with exaggerated specs and fresnels, let's put the whole lot together and add one final touch...

    Gold should be glittery and I'll thank Chuck_Jodry, who put me on the right track with metalflake - I had been doing it the hard way before, but using "noise" on the colour layer is easier than using a spray brush.

    NOW I know what "rauschen" is (I have a German copy of Corel Photopaint, so I have been trying to figure out what that meant for ages...)

    So... putting the whole thing together on all exterior textures, adding "noise" to the paint textures and rippling the bumps. Then toning down the colours of the specular an fresnel...

    I reckon you might agree that the flake paint gold effect is reasonably discreet for such an "in your face" paint...

    Enjoy. Who wants the paint? I guess I could upload it... even if it is only to accompany these musings...
    Greetings from Chris Brisland a.k.a. "Eagleskinner" a.k.a. "Dances with brushes" a.k.a. "Old One-Eye". I've not come unravelled yet and I am painting again.

    My paints can now be found on my website

  14. #14
    SOH-CM-2024
    Join Date
    Oct 2005
    Location
    Ringgold, Virginia, United States
    Age
    77
    Posts
    5,656
    Am I late? Is it up yet? Lemme look at Latest Add-Ons? Nope, not there. Gonna put it ay AvSim?

    Want it? Must have it!!!!

    You know me, I'm gonna have a look at all those textures too.

    This is a great guide Chris, have enjoyed it from the beginning.

    Caz

  15. #15
    Give me tomorrow to tie this up in a useable bundle, write a small readme and maybe add the "Ozzie paint".
    Greetings from Chris Brisland a.k.a. "Eagleskinner" a.k.a. "Dances with brushes" a.k.a. "Old One-Eye". I've not come unravelled yet and I am painting again.

    My paints can now be found on my website

  16. #16
    The texture is on Avsim - look for texture.gold.zip

    You can see the end results and maybe see where I was going...

    (As the upload is uploading now - 11.09 a.m. CET - you might have to wait a bit for Avsim to check and activate)
    Greetings from Chris Brisland a.k.a. "Eagleskinner" a.k.a. "Dances with brushes" a.k.a. "Old One-Eye". I've not come unravelled yet and I am painting again.

    My paints can now be found on my website

  17. #17
    SOH-CM-2024
    Join Date
    Oct 2005
    Location
    Ringgold, Virginia, United States
    Age
    77
    Posts
    5,656
    Downloading as I speak, as I type in IRIS's site to get the plane. I was under the impression it was Piglet's PC9 :isadizzy:.

    No worries mate, just another kink in the plastic!

    Caz

  18. #18
    Then you might as well DL the other 2 paints already and I am working on more.
    Greetings from Chris Brisland a.k.a. "Eagleskinner" a.k.a. "Dances with brushes" a.k.a. "Old One-Eye". I've not come unravelled yet and I am painting again.

    My paints can now be found on my website

  19. #19
    SOH-CM-2024
    Join Date
    Oct 2005
    Location
    Ringgold, Virginia, United States
    Age
    77
    Posts
    5,656
    That's a double check, kid's are out for Christmas an noon, gotta get ready to get them as the wife has to go to work then.

    Caz

  20. #20
    Hi Chris

    Nice wirte up but might i point you to Nvidia's Normal map filter for Photoshop

    http://developer.nvidia.com/object/p...s_plugins.html

    this will create real normal maps from your grey scale height maps using emboss is not the best way to go about it

    btw you'll still need to channel copy/fill ect to get them out to FSX's DXTC DDS format

    I've been working on a project which aims to build a HD repaint pack for the default Bell 206 totally recreating all base textures,normal & spec maps from a blank canvas,it still a WIP sofar but its coming on quite well


    every bit of detail you see here comes from a rebuilt normal map non of the rivets or pannel lines/mesh ect is poly modeled at all!

    Laters
    steve

  21. #21
    Steve,

    You are right about the nvidia tool - but...

    ...it doesn't work in Corel (which I use). OTOH, the Corel's emboss function - hold on - it isn't emboss, it is a proper "height map" function - does exactly the same as the nvidia tool - it is just a bit more time consuming.

    Excellent work on the Bell there! Love it!
    Greetings from Chris Brisland a.k.a. "Eagleskinner" a.k.a. "Dances with brushes" a.k.a. "Old One-Eye". I've not come unravelled yet and I am painting again.

    My paints can now be found on my website

  22. #22
    Hey Chris

    Aha its been a while since i took a lookie at corel,glad to know there an alternative out there

    The HD bell package is coming on quit nicely now all the normals are inplace just got to add a bit of ware and tear and a few other details + sort out final specs/reflection lvl and frm with the other guys work we should have 6 totally remade HD schemes for the Bell206 and we my also release a HD repaint kit later on so other repainters can use the remade normals

    (thumb link to 1920x1200 WIP image stright from fsx)


    if your in the mood for some Australian based repainting pop over to Ozx site and take a lookie at the painter forum there as they have a great little freeware community thats growing by the day and im sure everyone there would value your input

    All the best
    Steve

  23. #23
    Link linked and visited - interesting! Registered and posted already - thanks for the HU...

    That 206 is definitely coming along nicely. I do like so far.
    Greetings from Chris Brisland a.k.a. "Eagleskinner" a.k.a. "Dances with brushes" a.k.a. "Old One-Eye". I've not come unravelled yet and I am painting again.

    My paints can now be found on my website

  24. #24
    Bush Viking
    Join Date
    Feb 2007
    Location
    Backwards in Civilization
    Age
    43
    Posts
    62
    Thank you Chris for showing these techniques - am watching with great interest !

    Paularx

  25. #25
    Chris, I am most impressed, have noted everything down like Caz, now I'm off for a handfull of Tylenol and a good long nap!
    This will take some absorbing for my overworked neurones!!!!!!
    Confusion reigns!
    :faint:
    "Illegitimum non carborundum".

    Phanteks Enthoo Evolv X D-RGB Tempered Glass ATX Galaxy Silver
    Intel Core i9 10980XE Extreme Edition X
    ASUS ROG Rampage VI Extreme Encore MB
    Corsair Vengeance LPX 128GB (8x16GB), PC4-30400 (3800MHz) DDR4
    Corsair iCUE H100i ELITE CAPELLIX White Liquid CPU Cooler, 240mm Radiator, 2x ML120 RGB PWM Fans
    Samsung 4TB SSD, 860 PRO Series, 2.5" SATA III x4
    Corsair 1600W Titanium Series AX1600i Power Supply, 80 PLUS Titanium,
    ASUS 43inch ROG Swift 4K UHD G-Sync VA Gaming Monitor, 3840x2160, HDR 1000, 1ms, 144Hz,

Similar Threads

  1. Evolving Evolution
    By wiltzei in forum Ickie's NewsHawks
    Replies: 1
    Last Post: April 25th, 2011, 10:06

Members who have read this thread: 1

Bookmarks

Posting Permissions

  • You may not post new threads
  • You may not post replies
  • You may not post attachments
  • You may not edit your posts
  •